 What is the low FODMAP diet?The low FODMAP diet is a gut healing protocol, created at Monash University in Australia, that removes certain fibers found to cause GI distress in some individuals. While the diet does not eliminate all fiber, as perhaps a carnivore-type diet might do, it removes specific types of carbohydrates that have certain qualities that can make them irritate a damaged gut. These fibers make up the acronym FODMAP: fermentable oligosaccharides, disaccharides, monosaccharides and polyols. Foods that are high in these fibers are taken out during the removal phase, then are gradually added back in during the reintroduction phase. The goal, besides reduction of symptoms, is to eventually add higher FODMAP foods back into the diet, as they should be tolerated by a healthy gut.  Who can benefit from the low FODMAP diet?In a healthy, robust gut that has a balanced microbiome, these fermentable sugars actually feed beneficial microbes in the gut–-these are prebiotics. However, in a gut that has inflammation and dysbiosis, these compounds can feed the pathogenic, unwanted microbes and lead to worse GI symptoms. This diet was created to help those suffering with IBS (irritable bowel syndrome) and functional gut disorders, but others who have gut issues may benefit as well, including those without an IBS diagnosis but have symptoms of dysbiosis in the gut, such as chronic bloating, abdominal pain, constipation and/or diarrhea. How long should the low FODMAP diet be followed?As a practitioner, recommending the low FODMAP diet can be tricky, as it is only to be followed for a short period of time. Generally, the removal or avoidance phase of the diet is followed from 2-6 weeks, depending on the person. While this protocol can provide symptom relief to IBS sufferers and others, it is not to be followed for the long term. Because the low FODMAP diet restricts prebiotic fibers that feed gut bacteria, any beneficial microbes present will also be missing their main source of nutrients. If followed for too long, then, the low FODMAP diet can lead to more problems with the gut due to “starving out” the beneficial bacteria we need to cultivate for a healthy gut. In short, low FODMAP is helpful for temporary relief of symptoms and can help facilitate healing the gut, but is not a long-term solution and should not be followed indefinitely.  How do I transition off of the low FODMAP diet?Once the removal phase is over, higher FODMAP foods are gradually added in, checking for tolerance and changes in GI symptoms as the re-introduction phase progresses. I typically have clients add foods one at a time, focusing on one category of foods at a time, until all foods are added back in. If foods are not tolerated and cause GI distress, they can be left out and re-tested later when more healing has occurred. Food diaries are very helpful for this process. Some foods, however, may not be tolerated for quite some time and will not be added in for months or more. It is also important to note that foods contain a range of FODMAPs, and are not “with FODMAPs” or “without FODMAPs.” Some may tolerate foods at different ranges on this spectrum. There may be some level of FODMAP tolerance in individuals, and, once the elimination phase is over, they find they can tolerate small to moderate amounts of some foods, but that large amounts or regular consumption of some foods may not be appropriate for a long time as well. This may not be a black-and-white issue for some. For example, someone may find that a few bites of cheese or a splash of milk in coffee is fine, but that a quesadilla or milkshake is a no-go, as it causes a flare-up of symptoms. This varied level of tolerance can be expected, though may not happen with all high FODMAP foods, and can of course be re-tested after more gut repair has happened.  What are the pros and cons of the low FODMAP diet?The benefits of following the low FODMAP diet include relief of uncomfortable digestive symptoms, increased awareness of how certain foods trigger or affect your symptoms, and removal of many processed foods that irritate the gut, regardless of FODMAP content. It can bring down inflammation in the gut, which is necessary for healing the gut lining and creating a healthy, balanced gut microbiome for ultimate healing. The downsides to following the low FODMAP diet can include increased anxiety and stress around food choices, especially for those who already are unsure of what to eat and which foods cause GI issues. This should not be followed by those with active eating disorders, as it is an elimination diet that restricts many foods, and can trigger restrictive eating patterns in these individuals. Of course, in these cases, speak with a qualified dietitian to discuss options for improving gut health. The other “cons” are minor but should be considered: going out to eat is much more difficult (if darn near impossible), eating at friends’ or family members’ houses is more complicated, and meal planning in general takes more effort when a large number of common foods are removed. Lastly, many healthful foods are eliminated as part of the low FODMAP diet, so intake of certain nutrients can decline if not accounted for and reliance on the quick, easy foods on the “allowed” list can make the diet less nutrient-dense if this is not considered. However, with proper planning and consideration, including working with a dietitian while on the diet, the low FODMAP diet can (temporarily) provide a healthy, balanced diet for most. How is low FODMAP different from other gut-healing diets?Many gut-healing protocols exclude certain types of fibers and/or carbohydrate diets, so in this way, low FODMAP is similar to other gut-focused diets. It differs in the exact type of fiber excluded, however. In the case of SCD (specific carbohydrate diet) and GAPS diets, the main focus is on eliminating starches and sugars to help relieve GI symptoms. SCD was created for those suffering with IBD (Crohn’s and colitis) and celiac disease, while GAPS was inspired greatly by the SCD approach, focused on those with autism, mental illness, allergies, dysbiosis and other health issues (gut and otherwise). Low FODMAP differs from GAPS and some other gut-healing approaches in that it only focuses on what foods to avoid or eliminate, while others may also or only focus on adding in certain foods that are missing, such as collagen-rich broths and stocks, fermented foods, healthy fats, herbs, supplements and more. I must emphasize that low FODMAP on its own is not the answer, and should be combined with the introduction of healing foods, herbs and other approaches to get the most benefit. I often combine the low FODMAP diet with principles from other protocols to help further gut healing.  Which foods are allowed and not allowed on the low FODMAP diet?Finally, the do and don’t list for the low FODMAP diet! Below is the enjoy/avoid list–as I prefer to put it–but note that I have added a few foods that are italicized that are technically low FODMAP, but that frequently cause GI distress in those with IBS, and I often encourage to be avoided during the removal phase as well. Note that some foods’ FODMAP content changes through processing; souring/fermenting decreases the content in the case of sourdough bread, cheese, or tempeh, while other foods like milk or tomatoes are higher in FODMAP when processed (heated/dehydrated) or cooked for longer (bone broth). Ripe fruits will naturally be higher in FODMAPs that unripe counterparts, in the case of bananas and plantains, as unripe versions contain more starch and less sugar (fructose).
 What are fiber sources on the low FODMAP diet?Though certain fermentable fibers are avoided on low FODMAP, you can still get adequate fiber in the diet during the removal phase if well-planned. Most fiber will be from non-fermentable, insoluble fiber sources–see all the great veggies, fruits, grains and nuts on the enjoy list–as well as starches, including resistant starch in unripe bananas, rice, and potatoes. If fiber intake is a concern while on low FODMAP, such as if certain types of fibers need to be introduced to support the gut, there are supplements often tolerated by those with IBS and similar conditions, including psyllium husk, ground flaxseed, and partially hydrolyzed guar gum. Resistant starch “supplements” such as potato starch and green banana flour may also be used if well tolerated, and act as a prebiotic for the colon rather than the small intestine. What about pre-made foods? Can I go out to eat while on the low FODMAP diet?When buying pre-made, packaged foods while on the low FODMAP diet, reading labels is extremely important. Foods like pasta sauces, ketchup, and salad dressings nearly always contain high FODMAP ingredients like garlic and onion–they’re in everything!--so you are better off making homemade versions of your favorite condiments and other foods or scour the labels for an “allowed” version. However, there are some low FODMAP options out there if you are a diligent label-reader, including those from Fody, a company making specifically low FODMAP foods such as pasta sauce--this is an option if time or cooking skills are limited! The same goes for going out to eat: restaurant food tends to contain high FODMAP ingredients, so be sure to call ahead of time to where you plan to eat or be specific with the waitstaff about ingredients in your meal. You may find some places that can accommodate your needs but, honestly, cooking at home for the most part will be the best strategy while on this diet--luckily, it is a short-term protocol, so you should be able to enjoy restaurant food again once you are finished and have healed your gut.  Is the low FODMAP diet all I need to do for gut healing?Absolutely not! The low FODMAP diet is not a cure-all for the gut. While it is meant to relieve symptoms like gas and bloating, it is not the only strategy used in a proper gut-healing protocol. In the case of IBS, dysbiosis such as SIBO is very commonly present, so addressing the overgrowth of pathogenic microbes (bacteria, yeast, and parasites) is essential. Also necessary are looking at what is missing in the diet, hormone balance, gut motility, and lifestyle factors like stress and sleep that affect gut health significantly as well. Using low FODMAP as a tool is useful, but is just one piece of the gut-healing puzzle. Want to learn more about healing your gut?If you want to dig deeper into healing your gut, check out my FREE webinar, Stop Making These 5 SIBO Mistakes!
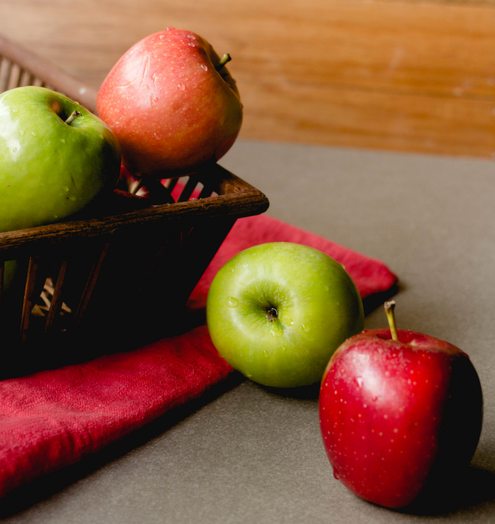
You can register for the webinar on my website, laurapoerd.com, which will also sign you up for my email list so you stay up-to-date on my upcoming classes, recent blog posts, and more!
1 Comment
 We are in the thick of winter, and I can tell many folks around me are starting to feel it. The days are short, it is bone-chillingly cold, and there is not as much going on in general. During the winter, people tend to get sick more often, feel lonelier, and have more seasonal depression--but I do not think it has to be so tough for everyone. To me, having some special routines is key, treating our bodies differently during the cold months than in warmer months. This is a time for extra self-care, prioritizing social interactions, and getting more rest than other times of the year. If we can employ a few helpful strategies and treat winter as the restful, special time that it is, I believe that we can achieve more health and happiness, and actually thrive during the winter, rather than just trying to survive it. 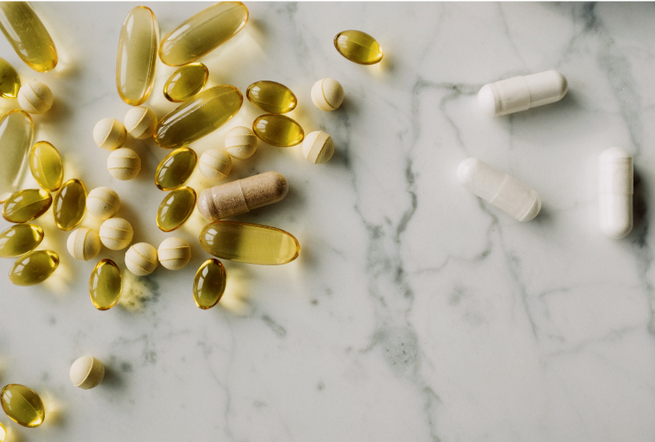 Strategy 1: Optimize Nutrition and Supplements Vitamin D3: Taking care of our nutrition in the winter is essential, especially to keep up our immune systems and to help with seasonal mood changes. Because of the longer nights and less time spent outdoors, we up North do not get enough vitamin D in the winter. Even if you were outside a lot during the winter, you likely aren't getting enough vitamin D from the sun because your skin in covered with clothing, and at the latitude where I live, not much D would be available even if you went outside naked. (It is below zero today, so don't even try it.) I recommend most people take a vitamin D3 supplement in the winter, though it is best to get your vitamin D levels checked to be know what dose is appropriate for you. Getting enough vitamin D will help with mood and energy in the winter, as well as immune health. Cod Liver Oil and Butter Oil: Along with vitamin D, supporting your body with the other fat-soluble vitamins is also important. Cod liver oil is a traditional remedy used during "cold season" and in Nordic cultures during the winter to support health. I use cod liver oil to get my supplemental vitamin A (naturally-occurring) as well as extra omega 3 fats for their anti-inflammatory and immune boosting properties. Combining cod liver oil with high vitamin butter oil helps to get the vitamin K2 necessary to keep the fat-soluble vitamins in balance, while supporting the health of the bones, teeth, and more. If butter oil isn't available, emu oil or supplemental K2 are good substitutes. Zinc: Adding in a zinc supplement in the winter can improve the immune system, especially for those prone to illness. I recommend a zinc supplement that contains copper along with zinc for the best mineral balance, such as the Jarrow Zinc Balance supplement. Chris Masterjohn, PhD, has a great post about supplementing with zinc, which you could check out to find what type is right for you. Vitamin C: This is a well-known vitamin for supporting immune health, and it can be extra helpful in the winter when our intake of fresh fruits and vegetables is naturally lower due to seasonality. Taking vitamin C, especially in food-based forms like amla, acerola cherry or rose hips, can be an easy way to increase your C intake during the winter. For non-food-based supplements, liposomal vitamin C has great absorption, and vitamin C supplements with added quercetin can add an extra boost to your immune regimen.  Immune-Supporting Herbs: Herbal remedies can be beneficial during the winter to help support the immune system as well. For those who work around a lot of people, such as a school or large office, taking astragalus during the winter can help with keeping those office bugs at bay. It is an immune tonic, which can be taken daily for long periods of time to improve the immune system. This is available in capsules, tinctures and glycerites, or can be added in its dried form to broths, teas and soups. Elderberry is another potent herb with anti-viral properties, that I always take at the first sign of a potential cold. These can be in lozenges, tinctures, or syrups, which I prefer, as it is delicious and usually mixed with other warming, immune-boosting herbs. Warming herbs and foods can be helpful for stimulating the circulation and digestion during this cooler, more stagnant time--common warming herbs include ginger, cinnamon, hot peppers, and garlic. Fire cider (aka fire tonic), an herbal infusion of garlic, onion, ginger, horseradish, and other immune-boosting herbs into apple cider vinegar and honey, can be a great daily tonic as well. This is hot and sour and full of nutrients that are beneficial in keeping you healthy in the winter, both by supporting the immune and digestive systems. Other herbs you may find useful include echinacea, reishi and other medicinal mushrooms, and licorice root, which can be used in supplemental forms or with food, for fighting off bacteria and viruses. I recommend the books Herbal Antibiotics and Herbal Antivirals by Stephen Harrod Buhner for a more in-depth look at herbs and protocols for when you need extra support. 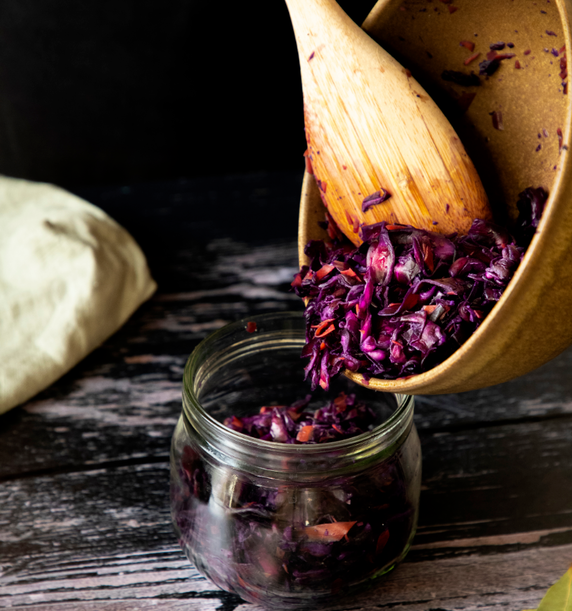 Focus on Food: Supplements and herbs, while often essential during the winter, are not enough to keep up truly healthy during this time of year--giving extra care and attention to our food is important as well. Though the holidays are over, winter tends to be a time for extra indulgence in general, be it in alcohol or sugar or processed foods. And, while a bit of feasting and indulgence is healthy and enjoyable, it must be balanced with nutrient-dense foods. Prioritize seasonal fruits and vegetables, like squash, cabbage, root vegetables, citrus, and apples, to ensure you are getting adequate vitamin C, potassium and fiber, which are usually lacking in our produce-poor winter diets. Our immune and digestive systems also need plenty of probiotics, available in fermented foods like sauerkraut, kim chi, kombucha, and yogurt. Getting a serving of fermented foods daily, or even better, at each meal, is another layer of protection you can provide this time of year. Plus, taking up learning to make your own fermented foods would be a great hobby to keep you busy during the lull of winter! Vitamin D is available not only in supplements, but in foods as well. Pastured pork, lard, liver, and seafood like sardines are good sources of vitamin D that can add to what you get in supplemental forms, along with vitamin A, omega 3's and other healthy fats. Pastured egg yolks, butter, and whole, raw milk are the best sources of vitamin K2, to help balance the vitamin A and D intakes. And of course, the most important food for staying healthy in the winter: broth! Soups, stews, and curries made from bone broth or meat stock are not only warming and comforting, but also offer an incredible amount of nutrition. Minerals, vitamins, amino acids, and collagen are available in these broths, helping support the immune system, digestion, and even preventing dry, cracking skin during the winter. It can be hard to get enough water in the colder months, so sipping on warm broth can help keep you hydrated as well. Whether you sip it, make rice with it, or turn it into a lovely soup, stocks and broths should be in heavy rotation in your kitchen this winter.  Strategy 2: Supplement Light and Heat Where I live, the winter months can start to wear on you emotionally and physically, as it just stays cold and dark for such a long period of time. This is where supplemental light and heat sources (in addition to, of course, heating your home) can really be beneficial. In the mornings, especially on those dreary, grey winter mornings, I like to use a light therapy lamp, such as the Happy Light. This simulates the light from the sun, helping with mood and energy, which can feel really nice when it has been gloomy for a few days in a row. 10-20 minutes of light therapy in the morning, such as while you are eating breakfast, can make a huge difference in your mood and energy levels in the deep winter. Be sure to use these as early as you can in the morning to help support your body's natural circadian rhythms. On the opposite end of the spectrum, are the more warming, relaxing light sources. Infrared saunas offer warmth and relaxation, as well as detoxification and other health benefits, and can feel really nice on a freezing winter night. I use the Sauna Space brand, with just the single bulb panel in my bathroom to create a makeshift tiny house sauna. but there are many brands and options out there, depending on your needs, space and budget. If an infrared sauna is not available to you, finding a spa or even a friend with a traditional sauna can be a wonderful warming experience as well. Not only is this warming and detoxifying, this has the added benefit of spending time with others, helping abate the loneliness many feel in the winter. Hot tubs, hot springs, mineral baths and even an epsom salt bath at home can be a great part of your self-care routine to bring some warmth, moisture and relaxation to your wintertime. Try to incorporate one of these warming practices into your daily or weekly routines, especially if winters are extra tough on you. Fires during winter can be so healing, as well. Of course, sitting by a roaring fire with a book or your loved ones (or both) is a classic way to warm yourself when it's cold outside, but having a bonfire outside (yes, we actually do this!)can be a great way to gather and socialize in the winter evenings, while keeping warm and toasty and enjoying the benefits of infrared light from a natural source.  Strategy 3: Get Outside and Actually Enjoy Winter I cannot emphasize enough how important it is to get outside during the winter. We must to do this, as getting fresh air helps to prevent illness, plus when we soak up whatever sunlight is available we boost our moods. Ensuring we interact with nature, even when it is cold outside, helps to keep us all-around healthy during this time of year. So much of what many "hate" about winter can be improved, though not necessarily fixed altogether, by simply going outside more. Where we live, winter can be beautiful, from snowy woods to ice caves, and would never be appreciated by staying indoors. Certainly, being wise and safe regarding temperatures and weather conditions is important. I probably won't be going on a long hike today with a wind chill that is -10F, but a well-bundled, short walk will likely happen. On those days when it is in the 30's or even 20's, spend as much time as you safely can outside, with adequate clothing and gear to keep warm enough to enjoy all of the beauty the winter has to offer. Perhaps you are stuck inside working all day and want to get some of this benefit; in this case, I would encourage you to even open your windows at home or work for just a few minutes to let in some fresh, cold air to purify the air indoors. The stagnant, stale air inside during the winter makes us more likely to get sick, and unless we periodically let some freshness in, we are stuck with this air until it is "nice" out again. An air filter can be helpful, too, but nothing beats fresh air. We must be willing to interact with our natural world, even when it isn't totally comfortable for us, in order to keep our mental and physical health up during the colder months. If you aren't acclimated yet, start with a short 5-10 minute walk, bundled up well, and increase your outdoor time and is safe and appropriate for you. There is much beauty to be seen, even this time of year!  Strategy 4: Emphasize Movement Outdoor time also gives us what most people desperately lack in the winter time: movement. Just as the air in our homes gets stagnant, so do many of our bodies. This is another reason people get depressed and sick more often in the winter. Movement is essential for the functioning of our lymphatic system, which helps with our immunity. It also is essential for our mental health as well. Going on a hike, snowshoeing, winter "fat tire" biking, downhill or cross-country skiing, or even regularly shoveling snow in your driveway can all be ways to interact with our natural surroundings, but also get our hearts pumping and muscles working. Perhaps there is a winter running or hiking group in your area to join to meet up with others who also want to gt moving! If you don't get physically active during the winter, you aren't getting the benefits of sweating, which helps with detoxification, and your circulatory system doesn't get enough stimulation. If outdoor exercise isn't going to be a part of your regular winter routine, then finding an indoor movement practice that you enjoy should be a priority. Especially during the winter, I recommend a movement class as opposed to an individual workout--this could be a Crossfit class, yoga class, martial arts class, dance class or even a natural movement-focused class--as the group setting gives the benefit of solving two cold-weather problems: too little movement and too little socializing. Classes often help with consistency as well, so you will be more likely to show up regularly if there are folks who expect you to be there. The winter could be a time when you try a new movement class or type of exercise, which could be something to look forward to, both for a new movement challenge and for possibly meeting new people. If you are a solo workout type of person, then find an indoor activity, such as weight-lifting, at-home yoga or other workout videos, dancing in your living room, a local bouldering/climbing gym, indoor lap pool or other activities that could meet your physical movement needs to stay healthy all winter long, either at home or out in the community.  Strategy 5: Get Social I mentioned attending group exercise classes in the movement section, because much of the unhappiness we experience during winter has to do with our isolation and loneliness. Certainly this winter has that knob turned up to 11, but even in a normal winter, there are usually fewer social functions happening, especially after the holidays are over. Unfortunately (or not, I actually believe), the computer or television are not good substitutes for the social interactions we need as humans. While we may be more interested in solitude and contemplation during the winter, which is totally healthy as a season of our lives, we must go out of our way to ensure we get adequate time with our people, even in the winter. This could be family, friends, co-workers or even meeting new people, but we can't get complacent in the winter and just expect to wait to hang out with our people in the spring...this will not lead to happiness during the cold, dark time of the year. Find an activity or group you feel comfortable and safe with, perhaps combining your social time with one of the other self-care strategies already discussed: attend a workout class or start a winter hiking group, host a bonfire for an outdoor activity, sauna with some friends, host a game, craft, or movie night, or call an old friend if you are snowed in. My favorite winter group activity, of course, is cooking and eating together. Make a big pot of soup and share it with your favorite folks, bake a batch of sourdough bread and bring it to someone dear, or host a winter-is-rough-so-let's-hang-out potluck dinner party. Again, find the activity that feels right for you at this time, but please don't neglect this part of your humanity, especially in the winter. Everyone will be healthier for it!  Strategy 6: Go Inward for Rest and Relaxation Traditionally, life in the winter would not have looked like life in the summer but just took place indoors. However, this is often how we live today, as technology has made us more capable of going against our natural patterns. But when we live without rhythms and seasonality, we often lose the lesson that each phase can teach us. In the winter, giving more attention to our self-care, to resting, to relaxing and going inward, can be valuable for our mental and physical health. Longer nights might be letting us know we should be sleeping more in the winter, and less time spent outdoors may be telling us to spend more time reading and meditating, or even drinking herbal tea and taking hot baths. While this doesn't necessarily give us license to be totally sedentary or become all-out hermits, it is an invitation to slow down and do less. With fewer obligations post-holidays, we can take this time to keep ourselves healthy and reset in a way that keeps up feeling good, even when it is brutal outside. Traditionally, winter would be the time for making crafts and clothing, preparing herbal remedies, telling stories, and tending to parts of our lives that don't get as much attention when we are busy with the tasks of warmer weather. Incorporating this rhythm and sense of rest into all that we do this time of year can help us feel more grounded and less cooped up. Above all, creating a routine of self-care is what is most important in the winter. Different supplements, foods, movements and activities may need to be incorporated depending on where you live, your health status and even personality, but keeping a consistent routine is what I see as the way to maintain well-being over these winter months. Winter is a strong force, urging us to rest, recharge, and slow down, but it also challenges us in our minds and bodies as well. Giving winter the reverence it deserves by appreciating its beauty and carving out time for taking care of ourselves can help us to not only stay healthy this winter, but also look forward to winters to come.  Need a little extra support this winter?
If your physical health is feeling the toll of winter, or you want to take this special time to devote to your healing journey, let's chat! I have packages available to fit your body's needs, and you can reach out for a free 15-minute meeting to see if working together is right for you. Click here to learn more or schedule your free call! See, winter can be pretty awesome!  You may be hearing a lot about "fermented foods" right now, as they are being featured more often in the media and by healthcare practitioners. Despite all of this increased attention, a good sceptic may be asking: are these supposed "superfoods" actually any good for you, or is it all hype? Let's dig in and figure it out! 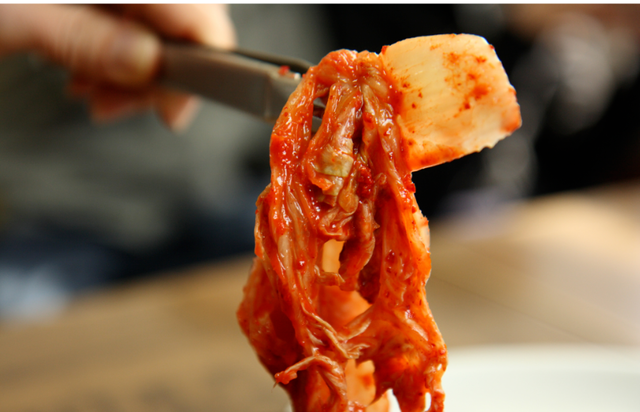 What are Fermented Foods?Fermented foods are simply food products that have undergone changes through microbial action (aka fermentation). This is also known as "culturing," as microbes are sometimes referred to as cultures. These changes will include texture, taste, acidity, smell, and even nutrient content. Microbes like bacteria and yeast, either added to or naturally present in/on the food, will essentially start to digest parts of the food and transform it in the process. For this transformation to happen, the conditions need to be just right for different types of fermentation, such as temperature, humidity or salinity, and different microbes thrive in different environments. The end result is a food that is similar, yet different, than before it underwent this microbial action. Think of cabbage turning into sauerkraut or milk into yogurt; you can certainly still recognize the original food, but the product of fermentation is different and unique. 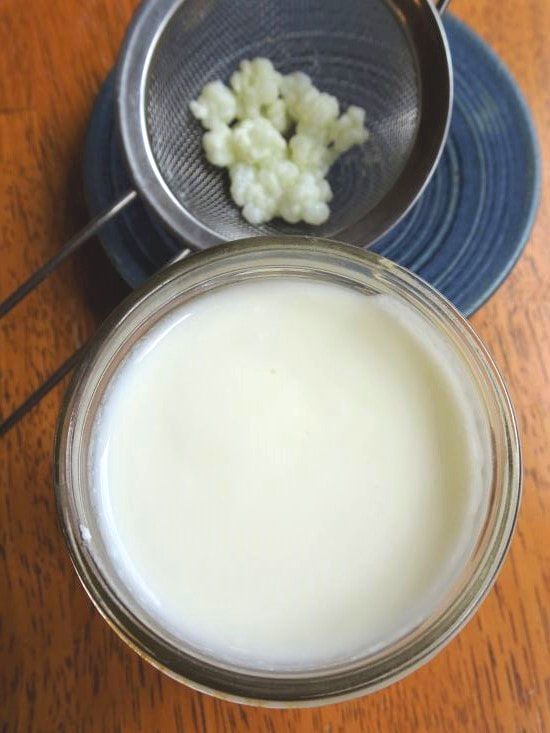 What are Examples of Fermented Foods?Fermenting foods has been a practice all over the world, for somewhere between 10,000-20,000 years. This was one of the original ways to preserve food, along with drying and freezing , that people learned to do in order to extend the life of their harvest. And, as we will see later on, this practice also had other benefits besides food preservation. Some examples of different fermented foods from around the world (that you can still enjoy today) are:
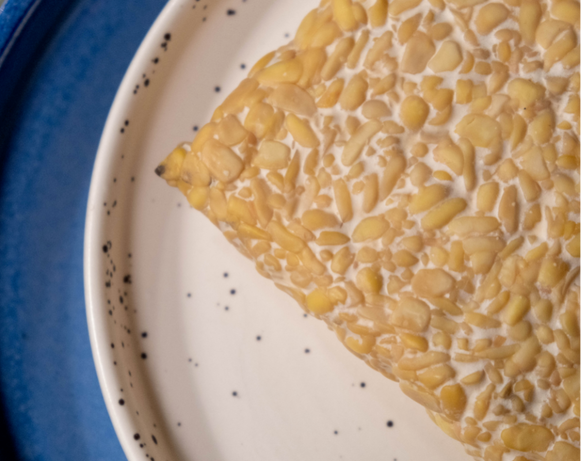
This is just a snippet of the fermented foods available, and if you haven't tried any of the foods on the above list, I encourage you to try at least one asap! There are also many common foods we consume that are the product of fermentation, that we may not even realize are fermented, such as cheese, vinegar, beer, wine, cured meats, coffee and chocolate. All of these items undergo fermentation before arriving in their delicious, well-known forms found in our homes. Many foods that were once traditionally fermented, but may no longer undergo this process due to modern food processing. One example is bread, which was traditionally leavened with sourdough yeast cultures, but is now made with commercial yeast. This is also true of most pickles nowadays, as the majority at the store are preserved with a vinegar brine rather than fermented in a salt brine as would have happened before canning. 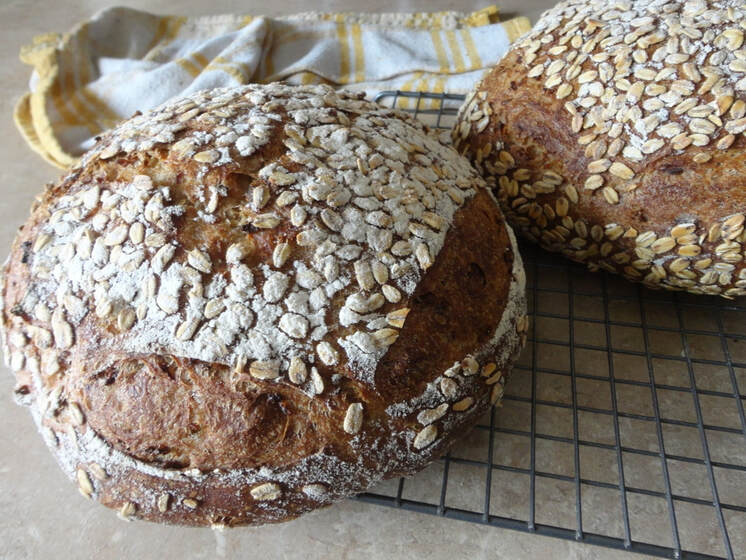 Do Fermented Foods Have Any Benefits?While it is easy (and wise) to be skeptical of foods promoted via tv and magazines, I can confidently say that yes, fermented foods really are good for you! It is important to remember that these are traditional foods and not just a food fad; as mentioned above, these have been around for millennia, and were prized for their nutritional value long before they were featured on blogs. Certainly, fermented foods have made a comeback in the last few years, but they are not new, nor did they ever really go away--we are just more aware of them due to the increasing popularity of ancestral diets and focus on gut health. There is lots of evidence to back up the claim that fermented foods have many health benefits. 1. Fermented Foods Can be Probiotic (and Prebiotic!) Many fermented foods contain beneficial bacteria and yeasts (probiotics), which are the very microbes that facilitate the fermentation process. An example of this would be the Lactobacilli that turn cabbage into sauerkraut, which are probiotics. These bacteria give the process its name, lacto-fermentation, which is a term you may see used, and you can be asured it has nothing to do with lactose, but rather the Lactobacilli cultures. Fermented foods can contain anywhere from millions to trillions of microbes in just a single teaspoon. Though we know many of the microbes involved in various fermented foods, there are still many strains that are yet undiscovered. Microbes like these confer numerous benefits to those consuming these foods, including supporting digestive health, decreasing inflammation and playing a role in a healthy immune system. As these microbes pass through the digestive tract, they offer benefit to the eater. For some people, using a targeted, strain-specific probiotic supplement is still necessary for healing their gut, but for many, simply adding in more of these fermented foods can help to improve digestion and more. Plus, supplements will not necessarily offer the other benefits of fermented foods...and I am all about food first! Though many are, not all fermented foods are probiotic, nor are all probiotic foods fermented--if fermented foods undergo heat processing (like canning, baking, or some beer and wine-making) they are no longer probiotic, as the microbes cannot survive those extreme conditions. So, if a fermented food has not undergone heat processing, it is most likely still probiotic. Another example is vinegar, which is fermented but not probiotic due to the acetic acid content, though it is still a beneficial, healthy food to consume. There are some "functional foods" on the market that are not fermented, but have had probiotic cultures added to them after processing, such as in sodas and protein powders. I am not against these foods, and they can be a good source of probiotics, but they may not be fermented, so they will not necessarily have all of the benefits of fermented foods. Fermented vegetables and beans like kimchi or tempeh will also contain prebiotic fiber, while fermented dairy like yogurt and kefir supply galacto-oligosaccharides that acts as prebiotics as well. Prebiotics are key in gut health, as they feed and support a healthy microbiome, making foods like these a double dose of digestive support. 2. Fermentation Increases Digestibility of Foods The microbial action undergone by fermented foods can not only make them probiotic, but can also make the end product easier to digest than the original food. This can be seen in dairy fermentation, where the Lactobacilli digest the lactose in milk, leaving the fermented milk product (kefir, yogurt, or cheese), lower in lactose and, thus, easier to digest for those who are lactose intolerant. Many who cannot eat commercial bread find that sourdough bread, which has undergone several hours of fermentation before baking, is more tolerable due to the breakdown of starches and gluten proteins during fermentation. The "souring" process used to make sourdough also lowers the glycemic index and FODMAP content of the bread, while increasing the resistant starch content, giving it even more potential for health benefits, especially for those with digestive issues. Fermenting foods can also help reduce the content of some "anti-nutrients" in foods like grains, vegetables and beans. These are compounds like phytates and lectins that inhibit digestion and absorption of nutrients, such as zinc or magnesium. These can also cause digestive distress in those with sensitive guts. By fermenting these foods, the amount of many anti-nutrients can be decreased, therefore increasing the digestibility and availability of nutrients in the foods. 3. Fermentation Increases the Vitamin Content of Foods By fermenting foods as a means of preservation rather than canning, you are preserving the nutritional content in these foods, as they will not undergo heat and pressure treatment. However, fermentation not only can help prevent nutrient loss, but it also can increase the nutritional content of the finished product. One example of this is with vitamin K2. This vitamin is important because it signals calcium into the bones and teeth, and away from soft tissues like blood vessels. K2 is key in improving bone and teeth health, as well as promoting heart, brain, and kidney health. Luckily, we can increase the K2 in our diets through more fermented foods. Pastured animal foods like milk, eggs and liver are wonderful sources of vitamin K2, but fermentation increases the K2 content of foods even more, as it can be produced by bacteria. This makes foods like grass-fed cheese an excellent K2 source. Other fermented foods like natto, a soybean ferment from Japan, are great sources as well. During fermentation, bacteria can also create vitamin B12, making foods like kim chi or tempeh sources of this vitamin that it would not have been prior to fermentation. Though animal foods like meat are the best way to get adequate B12 in the diet, including fermented foods in an omnivorous diet can help get even more B12, and can supplement vegetarian diets with bacteria-produced B12. 4. Fermented Foods Contain Post-Biotics Postbiotic may be a new term for some; it sounds similar to pre- and probiotics, and they are related in a way. Postbiotics are metabolic byproducts created by bacteria during fermentation, which themselves have health benefits beyond those of the bacteria themselves. This is another example of how fermented foods have health-promoting properties that the original food would not have contained prior to fermentation. Examples of postbiotics found in fermented foods are short chain fatty acids (which promote colonic health), polysaccharides (which can act as a prebiotic), enzymes, and organic acids to help promote digestive health, decrease inflammation and more. This is another "-biotic" that is becoming available as a supplement, as some may get health benefits from these metabolites who cannot tolerate probiotic supplements or fermented foods, but I encourage starting with food whenever possible and trying supplements if not well tolerated. 5. Fermented Foods Taste Good! This may not seem like a "benefit," but enjoying your food is an important part of mindful eating and we all deserve to love our food. Fermented foods have such different flavors than any other foods, adding variety to your plate and a pop of flavor to your meal. Most ferments, especially those that are lacto-fermented, have sour as their dominant flavor due to the presence of lactic acid-producing bacteria (LAB's). The sour taste is actually beneficial to digestion as it stimulates salivation--saliva contains digestive enyzmes--and secretions throughout the digestive tract. In healing traditions like Traditional Chinese Medicine and Ayurveda, the sour flavor is associated with balancing properties such as stimulating the liver (TCM) and lungs (Ayurveda). Sour, acidic foods can support digestion in the upper GI tract for those with low stomach acid and can be helpful for nausea, including during pregnancy. However, for those with ulcers, gastritis or excess stomach acid, consuming large amounts of acidic ferments may be contraindicated; sticking with lower-acid ferments or limiting serving sizes would be wise, and consider adding in a probiotic to supplement until you can tolerate these foods. 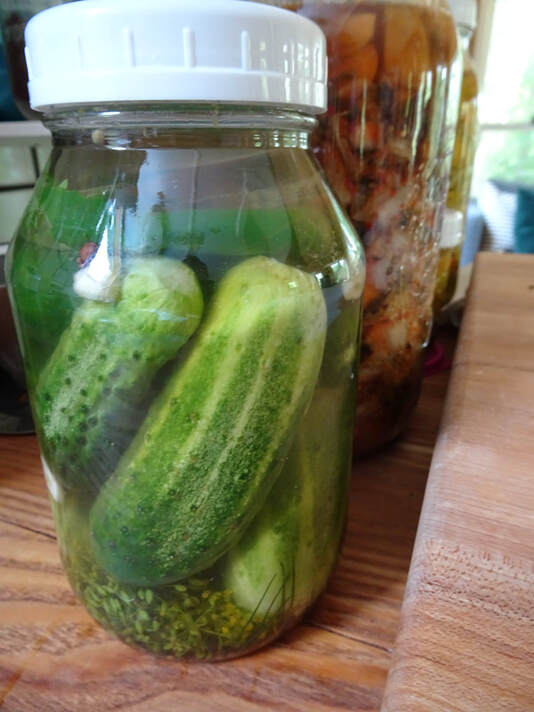 Some Easy Recipes and What to Look for When Buying Fermented FoodsI encourage making things yourself whenever possible, so you know the exact ingredients and processes that went in to making your food. If you are interested in recipes to get started, here are a few from my blog so you can try your hand at DIY fermentation:
Perhaps you are nervous getting started with the DIY-route, or there are ferments that you want to try but don't have the equipment to make at home, or you just want to taste something first to see if you like it before committing to making it at home. In these cases, store-bought ferments can be a great option. However, not all ferments on the store shelves are created equally, and you need to carefully read the labels to get traditionally fermented foods. Here are a few criteria to look for when purchasing fermented foods at the store:
 Beginner Tips for Eating Fermented FoodsIf you are totally new to eating fermented foods, my best advice is to start slowly. Try one new ferment at a time, starting with just 1 or 2 teaspoons per day, and gradually increasing your intake as tolerated. There is no "upper limit" for fermented foods, but you really only need a small amount to get benefits from them. As you try more ferments, aim to increase the diversity, not just the amount, of fermented foods you eat on a regular basis. Our general rule is to have something fermented at each meal, as often as possible; this could look like a spoonful of sauerkraut on a pastured hot dog or brat, a kefir smoothie with breakfast, a sprinkle of kim chi on eggs, a glass of kombucha with lunch, or a miso dressing with dinner. Even small children should be adding in ferments on a daily basis--they particularly love yogurt, pickles and cheese, and some even like kombucha! Whatever ferments you like, incorporate them into as many meals (or even snacks and desserts!) that you can, even just a small amount daily. Contraindications for Adding Fermented Foods Some new to ferments may find that they get some gas, bloating, stool changes, or GI upset when adding them in; small amounts of these symptoms may be normal, but if you experience significant gut changes after adding in small amounts of fermented foods, you may need to do some gut healing before making ferments a regular part of your diet. As mentioned above, those with gastritis or related issues may need to moderate their intake of ferments and avoid higher-acid items like vinegar until healing has taken place. Folks with gut dysbiosis (such as SIBO/SIFO), leaky gut, IBS, IBD and other gut conditions may find that they do not tolerate fermented foods. In these cases, going through a gut-healing protocol that helps to address underlying infections and overgrowth, decrease gut inflammation, balance the microbiome, and repair the gut lining, is an important to step before being able to enjoy ferments, and of course, will help improve overall health. For some conditions, probiotic supplements may work better rather than starting with fermented foods as a source of beneficial microbes, as they may be better tolerated.  Want to Know More?Want to learn to make your own fermented foods or need more support with healing your gut? Reach out!
Visit my website here to learn about upcoming fermentation workshops (including virtual classes!) or find me here to learn more about working with me on your gut healing journey--including signing up for a FREE 15-minute call! 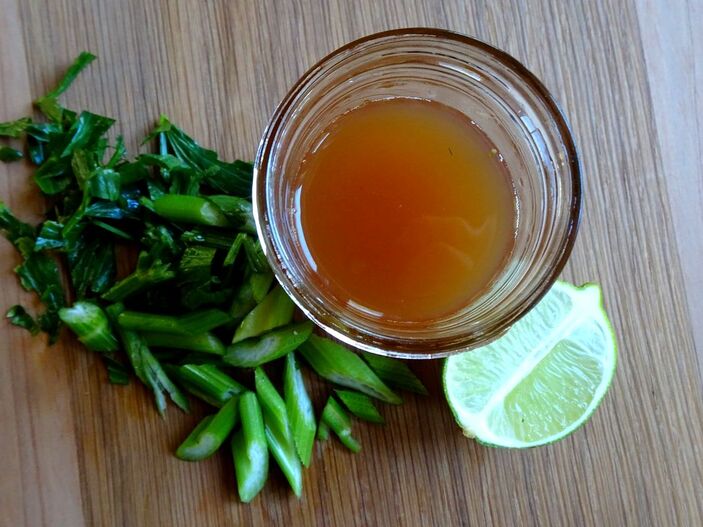 What is a "Shrub?"Shrub, also known as drinking vinegar, is an infusion of fruit or herbs into a mixture of vinegar and sugar. This creates a sweet and sour flavor bomb, and this concentrate is used to dilute into water or cocktails to add a nice pop. The standard formula is to use equal parts fruit, sugar and vinegar, but I typically cut the sugar in half to make it less sweet and syrupy, with more emphasis on the tart flavor. Why make or even drink shrubs? Because it is a bit sweet, a shrub with some sparkling water is a good soda substitute or way to make flavorful cocktails or "mocktails" without so much sugar. I also love them as a way to use fruits, herbs and even veggies from my garden in a different way, and a new way to eat seasonally. On the health side, shrubs are supportive of digestion as vinegar, especially raw vinegar, confers health benefits on its own. High-quality, raw vinegar is a source of organic acids, enzymes, and post-biotics, which are health-promoting metabolites created during the fermentation process. Vinegar itself is not necessarily probiotic, despite being a fermented food, because of its extremely high acidity. However, it is still great for digestion and more. If you are interested in fermenting your own vinegar to use in your homemade shrub (especially during apple season right now!), check out the book Homebrewed Vinegars by Kirsten Shockey, a fermentation queen. 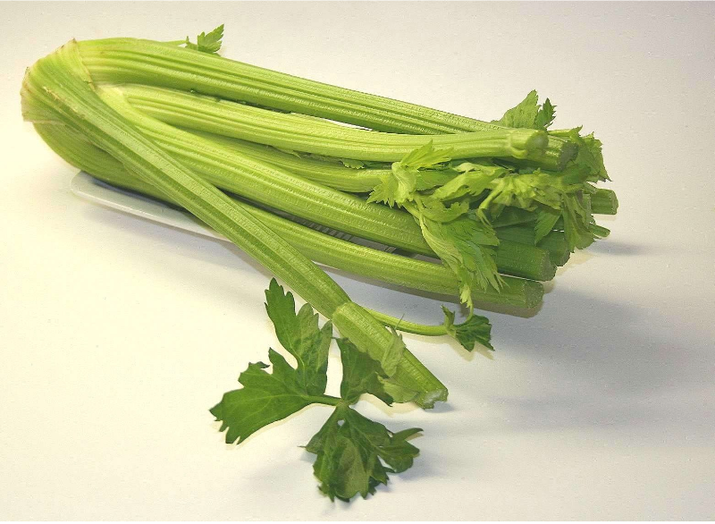 You can make shrubs with pretty much any fruit or herb you like, such as apple, rhubarb, berries, or basil. I like this celery shrub as it tends more savory, where most shrubs are quite sweet when made with fruit. Plus, it adds some minerals and phytochemicals to your beverage as well! Certainly, this is still a bit sweet due to the use of sugar, but less so, plus it has an herby quality as well that I love. Celery Lime Shrub Makes 2 cups 2 cups sliced celery (can include leaves) 1 cup unrefined cane sugar 1 cup raw apple cider vinegar 1 cup white wine vinegar Zest and juice of 1 lime Variation: Celery-Apple Shrub For a milder, sweeter shrub, use 1 cup diced green apple for 1 of the cups of celery, keeping the other ingredients the same. Directions: 1. Chop the celery and place in a 1 quart glass jar. 2. Add the lime and sugar and stir to coat the celery. 3. Pour the vinegars over the celery and seal with a plastic lid. 4. Shake vigorously to dissolve the sugar into the vinegar and letting the celery begin to macerate. 5. Let sit for 5-7 days at room temperature to infuse the vinegar with the celery. 6. Strain out the solids and return the liquid to your jar. Keep in the refrigerator until ready to use; this will keep for about 1 year in the fridge. 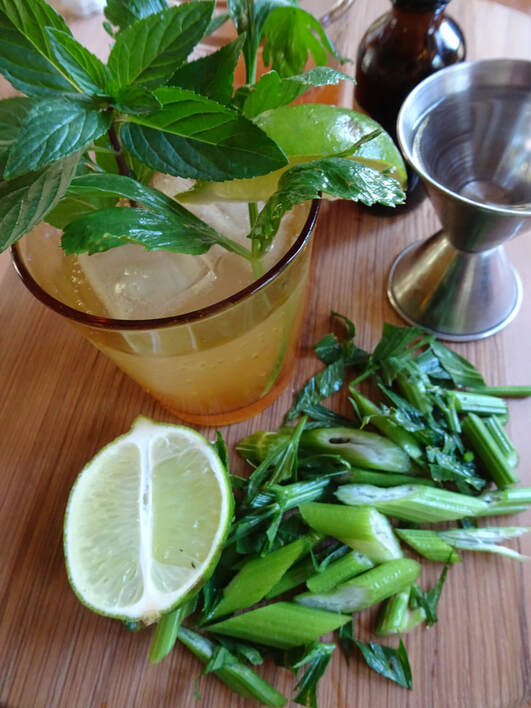 What Can You do with Your Shrub?Now that you have this super tasty concoction, what can you do with it? You can add 1-2 ounces to still or sparkling water for a flavor boost to plain water, or add to a cocktail to create something unique and delicious. Below are some recipes I've brewed up using my Celery Shrub. Celery is naturally quite salty, so a pinch of salt in these recipes really brings that quality out...feel free to do a salted rim instead if you're feeling fancy!
Super Celery Mocktail 12-16 oz. lime or lemon sparkling water (we use Sparkle which is local to here, but feel free to use Spindrift, Topo Chico, etc.) 2 Tbs celery lime shrub Squeeze of lime juice Sprig of fresh mint (I will sometimes stick the leafy top of a celery stalk in there, too!) Pinch sea salt Ice Fill a tumbler with ice to your liking. Add the shrub, lime juice, and salt. Stir gently. Pour the cold sparkling water over the top and garnish with a sprig of mint or other herb such as basil. Herbal Celery Cocktail 2 oz herbaceous gin (We often use Prairie organic gin, but use your favorite here) 1-2 oz celery shrub 4-6 ounces sparkling water, plain or flavored Celery leaves Lime wedge Pinch salt 2-3 dashes bitters Ice In the bottom of a cocktail glass, muddle a small handful of celery leaves with the pinch of salt. Add ice to the glass, then pour in the gin, shrub and sparkling water. Add a few dashes of bitters and serve with a lime wedge. Cheers to your health! 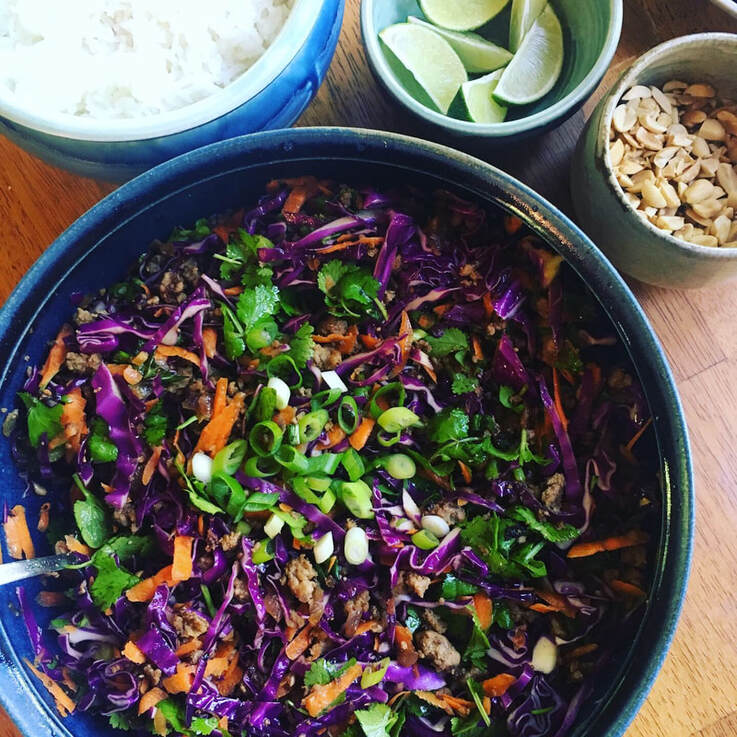 For those who are looking for easy, tasty dishes to sneak some organ meats into their diet, this recipe is for you! Laab (also spelled laap or larb) is a Thai meat-based salad that combines flavorful ground meat and fresh vegetables, served in lettuce cups. This is typically served with sticky rice, but we will often make rice noodles to go with them instead if we are looking for a quick-cooking dinner. You could leave the rice or noodles out if you follow a grain-free diet, however, and just add more vegetables to the filling. Laab has become a staple at our house, as it is comes together quickly and easily. This dish creates a nice vessel for organ meats and is so delicious that everyone in my house loves it. This is probably the most-requested meal from my husband, which I would say is a glowing review! If you love Thai flavors like ginger, fish sauce, and fresh herbs like cilantro and mint, I encourage you to give this one a try. You get a meal that is full of fresh vegetables, as well as protein and healthy fats, plus it is easy to serve to a crowd and they can make their own lettuce cups. If you have nice lettuce leaves available you can serve the meat-and-veggie mixture in those, or try the filling in napa cabbage leaves during the cooler months when lettuce isn't in season. We have also made this filling and put it into spring rolls or mixed it with rice noodles to make a pack-able cold lunch as well. Another modification is that, if you don't eat pork, you could make this with ground chicken instead, using chicken, beef, or lamb organs. Why Add the Organ Meats?The addition of heart and liver is certainly optional here, but I would encourage you to try and add them in if possible. Organ meats are more nutrient-dense than muscle meat, providing more vitamins and minerals in your meal than when just cooking with muscle meat alone. Liver is high in fat-soluble vitamins A, D, and K2, as well as vitamins B12 and B6, choline, iron and folate. Some of these nutrients can be difficult to get, even in a "whole food-based" diet, unless adding in liver or other organs 1-2 times per week. Hearts are also very nutritious, offering the antioxidant coenzyme Q10 (CoQ10), known for benefiting heart and brain health, but with few dietary sources. With all of the flavors and textures in this recipe, you can hardly tell they are in there, which may be preferable for family or friends who want to eat organ meats but aren't huge fans of the taste and texture. Liver and heart can be chopped or ground, then incorporated into any seasoned ground meat to create nutrient-dense recipes (think chili, tacos, etc.), and is such an easy way to get your 1-2 weekly doses of organs. Using organic and/or pasture-raised sources of organs is important, both to avoid hormone and antibiotic-laden conventional meat, but also to ensure a higher nutrient content and better quality of life for the animals used for their meat. Check with your local health food store or local farmers to purchase high-quality organ meats, as they are likely not available at conventional grocery stores. Pork Laab with Heart and Liver
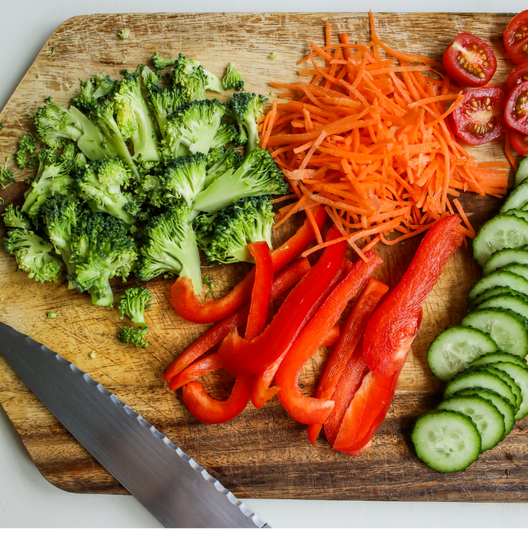
Serves 4-6 For the meat filling: 2 Tbs coconut oil 1 small red onion, diced 3-4 cloves garlic, minced 1" fresh ginger, minced 2 tsp toasted rice powder, optional--available at Asian grocery stores or online 1 lb ground pastured pork 4 ounces chicken livers (can use any animal liver), finely chopped 4 ounces heart, any animal, chopped or ground 1-2 tsp Sriracha hot sauce, or substitute red chili flakes to taste 1 1/2 tsp fish sauce (I use Red Boat brand) 2 Tbs lime juice For the vegetable mixture: 4 cups shredded cabbage 2 medium carrots, grated 4 scallions, sliced 1 cup fresh cilantro, chopped 1/2 cup fresh mint, chopped ~1 tsp fish sauce 2 Tbs lime juice 1/2 cup peanuts, chopped To serve: Garnishes: extra chopped fresh cilantro, sliced scallions, lime wedges, and chopped peanuts Sriracha or other hot sauce Fish sauce or organic soy sauce Sticky white rice or cooked rice noodles Butter lettuce leaves or cabbage leaves Directions: 1. In a medium skillet, heat coconut oil over medium heat. When melted and hot, add in the onions. Saute 5-8 minutes until softened and beginning to brown, stirring regularly. Add the garlic, ginger, and toasted rice powder (if using) and cook for 3-5 more minutes. 2. Add the ground pork and chopped organ meats to the pan. Break up the meat as best you can, so it can cook evenly and begin to brown. Cook, stirring regularly, until all of the pink is gone, about 10-12 minutes. Then, continue to let the meat cook without stirring often to allow the meat to brown and crisp. 3. Add the hot sauce, fish sauce and lime juice to the browned pork, letting the liquid de-glaze the pan and stirring to get all of the crispy meat bits off the bottom of the pan. Remove pan from the heat and set aside until ready to add to the vegetable mixture. 4. While the meat is cooking, prepare the vegetable mixture and lettuce cups. Combine the cabbage, carrots, scallions, cilantro, and mint in a large mixing bowl. Wash and dry the lettuce or cabbage leaves for serving, then set aside. 5. When then pork is cooked, add to the cabbage mixture. Season with the rest of the fish sauce and lime juice, to taste, then stir to combine. Toss in peanuts just before serving to keep them crunchy. 6. Serve with cooked rice or rice noodles in prepared lettuce cups, garnishing with extra herbs, peanuts, and sauces as desired. Note: The meat and veggie filling can be made ahead of time to serve later, but is best when served fresh and warm. Leftover filling will keep for several days in the fridge, and makes great leftovers mixed in with rice or noodles for a quick salad to bring for your lunch! 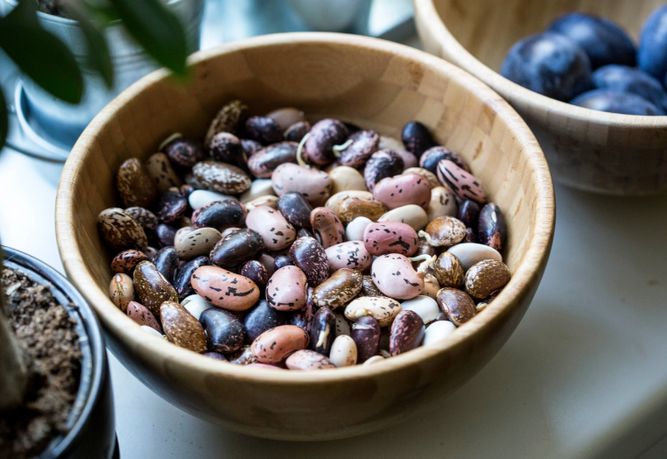 What is Fiber?If you are into health at all, and probably even if you aren't, chances are you have heard of fiber. So what exactly is it? Dietary fiber is a category of complex compounds, found mostly in plants, that cannot be absorbed by the body through the digestive system. So what happens to them if we don't digest and absorb them like the rest of our food? Instead of fueling our bodies with nutrients, dietary fibers are used as a substrate (food!) by microbes like beneficial bacteria in the gut or to create bulk in the stool. Lots of gut-health information out there emphasizes probiotics and fermented food, broth, and herbs to help heal the gut, but it is also important to emphasize good old fiber when it comes to keeping your digestive tract healthy, and the research supports this as a part of promoting good gut health. What Are the Different Types of Fiber?You may have seen the terms "soluble" and "insoluble" when distinguishing between types of dietary fiber, which refers to the compound's ability to dissolve in water. Soluble fiber is generally thought of as prebiotic, feeding the gut microbes, insoluble fiber is what creates bulk in the stool and keeps us regular. Deeper study into dietary fiber actually shows that fiber in food can also be categorized not just by solubility, but also viscosity and fermentability, and these characteristics may better reflect each type of fiber's role in the body. There are about 5 main types of fiber, depending on which source you are using, based on these three factors above, which are: 1) Highly soluble, fermentable non-starch polysaccharides (NSP) (pectin, inulin, oligosaccharides, etc.) 2) Moderately soluble and fermentable NSP's (psyllium, oats) 3) Insoluble, fermentable fibers (bran, flax, vegetables, fruit peels, lignan) 4) Insoluble, non-fermentable fibers (such as vegetable "roughage," cellulose) 5) Resistant starch (RS)—These are both soluble and fermentable, but differ from type 1 as they come from starch and byproducts of small intestine fiber fermentation; RS resists digestion in the small intestine and makes it to the bowel, where it is fermented and can then feed microbes in the large intestine, which makes RS unique as the first four are used by microbes in the small intestine. (potatoes, green bananas, rice)  So which type of dietary fiber is the best? While the body needs all of these different types of fibers in the diet to support gut health, the gut microbes prefer those that are fermentable to use as their source of fuel. Plant foods have soluble and insoluble fiber in varying proportions, with some providing RS as well, so having a variety of fiber-rich plant foods in the diet should be the focus, unless you have a certain symptom or gut condition, such as constipation or IBS. While all of the different fibers play a role in the gut, new research suggests the “best” type of fiber for the gut microbes is the soluble, fermentable, viscous fiber type, and this category of fibers is being referred to as microbiota-accessible carbohydrates (MAC) due to the bacterium's preference for this fuel source. MAC's would include both soluble non-starch polysaccharides and resistant starch, as these types both have the ability to feed the microbiota in the small intestine and the colon, respectively. This new distinction shows the importance of these specific foods to promote a diverse microbiome, which must be considered when looking to create a healthy gut. 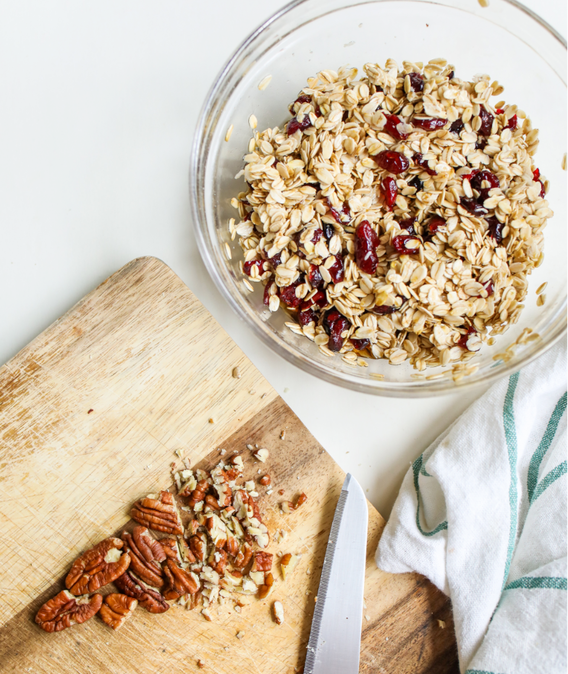 What Are the Best Sources of Fiber?With a few exceptions, dietary fiber comes from plant foods. I am a big advocate of a diet that is centered around nutrient-dense animal foods, but we do need to include adequate plant foods to meet our fiber needs. It's all about balance! Here are the main sources of fiber in the modern diet: 1) Whole grains and whole grain flours—Though not everyone can tolerate grains, they are a significant source of fiber in the diet, and have been for thousands of years. This includes all varieties of wheat, as well as rye, barley, oats, rice, millet, quinoa, buckwheat and corn. Whole grains do contain some soluble fiber, but provide mostly insoluble fiber. The exception to this is with barley and oats, which are high in beta-glucans, a type of prebiotic fiber. Whole grains do provide resistant starch, which is also present in refined grains (not saying go eat those, however!). Notably, RS is increased in grains and some other starchy foods when cooked and cooled or when soured, like in sourdough bread. 2) Beans and legumes—Beans are one of the densest sources of fiber for a whole food, and are a significant source of MAC’s, as the fiber present in legumes is highly fermentable. They provide some RS as well, along with protein and minerals, making them dynamite for gut health once tolerated. This would include black, pinto, red, white/navy, lima, and garbanzo beans, lentils, split peas and green peas, and peanuts. 3) Tubers, root vegetables, and winter squash—These higher-carbohydrate vegetables do have quite a bit of nutrition (yes, even white potatoes!), including a significant amount of fiber. In this category, I'll put beets, carrots, sweet potatoes, potatoes, chicory and dandelion roots, burdock root, ginger, butternut and other winter squashes. These foods contribute NSP fibers along with insoluble fiber and RS, which increases when cooked and cooled--think potato salad, leftovers. 4) Non-starchy vegetables—Much of what these provide is insoluble fiber, what I refer to as roughage, but some have smaller amounts of soluble fiber as well, depending on the specific food. This group collectively refers to veggies that grow above ground and/or are lower in carbohydrates, like lettuce, kale/greens, summer squash, artichokes, onions and garlic, green beans, eggplant, tomatoes, okra, peppers, cabbage, Brussels sprouts, etc. Okra, artichokes and alliums like onions and garlic do provide prebiotic fibers along with their roughage. 5) Fruit—Fruits, including apples, pears, citrus, berries, avocado, peaches, cherries, mango, banana and all of the other fruity goods, provide pectin, which is a great MAC, along with other fermentable fibers and some insoluble fiber. Under ripe fruit such as green bananas or plantains provide more RS and less NSP, because the starch increases and the sugars increase as the fruit ripens. Avocado and berries are both very high in fiber and low in carbohydrates if you need to follow a low-carb diet. 6) Nuts and Seeds—Foods like almonds, cashews, macadamia nuts, walnuts, Brazil nuts, sunflower seeds, chia, flax, and pumpkin seeds, contain a good amount of all of the non-starch fiber types, along with protein and fat, making these a great fiber option for low-carb folks. 7) Other: This is my catch-all category of high fiber foods, which includes mushrooms, algae and seaweed, all sources of beta-glucan prebiotic fibers. Cocoa powder and dark chocolate also provide fiber! Yay! I will also include milk here, with an emphasis on breastmilk for infants. Milk is a source of oligosaccharides and lactulose that are prebiotic as well--the human milk oligosaccharides (HMO's) are what feed the gut microbes in breastfed infants, while other dairy milks contain galacto-olicosaccharides (GO's), acting as prebiotics in those consuming dairy; there is a difference in the gut microbiome between breastfed and bottle-fed infants for this reason. 8) Functional fiber—These are supplements/manufactured products that provide concentrated sources fiber, though some of them can be derived from food, such as psyllium husk, guar gum, maltodextrin, inulin, OS/FOS/GOS, and prebiotic powders/supplements. There are also sources of RS for supplemental use, including high maize corn starch, potato starch, and green banana flour. I always go to food first, but some may need to supplement if getting adequate fiber is difficult in the diet or if certain conditions require supplementing this nutrient.  The Many of Roles of Fiber and Its Benefits to the BodySo we know that fiber is good for the gut, but exactly what does it do for us? Here is a list of some of the evidence-based roles of fiber in the digestive system and throughout the whole body:
 How Much Fiber Should We Be Eating?There are many different recommendations for how much fiber we need to eat for optimal health. The current RDA is 25 grams for adult women and 38 grams per day for adult men, though most Americans get an average of 15 grams per day. No wonder digestive issues are so prevalent on the Standard American Diet (SAD)! Despite this governmental recommendation, there is evidence that some of our ancestors ate up to 120 grams per day, and while most would struggle to consume this much, getting the RDA is the bare minimum needed to support a robust microbiome and gut functioning. This can be hard to achieve, especially if following a low-carb diet, which is when fiber supplements, such as a prebiotic powder, can come in handy. We know that diversity of the microbiome and the ability to have optimal gut functioning depends on adequate fiber in the diet, and these markers of health were much better in traditional diet, so increasing fiber above the RDA may be necessary for some, though not for all. If you have been eating a lower-fiber diet, such as the SAD, it is important to gradually increase how much you dietary fiber you consume, especially from supplemental fiber, to avoid unwanted symptoms like bloating, gas or abdominal cramping. Also, be sure to drink plenty of water when consuming a high-fiber diet as well to prevent constipation. Do Some People Need to Avoid Fiber?Getting higher amounts of fiber per day is a recommendation for general wellbeing, not for those with intolerance of certain fibers or starches, or with certain gut conditions. Some people actually may need to avoid or limit fiber for a period of time; though fiber may help prevent IBS, those suffering with it may find their symptoms worsen when fiber is increased, in part due to slow gut motility and dysbiosis that is commonly seen in IBS patients (such as SIBO). This is because fermentable fibers can feed pathogenic microbes, in addition to beneficial ones, which can worsen symptoms, and increased bulk through non-fermentable fibers can be aggravating as well if the gut is inflamed. In the case of dysbiosis, IBS, or other chronic gut conditions and even some autoimmune diseases removing or decreasing fiber, or just specific types of fiber, can be beneficial as part of a gut-healing protocol. This is the reasoning behind the low FODMAP diet, as FODMAP's are prebiotic, fermentable fibers. However, once inflammation has gone down, dysbiosis has improved and the gut lining started to be repaired, it is critical that fiber should be reintroduced gradually to maintain healthy gut flora and function going forward. 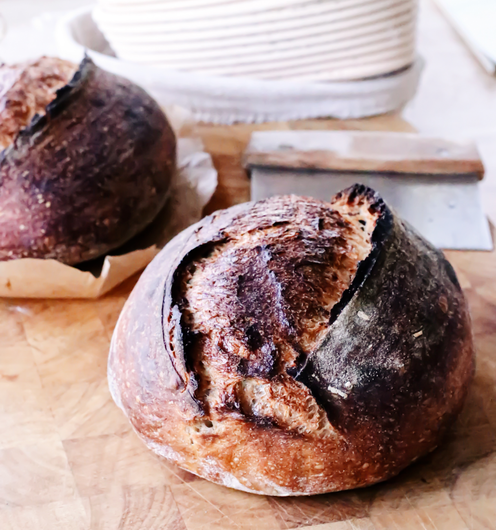 How Do I Get More Fiber in My Diet?It can be difficult to get adequate fiber in the diet, but it can be done with careful planning. Below are some of my favorite tips for increasing your intake of dietary fiber.
 A Day of High-Fiber EatingOk, so we know why to eat fiber and what foods provide it to our diet, but what would a day of high-fiber eating actually look like? Below is an sample of a meal plan that provides about 53 grams of fiber per day--well over the RDA. Of course, increase your fiber intake gradually and monitor changes in gut health for discomfort or unwanted symptoms, especially if this way of eating is new to you. Feel free to modify it as needed! Breakfast (10 grams fiber): 2 eggs scrambled with 1 cup spinach, top with cheese (2g) 1 cup soaked oatmeal with cream and 1 Tbs ground flaxseed (8 g) Lunch (12 g): Half sandwich with deli meat, cheese, veggies and ¼ cup avocado slices on 1 slice sprouted Ezekiel bread (6 g) 1 cup carrot sticks with ¼ cup hummus (6 g) Glass of raw milk Dinner (11 g): Meatloaf with organ meats, with onion in the mixture (1) 1 cup Cooked broccoli with butter(5) 1 baked potato or ¾ cup winter squash with sour cream(5) Snacks/Desserts (20 g): Yogurt with 1 cup raspberries with 1 oz dark chocolate (11 g) 1 medium apple and ¼ cup almonds (9)  Need Even More Gut Health Support?Need some help increasing your fiber intake? Or curious if a low fiber diet may be therapeutic? If your gut health could use some TLC, then please reach out! I have a passion for helping people heal their gut, focusing on what is missing in the diet and the non-food habits that impact our gut as well. Visit my website to find out more about my 3- and 6-month plans, or to set up your FREE 15-minute consultation to see if working together is right for you healing journey! Sources:
https://journals.physiology.org/doi/full/10.1152/physrev.2001.81.3.1031 https://onlinelibrary.wiley.com/doi/10.1111/j.1440-1746.2010.06433.x https://pubmed.ncbi.nlm.nih.gov/3020970/ https://www.ncbi.nlm.nih.gov/pmc/articles/PMC4291444/ https://www.ncbi.nlm.nih.gov/pmc/articles/PMC6041804/ https://jneuroinflammation.biomedcentral.com/articles/10.1186/s12974-020-01760-1#Sec31 https://www.ncbi.nlm.nih.gov/pmc/articles/PMC5427073/ https://www.healthline.com/nutrition/22-high-fiber-foods#5-High-Fiber-Foods-You-Should-Eat https://www.gutmicrobiotaforhealth.com/an-update-of-the-scientific-evidence-behind-the-microbiota-specific-effects-of-common-dietary-patterns/ https://www.sciencedirect.com/science/article/pii/S1550413114003118 https://journals.asm.org/doi/10.1128/AEM.01705-20 www.nutritiondata.self.com https://pubmed.ncbi.nlm.nih.gov/22747080/ https://www.ncbi.nlm.nih.gov/pmc/articles/PMC6537190/  The Master Endocrine GlandAs a gut health-focused dietitian, I find it important to address not only gut-specific symptoms and strategies, but to also look at the other parts of the body that impact the functioning of our gut. One of these areas is our thyroid health. The thyroid is a small gland that sits at the base of the throat and is considered the master gland of the endocrine system, as it directly interacts with every other gland in the system. This means that a healthy thyroid is essential for properly-functioning digestive, reproductive, immune and stress adaptation systems in the body, so taking good care of it has huge health implications. The roles of the thyroid include making and storing thyroid hormone, regulating body temperature. and regulating metabolism--this role is important for weight maintenance, but also determines how quickly our body processes food to use it for energy, impacting digestion. Good thyroid health is also needed for fertility in both men and women, and for development and growth of the fetus during pregnancy. In children, it is needed for proper development, both physically and cognitively. As part of the HPAT axis (hypothalamic-pituitary-adrenal-thyroid), the thyroid influences hormone balance in the endocrine system, along with helping to maintain balance of the reproductive hormones. This little gland has big implications in the health of our whole body. The Thyroid-Gut ConnectionWhile we can see the role of the thyroid in our hormones and metabolism, the connection between the gut and the thyroid is lesser-known. However, the presence of a "gut-thyroid" axis is becoming more widely accepted, as the functioning of the thyroid and the digestive system are directly linked. Because the thyroid influences metabolic rate, it then impacts digestion, absorption and assimilation of nutrients, as well as gut motility, which is how quickly food moves through the GI tract. For those with dysbiosis, an imbalance in beneficial and pathogenic microbes, in the gut, slow gut motility can be a major factor contributing to overgrowth of pathogen, leading to diagnoses like Small Intestinal Bacterial Overgrowth (SIBO), fungal overgrowth, or H. Pylori. As with its influence on other glands, the thyroid helps to regulate pancreatic function, which can impact digestive enzyme production and overall gut function. Plus, adequate thyroid function is needed for secretion of digestive juices, from salivary enzymes to stomach acid production and bile flow, all needed for proper breakdown and absorption of food and nutrients. Every cell in the body has thyroid hormone receptors, and the gut is no different. The cells in the lining of the gut require thyroid hormone to work properly, which can have implications for intestinal permeability, lack of healthy mucosa and poor gut immune functioning. While a well-functioning thyroid is needed to keep things moving properly through the digestive system, conversely, a healthy gut supports proper thyroid function. Having a balanced microbiome, healthy gut mucosa, integrity in the gut lining and adequate stomach acid all have connections to a properly-working thyroid. Poor gut health can lead to impaired absorption of nutrients, which can lead to inability to make thyroid hormones, and nutrient deficiencies a major factor for thyroid dysfunction. The liver, which is needed to get rid of toxins and excess hormones, can impair thyroid function if not working properly, as the thyroid is very sensitive to toxins like heavy metals. Plus, much of the thyroid hormone is activated in the liver, and some in other part of the gut, so we need the liver to work well to allow our body to have the usable form of thyroid hormone it needs (T3). If leaky gut is present, particles from our food and environment can cross the gut barrier, instead of being excreted in waste, and cause inflammation and even an autoimmune response. Many thyroid conditions are autoimmune in nature, including Hashimoto's thyroiditis (hypothyroidism) and Grave's disease (hyperthyroidism), so having strong gut integrity may help protect the thyroid. Healthy overall immune function is also necessary for protection from autoimmunity, as well as infections in the gut and the entire body. Poor immune functioning is often seen in both gut and thyroid conditions, and addressing this is necessary for the gut-thyroid axis to be healthy. The thyroid has very specific nutrient needs and is also very sensitive to toxins and inflammation, so it is no wonder why so many have dysfunction in not just one, but both of these systems, as they are intricately connected. Taking special care to nourish and protect the thyroid though diet and lifestyle may be a piece of your gut-healing puzzle.  What Can Thyroid Dysfunction Look Like?How would you know if your thyroid isn't working as it should? Some common symptoms of thyroid dysfunction (which can be under- or overactive) include:
If you experience these symptoms above, it is certainly worth getting a full thyroid panel run by your doctor to determine if an imbalance of thyroid hormones is part of your health picture. Medication may be necessary, but there are often other areas to address as part of your care plan, including nutrition, lifestyle facotrs and healing the gut. When there are issues with the thyroid, you must address your gut health, even if you don't have overt symptoms like gas, bloating or diarrhea, as you can still have dysbiosis in the gut without these symptoms. If you do have issues with the gut, especially GERD, dysbiosis or constipation, be sure to address thyroid health by getting labs done and ensure you are getting proper nutrition for the thyroid as part of your diet. 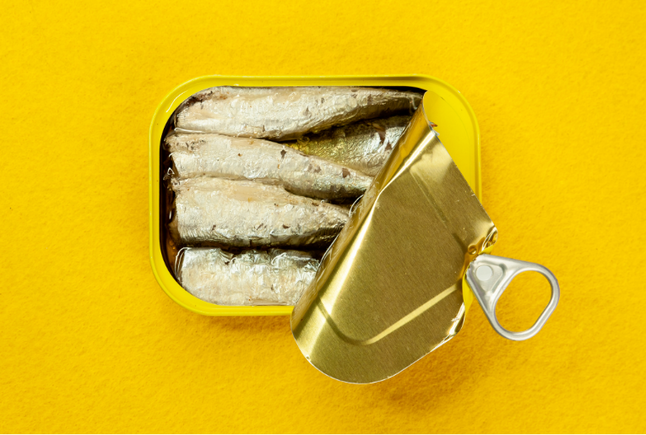 Nutrients Needed to Support Thyroid HealthSo we know we need to take good care of our thyroid, for our gut and our overall health, but how do we do that with nutrition? Well, starting with a protein-rich, nutrient-dense ancestral diet that avoids processed foods builds a good nutritional foundation, but there are also some very specific nutrients that the thyroid needs to run like a well-oiled machine. Many of these are inadequate in the modern diet, which makes sense when realizing how many millions of people thyroid dysfunction impacts. Some of the nutrients needed to support the thyroid are used in the synthesis, activation, or metabolism of thyroid hormone, or they play a role as antioxidants and anti-inflammatories as protection. Others support gut health to, in turn, benefit the thyroid. Here are the main nutrients of concern when it comes to the thyroid:
 My Top 12 Foods to Support the Gut-Thyroid AxisKnowing which nutrients we need can only get us so far, so let's put that knowledge to good use and get practical! There are so many nutrient-dense foods that can help to nourish the thyroid, but here are a few key foods to get you started on supporting your thyroid (and gut!) though nutrition:
 Habits to Help Support Thyroid HealthAs with supporting every aspect of health, diet is not the only change to consider to improve the health of your thyroid. This gland also needs protection from toxins, stress and inflammation, and there are some changes to make to the lifestyle to accompany dietary changes when looking to heal the thyroid. If you are looking to support your thyroid, here are some other lifestyle modifications to address:
It is important to note that diet and lifestyle may not be substitutes for prescriptions, but may be adequate for some to improve their thyroid health or can be used in conjunction with medication. This is why working with doctors and nutrition professionals in complicated health conditions like these is so necessary.  Do I Heal the Gut or the Thyroid?Because the gut and thyroid have a direct connection, it is a bit of a chicken or egg situation, so it can be confusing to know where to start when it comes to making dietary changes. The main thing to remember is that, if dysfunction in one area exists, there may be imbalance in the other, so expanding your idea of what your healing protocol might include is important. In short, you almost always need to address both--it is a two-way street. If you struggle with certain gut conditions, especially constipation, bloating or SIBO, then addressing thyroid nutrition and lifestyle strategies is essential, especially if these symptoms or infections keep coming back. Of course, other gut-healing protocols will be a focus of your plan, but you will likely need to nourish your thyroid using the foods and nutrients listed above in order to support gut health. Conversely, when thyroid dysfunction exists, especially when there is autoimmunity present (Hashimoto's, etc.), you must consider gut healing as part of your journey. You will certainly need nutrition and lifestyle modifications to ensure your thyroid is adequately nourished but also take care to address your gut function. Adding in strategies to balance the gut microbiome, ensure adequate stomach acid, seal leaky gut, lower gut inflammation, and support liver function and bile flow, all can be part of supporting thyroid health. Digging deeper into either side of this gut-thyroid axis is important, especially if you have chronic, ongoing issues on either side that don't seem to budge or improve despite your best efforts. In these cases, it's really time to consider if there is more going on in your health struggles.  Need More Support?When experiencing issues thyroid and/or gut health, it can be difficult to know what changes to make and even harder to do it alone. But you don't need to DIY it! It can be so beneficial to get support from a healthcare professional when you're on this healing path, helping to get the right tests (like your complete thyroid panel with antibodies, vitamin D, iron status, and comprehensive stool testing), implement diet changes to ensure nutritional adequacy, add proper supplementation and medication if needed, and use gut-healing protocols as part of your plan. If you think some gut-healing could be beneficial as part of supporting your thyroid and want help, reach out! Visit my website to learn more about my services, book a package or set up a FREE 15-minute consult to see if working together might help you on your healing journey! Sources:
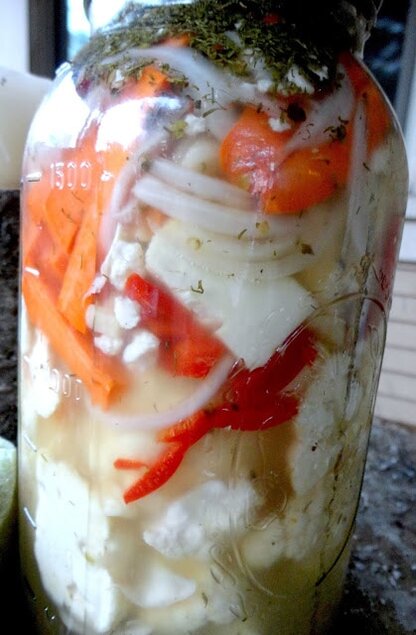 So you know fermented foods are a MUST for maintaining good gut health, and you want to make your own ferments at home but don't know where to start...then this is the post for you! The world of fermentation can be scary to dive into, but I promise it can be easy and fun! I have been fermenting my own foods at home for over twelve years, starting with home brew kombucha in my college apartment, so you know you don't need much extra tools or space to start fermenting. First, let's talk about the kitchen tools you'll need to get started. For the most part, the utensils and gadgets will you need are basic items you may already have on hand, with a few extra pieces to make your fermentation process ever better. With the list below, you can ferment almost anything, from kefir and kombucha to sauerkraut and yogurt--and with so little cost compared to buying pre-made ferments at the store. Pair these simple items with organic, seasonal produce and other high quality, whole-food ingredients and you are on your way to homemade, nutritious ferments. Here's my list of 12 fermentation essentials, plus a few extra fun gadgets if you want to get a little nerdy with it. 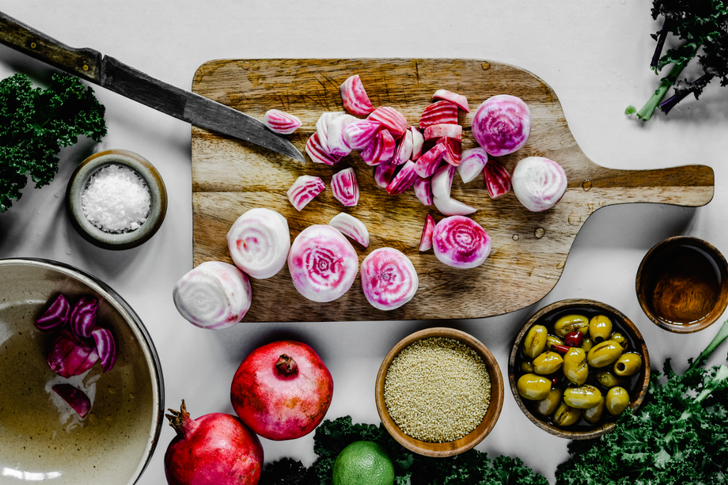 1. Big Cutting Board For vegetable fermentation projects like making sauerkraut or kim chi, you're going to need a nicely-sized cutting board to have room for all your chopped veggies. You can opt for a wooden or plastic cutting board, whichever you prefer, using one that is sturdy and durable. I like a big cutting board for these jobs, so I can spread out and make a big mess that stays (mostly) on the board. I prefer wooden cutting boards in general, but keep in mind that wooden cutting boards must be cleaned and sanitized before using for fermentation projects and remember that they can stain easily when you are chopping turmeric or beets, or hold odors like onions and garlic. I typically use a plastic board just for fermentation for these reasons, but stick to wooden for all my other cutting needs.  2. Chef's Knife (and something to keep it sharp) I like to chop my veggies by hand, so having a good, sharp chef's knife is key for vegetable ferments. You could certainly use a food processor to do the cutting for you, but I like interacting with the produce, adding in my own microbes while also getting some movement in instead of having a machine do it for me. See the "bonus" list for more on using a food processor. If you are making mega batches of kraut, I totally get not doing it by hand, but for smaller projects, a good chef's knife is a must. Be sure to keep it sharp both for ease of cutting and for safety, storing knives in a block or on a magnetic strip--never in the drawer!--to keep them sharp even longer. Depending on your fermentation project, you may want a small paring knife on hand as well, so keep that in mind when stocking your ferment-friendly kitchen. 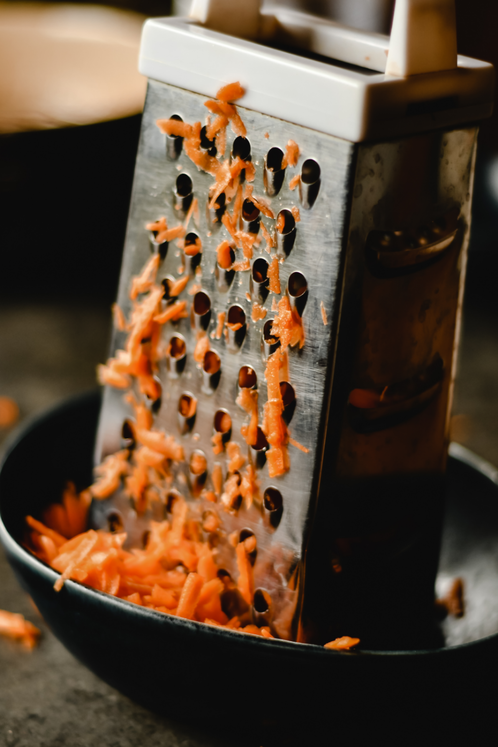 3. Other Sharp Stuff: Graters and Peelers Like I said with the chef's knife, I like to do things by hand. This carries over to the box grater as well. Instead of using a food processor, I go for the four-sided box grater for shredding vegetables to go into my ferments, such as carrots or beets. One of the sides on mine is a zester, which works well for citrus peel and ginger, but if yours doesn't have this feature, you could purchase a separate zester to play with. Less crucial but somewhat helpful is a vegetable peeler. I typically keep my peels on for fermentation and cooking, but if you like or need to peel your veggies before using, keep a nice, sharp peeler on hand for your projects. 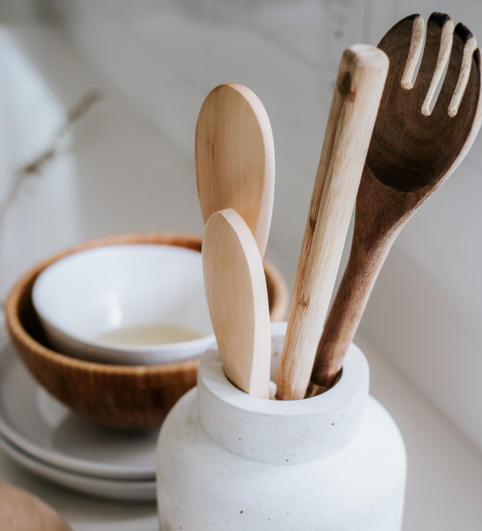 4. Wooden Spoons Whether for mixing vegetables with salt, stirring sugar into tea for kombucha or using the handle to press kraut into a jar, a sturdy wooden spoon is a must for fermenting. Wood is preferable over plastic or metals for utensils, as it is non-reactive so you can mix more acidic foods with it, and it will probably make its way into most of your kitchen projects anyway, so it is essential to have around. You could even carve your own if you were so inclined! 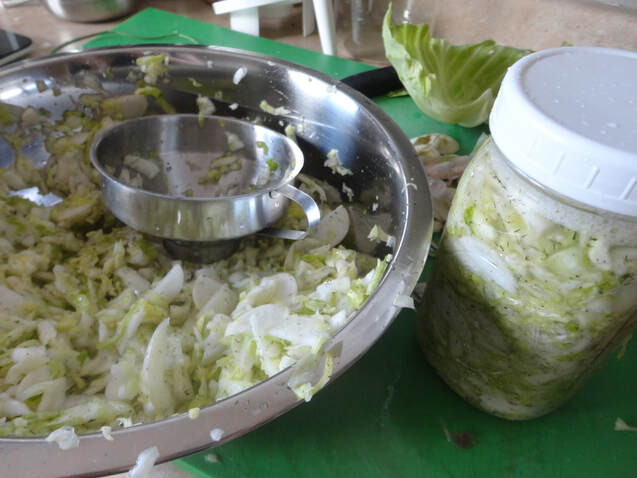 5. Large Mixing Bowls Big mixing bowls are great for filling with cabbage and salt, then massaging the heck out of it to make kraut. You can also use them for brining Napa cabbage for kim chi and making sourdough bread. I typically use stainless steel bowls as they are easy to clean and aren't breakable, but ceramic or glass bowls work well, too. Try to avoid using plastic bowls if possible and have a set of quality bowls as part of your fermenting kit. 6. Funnels of Varying Sizes To prevent making (more of) a mess when I am transferring my cabbage into jars for kraut and kim chi, I like to use a wide mouth canning funnel. I tend to use stainless steel, but if you have a plastic one that will do. I also like to have a smaller, more narrow-mouthed funnel for bottling kombucha, kefir or ginger ale for their second ferments. Using funnels not only keeps your kitchen tidier, but I find that I lose less to spillage, saving money and food, which I love. 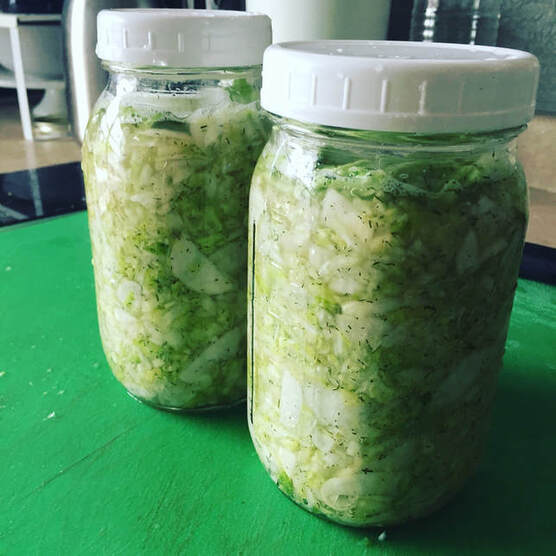 7. Glass Jars and Plastic Lids Once your veggies are chopped, they need somewhere to ferment, and my go-to is the Mason jar. So many of my ferments are made in glass mason jars, so I have a lot on hand at all times. My krauts, kvass, pickles, yogurt, kefir and even my sourdough starter all live in glass jars, so these are essential if you want to do many different fermentation projects. Now, if I am looking to make a really big batch of something like pickles, I will go for my gallon-sized ceramic crock, but even then I will sometimes use two half gallon jars instead for ease of storage and to be able to check on the ferment's progress. For making kombucha or jun, I use a gallon-sized glass jar that works really well, so having multiple sizes of glass jars lets you ferment so many different things. I love that I can see in the jar to watch how my ferments change over time, and also to easily check for scum, mold and yeast on the surface. The pint and quart jars are nice for making small batches when you are experimenting with flavors or have a smaller amount of produce to use up. For lids, I use the BPA-free plastic lids when I ferment in jars because they don't rust or corrode like the metal ones do, and they are a single piece, making them easier to clean. I ensure that the lid doesn't touch the actual ferment by avoiding over-filling my jars. You can certainly use metal canning lids for fermentation, but be sure to place a piece of parchment paper between the jar and lid to prevent corrosion.  8. Kitchen Scale I measure almost everything in my kitchen by weight, as it is the most accurate way to measure. Maybe I am just being a food snob (likely), but I often find better results with weight than volume. For making sauerkraut, the amount of salt required is based on weight of vegetables, so using a scale is really important for successful and safe ferments in this case. If you are unsure about purchasing one, trust me, you will find many ways to use a kitchen scale in addition to fermentation, like making good coffee or bread, so it won't just take up space in the cabinet until you are ready to ferment. I like to use digital for better precision and more units of measure, but if you find a lovely vintage analog scale, go for it. 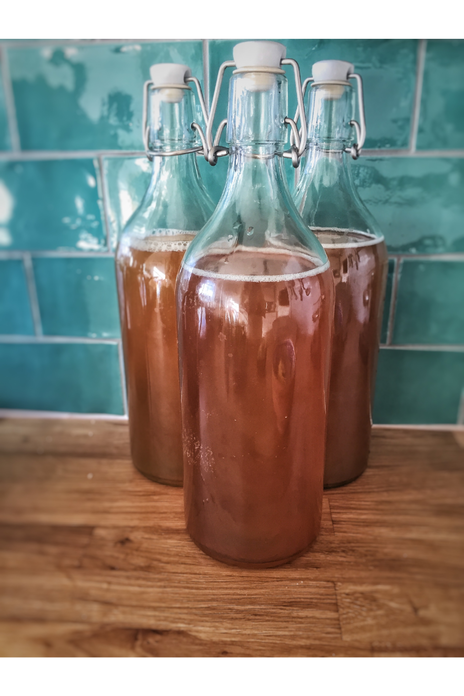 9. Swing-Top Bottles If you are going to be making fermented beverages and you want to safely carbonate them, then I really urge you to get a set of flip-top bottles, sometimes called "Grolsch" bottles. The seal that the swing-top provides lends itself to well-carbonated, bubbly beverages like kombucha, water kefir and ginger ale, as opposed to reusing other jars that don't have as tight of a seal. I use amber bottles that are round in shape because the amber glass prevents damage from light and the round shape of the bottles helps to prevent explosions when your ferments begin to bubble, making them safer to use. These are often used in home-brewing beer, so you can find these through brewery supply stores or online retailers. A set of a dozen will enable you to make many different fermented beverages, keeping you hydrated and full of probiotics, with very little cost up front. 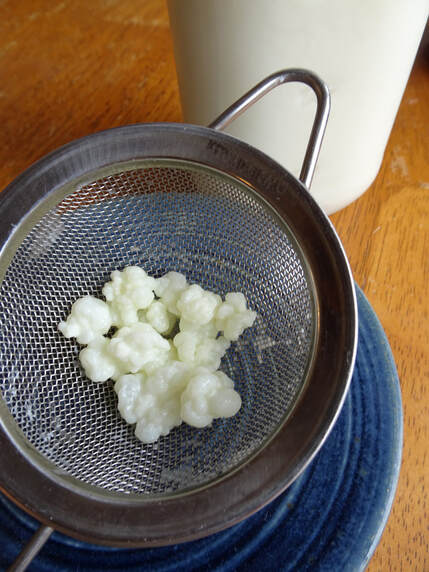 10. Fine Strainers Fine mesh strainers are great for removing tea leaves when brewing kombucha or for removing kefir grains once a batch is done fermenting. I like to have a larger and a smaller size so I can tailor it to whatever project I am working on, but I find I use my small one a lot more when I am making fermented beverages. It can also be nice to keep cheesecloth on hand to strain yogurt or kefir for making thickened dairy products like Greek yogurt or labneh. 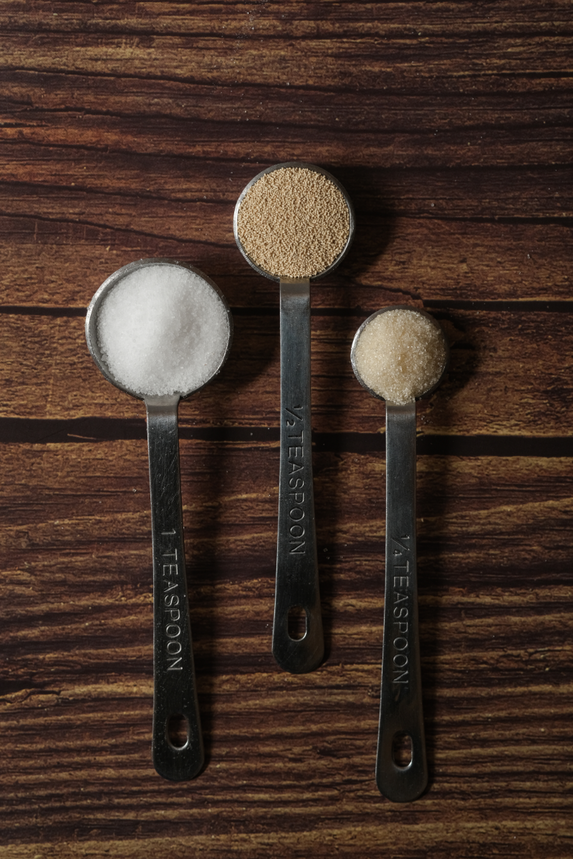 11. Mixing cups and spoons Precision is important in fermentation, both for safety and for quality. A set of measuring utensils for liquid and solid items is key for a ferment-friendly kitchen, as well as probably a million other kitchen uses. You'll need measuring cups for sugar in batches kombucha or water kefir and measuring spoons for starter cultures, salt in krauts, pickled veggies, and more. Liquid measuring cups are needed for making brine, useful in kvass, pickles, and kim chi.  12. Fermentation Weights To keep your veggies submerged in their brine and prevent molding, a weight can prove very useful. You can see one floating in the pickles in the above picture! There are several companies now, such as Pickle Pebbles, making glass weights that fit into both wide- and narrow-mouth glass jars, to ensure everything stays safely under the brine. I also use them to keep small pieces of kraut keep floating to the top of the jar, or with pickled veggies that are larger and like to float. If you don't want to purchase specialty fermentation weights, you can use a smaller jar fit into a larger jar as a makeshift weight; in this case, you'll need to cover the jar with a fine weave cloth in leiu of a lid. There you have it! The twelve items I use very regularly for fermenting vegetables, dairy, and beverages. These are all low tech, electricity-free items, so homesteaders off the grid and apartment dwellers alike can use them with ease. Ok, so you have all the basics, but maybe you want a few extra gadgets to make fermenting more fun or easier...here are 5 more items you could keep on hand for fermenting fun! Food Processor Many people bust out the food processor when prepping a large amount of veggies. As I said above, I prefer hand tools, but with a mega large batch of kraut, it would probably be smart to use a food processor to save you some time. More "power" to you! If you have arthritis or another level of ability that makes chopping difficult, a food processor would certainly make fermentation more accesible to you. making this an essential tool in that case. This can also be handy for making fermented herb pastes if you don't have a mortar and pestle or to puree beans for a lacto-fermented hummus. Kraut Pounder (aka a "pickle packer") This item has come back into popularity over the past few years as a tool for packing sauerkraut into crocks. It is really nice for packing kraut or kim chi into a bigger vessel, but since I tend to use glass jars for my ferments, I tend to use a wooden spoon for my packing. I do have one around for when I need or want to use it, but you can get along fine without it. A wooden cocktail muddler would also work for smaller-mouthed vessels like mason jars. Airlocks Airlocks, which allow CO2 to escape your jars but no air to come in, can make fermenting much easier and fool-proof. If you are new to making ferments, it may be helpful to use one of these on your jar to help prevent mold or yeast from forming. I have used them before with success, but don't use them on a regular basis. People fermented veggies almost forever without using airlocks, but they can be a useful tool for newbies or those nervous to ferment. Ceramic Crock Earthenware crocks are a very traditional way of making sauerkraut and other fermented foods, as glass is pretty new compared to pottery and ceramics. Kim chi is traditionally made in a special type of crock called an onggi, so you could search those out for an every more authentic kim chi method. Crocks are also great to use if you want to explore more advanced fermentation such as making miso. Crocks come in larger sizes, from one gallon to over ten or more gallons, so you can make a very big batch of pickles and store them in your root cellar for the whole year. Many even come with a ceramic weight to fit inside and even some with lids. Just be sure your crock is lead-free, especially if it is a vintage crock. I started out making sauerkraut in a gallon crock and have since moved to the glass jars, but that is purely preference. Even when making ferments in a crock, I transfer them to a glass jar for storage in the fridge, which is why the jars made the essential list and the crock didn't. They both are awesome to have around! Plus, having a big crock on your counter will give you major homesteader points. Food-Grade Gloves I very frequently find myself wearing gloves when making my ferments. Not for sanitary reasons, but for whenI am chopping and massing spicy peppers or hand-staining turmeric in batches of kraut or kim chi. Also, if you have a cut with a bandage on it, gloving up is usually a good idea. If you only ever make sauerkraut with cabbage and salt and no other ferments, perhaps you won't ever use these, but I hope you get wild and need gloves sometime.  Now that you have stocked your kitchen properly, you are ready to ferment almost anything. Be prepared to heal your gut, nourish your family and impress your friends!
Have all the gear but need to learn some skills? I got you covered! If you want to learn how to ferment with me, check my website for upcoming fermentation workshops, both in-person and virtual! I teach classes on fermenting vegetables, beverages, cultured dairy, sourdough bread and more, so keep any eye on my website for classes that can help you reach your fermentation potentials...let's do this!  Parasitic Infections: Another Potential Gut Health DisruptorWhen addressing gut health, we often think of overgrowth in the gut caused by bacteria (such as SIBO or H.pylori infections) or yeast (such as candida), but parasitic infections in the GI tract can also be to blame for disruption in the gut. Examples of parasites found in the GI tract include: Giardia Cryptosporidium Blastocystis hominis Entamoeba histolytica (dysentery) Ascaris (roundworm) Pinworms Hookworms The term "parasites" or "worms" may conjure up images of underprivileged countries with lack of clean drinking water or farmers raising livestock; however, while these are certainly situations that are higher-risk for parasite infections, they can happen even in "modernized" nations and to those who don't spend a lot of time with animals. These can happen to anyone and can cause digestive symptoms as well as other significant symptoms throughout the body. Some common symptoms of parasite infections include:
Some of these symptoms are acute, such as diarrhea during an infection, while other symptoms can be more chronic, such as IBS, lasting for a longer period of time following an infection. It is worth noting that some of these symptoms can be cyclical, as in they can come and go over a period of several weeks the parasites move through their life cycle. Because it can be hard to pin down some of these symptoms, which can be attributed to many different infections and illnesses, testing properly to diagnose if they are due to parasites or not is extremely important. Some parasitic infections can not only cause the gut and other symptoms above, but some can cause long-term damage if left untreated, such as Entamoeba histolytica and Giardia, which can damage the liver and bile duct, respectively. This is why one of the reasons that testing and working with a practitioner are so important if you have any GI symptoms and especially if you feel you may have contracted parasites. Testing can be done using stool tests through your doctor or you can opt for an at-home stool testing kit (I use the GI Map) to see what infections, parasitic or otherwise, are present. This is the best way that your symptoms and infections can properly be diagnosed and treated, either with herbs or a combination of herbs and prescription treatment if necessary.  How do we Get Parasites?Parasitic infections can be picked up in many different ways, both in rural and urban settings, in poor or wealthy communities, with different organisms appearing in different environments. Those typically affected with severe infections are those living in or traveling to areas with poor water quality and unsafe drinking water. However, some of these organisms can be acquired from foods (such as undercooked pork or fish), pets and farm animals, swimming in natural waters, animal or insect bites, and even walking barefoot. Apart from drinking or swimming in contaminated water, most of these activities or settings do not necessarily have to be avoided, and some even have health benefits--I would never recommend not walking barefoot or petting sweet pups!--but it is important to understand they are risk factors and possible ways to "pick up" a parasite, especially for those with weak immune systems or compromised gut health. It is worth noting that many people can carry around some "load" of certain, less harmful, parasites with no symptoms or health problems. Some can either fight them off on their own or find they are not affected by these microbes, and some population of certain parasites may be considered normal. However, many people affected by these organisms will have symptoms, some severe and some mild, and do need to seek treatment.  Herbal Remedies for ParasitesSo what are some of best herbs that help support your body if you have a parasitic infection (acute or chronic)? Herbs that provide different medicinal compounds, including saponins, alkaloids, flavonoids, and tannins, have been used for centuries all over the world for their anti-parasite and anti-microbial activities. Many of these herbal remedies not only affect parasites, but also help control overgrowth of bacteria and yeasts, which often are concurrent with parasitic infections as, often, this overgrowth has a root cause. I typically like to address parasites before other types of overgrowth, though some herbs can be used for both. There are certainly more herbs that have anti-parasite action than what I have listed here, but these are some of the commonly used and more easily accessible traditional remedies to treat parasites, helping bring balance back to your gut. Herbs with Anti-Parasite Activity
I typically like to do a combination of herbs, as some parasites will be more affected by one herb over another. These herbs can be prepared in a tincture, tea or or capsules, but I have an affinity for tinctures myself. However, many of these herbs are not highly palatable, especially for a tea or culinary preparation, so capsules can be preferable for some. Tinctures with a combination of wormwood/black walnut/clove are easy to find, and this could be paired with an encapsulated supplement containing stronger-tasting herbs like berberine, garlic, and thyme oil or oregano oil. If herbs are too strong for you, consider homeopathy as an alternative as well, or incorporate foods that have been shown to have anti-parasite action, such as pumpkin seeds, raw honey, high fiber foods, and culinary preparations of anti-parasite herbs like garlic, onion, ginger, cinnamon, and turmeric rather than their stronger remedy preparations (such as capsule or tincture).  The Root Cause of Gut InfectionsSince we can't avoid nature and anything potentially harmful at all times, whether concerning parasites and darn near all other aspects of health, is it important to understand the root cause of how we got to this point in the first place. If you experience chronic gut infections, parasitic, bacterial or fungal, these are often the result of an underlying imbalance that allowed these infections to take over in the first place. If the diet is of poor quality and the gut is not functioning properly--including low stomach acid, lack of beneficial microbes, poor immune function, and compromised gut integrity (leaky gut, lack of healthy mucous membrane)--parasites are more able and likely to become a problem as your body cannot fight them off. These health factors, paired with an overburdened body from our toxic load (personal products, agricultural chemicals, heavy metals, etc.) and stress, can make us more susceptible to gut infections, including parasites. I believe that getting infections of many types is normal at different points in our life and is part of our body's natural healing processes, but chronic infections like this that interfere so much with our health should be able to be fought off by a healthy immune system, robust gut microbiota and adequate stomach acid production, not allowed to take over by a healthy gut environment. This is why it is necessary to address these underlying health and lifestyle issues in conjunction with herbs when it comes to parasitic infections. If not, they will either not clear up or they will come back, because the environment of the gut is not able to protect against them.  Digging Deeper: Other Gut Support to ConsiderAs I mentioned above, it is essential to consider address the root cause of overgrowth and support gut healing in addition to herbal remedies when approaching parasitic infections. Incorporating herbal remedies, either alone or complementing prescription therapies, are important and usually necessary, but we must look at healing the gut in addition to these treatments to repair and rebuild going forward. Other gut support to consider in conjunction with herbal anti-parasite remedies include:
 Don't Go It Alone! Why to Work with a Provider on Gut HealthGut infections, parasitic and otherwise, can be very serious medical conditions and deserve the care and treatment you can find by working with the right providers.
If you have acute or chronic gut symptoms and have potentially been exposed to parasites, seek medical treatment find out what is causing your symptoms, especially to prevent medical complications. This helps takes the guesswork out of your treatment plan and gets you the right diagnosis--I cannot recommend against self-diagnosis enough! Testing, rather than guessing, when it comes to GI infections helps you know which microbes may be overgrown, (parasitic and otherwise), if beneficial microbes are lacking, and how to get right treatment, including if herbal/complementary treatment is enough or if you need medical attention and prescriptions in addition to diet and lifestyle modifications. Lastly, gut issues, especially those chronic, ongoing symptoms are stressful! By getting help from providers, you get not only help with a treatment plan, but also the personal coaching and support that is necessary when on a healing journey. If you want extra support with your gut healing path, visit my website to see if working together could be helpful for you, and sign up for a free 15-minute call to make your decision even easier! In good health, Laura 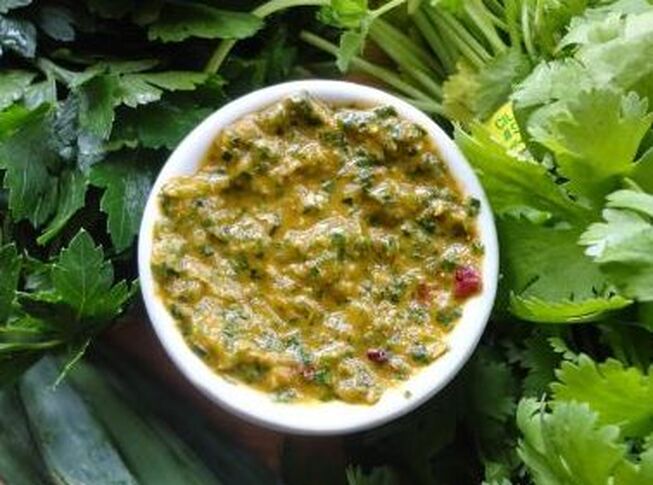 Celebrating Spring with Wild FoodsI know without a doubt that spring is here in Southwest Wisconsin because the ramps have arrived, and that is fantastic news! If you are unfamiliar with ramps, they are a wild allium, that have a flavor resembling onion and garlic. They have a white and sometimes pink stalk like a scallion, with wide, flat green leaves. Ramps grow on shaded forest floors, usually on a hillside that is on a North-facing slope. In recent years, foraging ramps has become more popular in the culinary world, so being careful while wild-crafting is extremely important to ensure we are able to enjoy these for many years to come. Read my previous post here for more on sustainable harvesting of these tasty treasures (and another great ramp recipe!). If you don't have access to a rural area where ramps are available, or are unfamiliar with foraging, you may also be able to find ramps at higher-end grocery stores or health food stores depending on where you live. Whether you forage or buy ramps, cooking with them is a reason to celebrate, as it is one of the first wild foods that emerges after a long winter. With a short growing season and only harvesting a small amount per year, I hold ramps very near and dear to my heart and always look forward to cooking with them in the Spring. 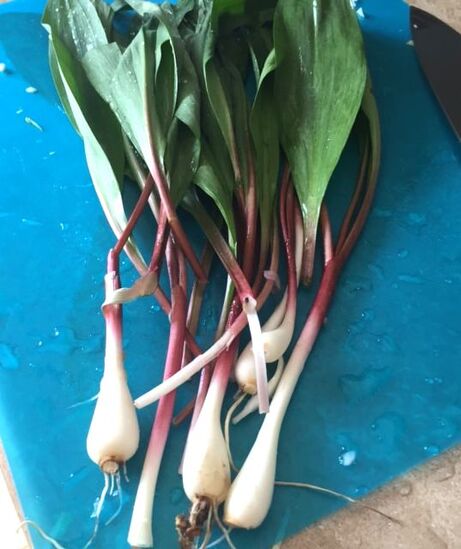 How do You Use Ramps?You can use ramps like you would most other herbs or alliums, such as onions and garlic. You can harvest only the green, leafy tops or use the whole ramp, including the white bulb, much like you would with scallions. I like to throw them into sauces and pastes, pickle the stems and even put the green tops on pizzas or toasted sandwiches. One of my favorite ways to use ramps is in chimichurri, an Argentinian sauce that would typically be put on grilled meats like flank steak or chicken. Chimichurri is full of fragrant herbs blended into olive oil, so it is akin to the Argentinian version of a pesto. I love this on all sorts of grilled, roasted or slow-cooked meat--beef, pork, chicken and fish all pair beautifully with this herbaceous blend-- and it is even delicious on eggs. This comes together easily in a blender or food processor and takes very little time and is truly our house favorite when it comes to sauces. If you don't have ramps available where you live or you want to make chimichurri outside of ramp season, you can easily substitute scallions, diced red onion or even a few garlic scapes if they are in-season. Wild Ramp Chimichurri
Makes ~2 cups Ingredients: 4-6 ramps, chopped (or sub 1 cup chopped scallion or red onion) 1 bunch cilantro, chopped--about 2 cups) 1 bunch flat leaf parsley, chopped--about 2 cups 4 cloves garlic, diced 1/2-1 jalapeno pepper, diced (can use more pepper or try a hotter pepper if you like more spice) Zest and juice of 1 lime 2 Tbs red wine vinegar 1 Tbs dried oregano 2 tsp dried basil 1 1/2 tsp sea salt 1/2 tsp smoked paprika 1/4 tsp black pepper 1/2-3/4 cup olive oil Directions: 1. In a blender or food processor, pulse together all of the ingredients except for the olive oil, until the mixture has become roughly chopped. 2. With the blender running, drizzle in the olive oil until the mixture comes together into a smooth paste. If you want a thicker paste, use about 1/2 cup of olive oil, or increase this to 3/4 cup for a thinner sauce. 3. Taste and adjust seasoning as desired. Transfer to a jar and refrigerate until ready to use, where it will keep for 2 weeks in the fridge. Alternately, you can make a double batch and freeze extra to use later. |

Brine & Broth
I am a gut health-focused nutritionist and online health coach based in Southwest Wisconsin. My recipes and philosophies center around traditional, nutrient-dense foods that support robust gut health. Archives
May 2022
Categories |
 RSS Feed
