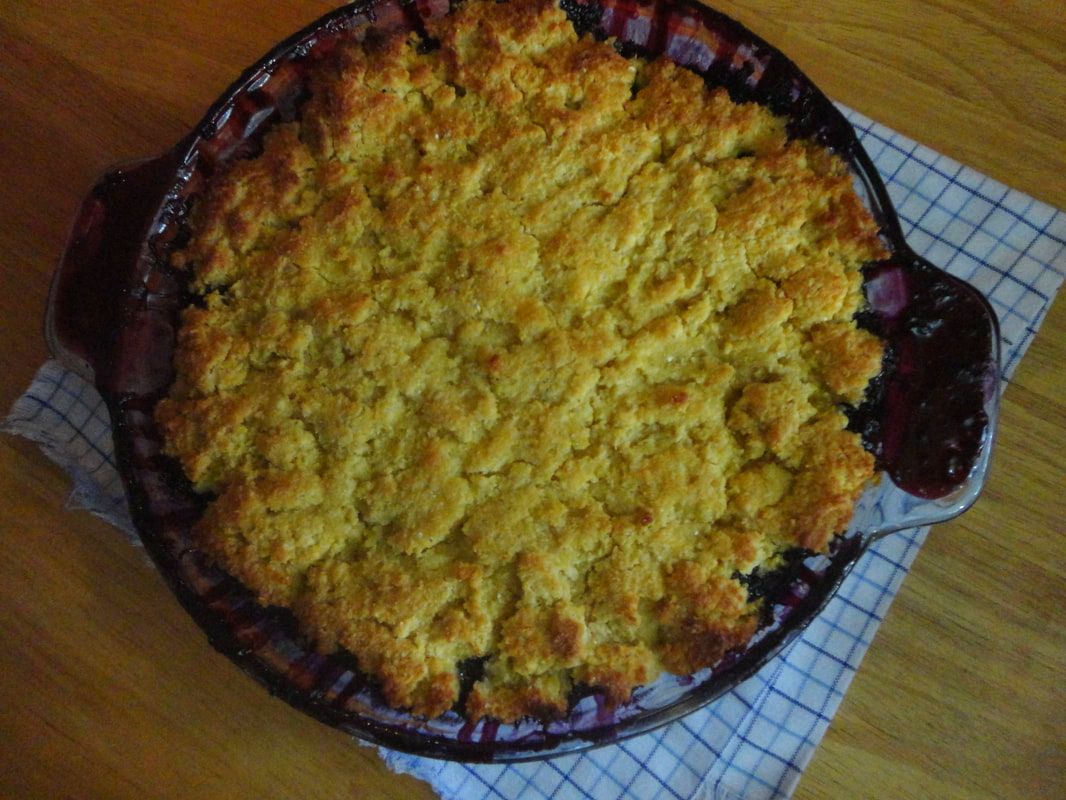
 One of the best parts of summer is being in the peak of berry season. I am a major fan of blueberries, obviously because of their deliciousness, but also because of their high vitamin and antioxidant levels. What better way to enjoy them than in a perfect cobbler, complimented by bright lemon and a cornmeal crust? Serving this warm topped with vanilla ice cream is a must. You will be so happy you did, and so grateful for the bounty of summer! 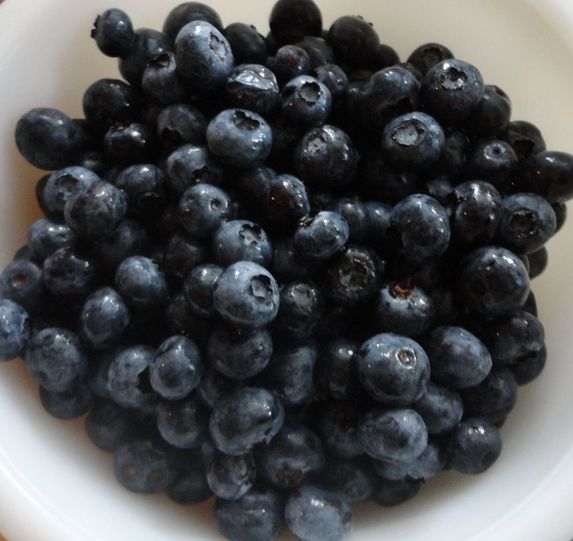 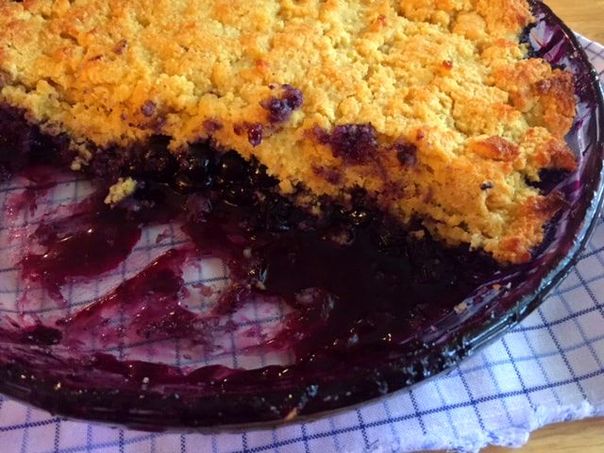 I got the blueberries for my cobbler at the Farmers Market this past weekend, but if you put some up in the freezer, you could make this any time of year. Just thaw your berries first and you will be good to go. I also made mine in a glass pie pan (9.5"), but you could use a square baking dish, or 1 1/2 times the recipe for a larger portion baked in a 9x13 casserole dish. Whatever you use, set your baking dish on a sheet pan when baking in the oven, as the berries will likely bubble up out of the pan, resulting in a lot of burnt sugary berry goo on the bottom of your oven. Not fun.  Lemon Blueberry Cobbler with Cornmeal Biscuit Crust
gluten free Makes 1 9" cobbler Blueberry Filling: 2 pints blueberries Zest and juice of 1 large lemon or 2 small lemons 4 tsp arrowroot powder 2/3 cup maple syrup or honey 1/4 tsp sea salt 1 tsp vanilla 1 Tbs butter Cobbler Topping: 1 1/2 cups almond flour 1 1/2 cups fine cornmeal 2 tsp baking powder 1/2 tsp sea salt Zest of 1 lemon 4 Tbs butter 1 Tbs maple syrup or honey 1 cup buttermilk Preheat oven to 350 F. Butter a 9-10" round or square baking dish. To make the blueberry filling: Combine the berries, lemon, arrowroot, maple syrup, salt and vanilla in a small bowl. Stir well to combine. Set aside while making the topping. To make the cobbler topping: Sift together the almond flour, cornmeal, baking powder and salt in a medium bowl. Stir well to combine. Cut in the butter, mixing with your fingers or a sturdy fork until the mixture becomes crumbly and all of the butter is incorporated. Add in the lemon, maple syrup and buttermilk, then stir until the mixture comes together into a shaggy dough. Pour the blueberry mixture into the pan and dot with small pieces of the butter. Cover the top of the berries with the cobbler topping, either in one layer or in more biscuit-like pieces, whichever you prefer. Bake for approximately 40 minutes, until the topping is slightly firm and becoming golden brown. Let cool at least 30 minutes to set before serving. Top with vanilla ice cream and enjoy!
1 Comment
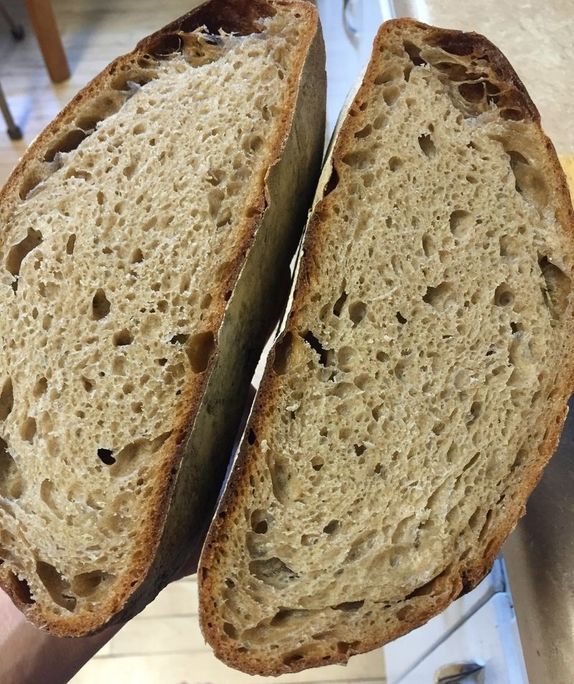 Making sourdough bread and trying to get really good at it has become a hobby and bit of an obsession over the past few years. Gaining skill and technique through a lot of practice is probably the most important piece, but being set up with the right tools is the place you have to start. I love baking because there is so little required other than the dough, but there are a few essential pieces I have found that make the bread-making experience not only easier but also produce better loaves. If you are looking to get into baking bread, especially sourdough, having these things on hand will totally change your bread game and help you bake like a pro...these and lots of practice! 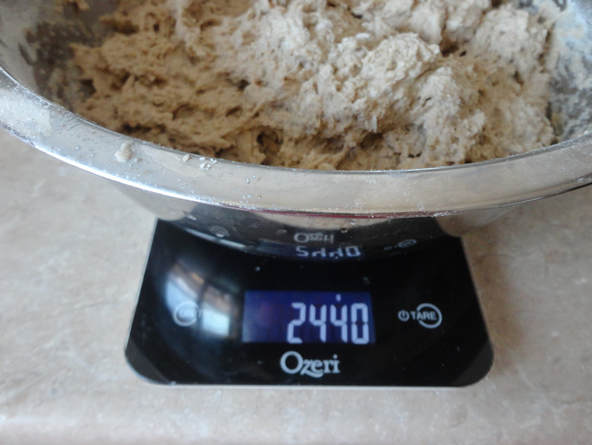 1. Kitchen Scale I have gotten the best bread results when measuring by weight, not volume. Having a kitchen scale is useful for so many things, but I think my favorite use it for baking bread. Going by weight allows the recipe to remain the same, even when you change the kind of flour used, as some more whole grains are heavier than white flour, and overall the consistency is better. All of the recipes and guides for bread I've found use weight, so that's the method I have used the most, and I don't think I'll ever go back! 2. Mixing bowls or plastic food service containers If you are just starting out making bread, mixing your dough in clear plastic containers, like a Cambro, can be really helpful. Since the goal is to manage fermentation for a proper rise, being able to see the dough in action is extremely useful for gauging when the dough is ready, and they are usually marked for volume so you can see how much it has risen. If you have been baking a while and feel like you have a handle on when dough is proofed enough, then stainless steel or glass bowls work great for mixing and proofing dough. 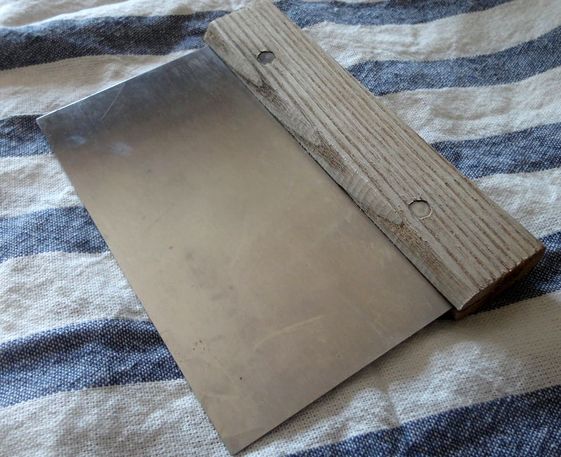 3. Bench Scraper and Dough Scraper Whether you are dividing your dough into loaves or scraping bits of dough and flour off of your counter, having a bench scraper (aka bench knife) around is extremely handy for making bread. It makes clean up easier, and you are able to flip, turn and handle your dough without touching it too much, leaving in lots of the air you built up in fermentation. I like mine that is stainless steel with a wooden handle, but there are all-metal or even rubber-handled varieties out there to suit your taste. 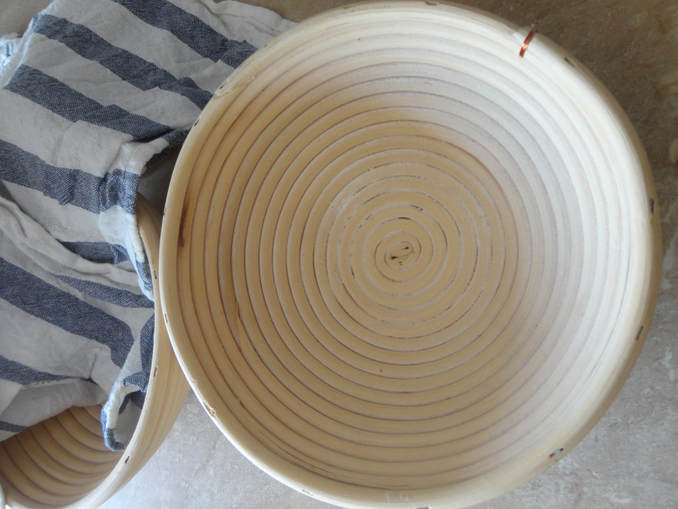 4. Brotform Also known as a banneton or proofing basket, a brotform is used during the second stage of fermentation to give your bread shape as it rises. You line them with a cloth, so the dough comes out easily, and it keeps the shape of the basket you are using. I usually make boules, or round loaves, when I bake bread, but there are longer, rectangular baskets for making different shapes of loaves like batards. 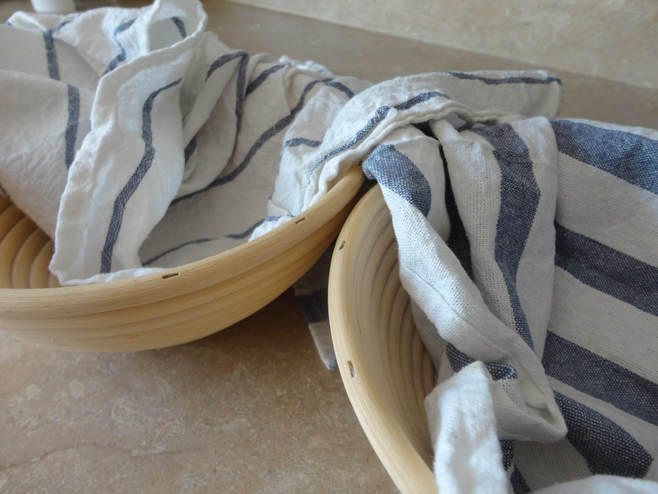 5. Linen, flax or cotton cloth (clouche) Used to line your proofing baskets, cloths that are made from natural fibers and are easy to clean are perfect to keep your dough from sticking to the basket. They also help to prevent the dough from drying out when left to ferment, and to shape loaves that aren't risen in a basket, such as baguette. I use cotton tea towels, but you can buy cloth specially made for proofing bread, usually made of flax or linen, which is known as clouche. 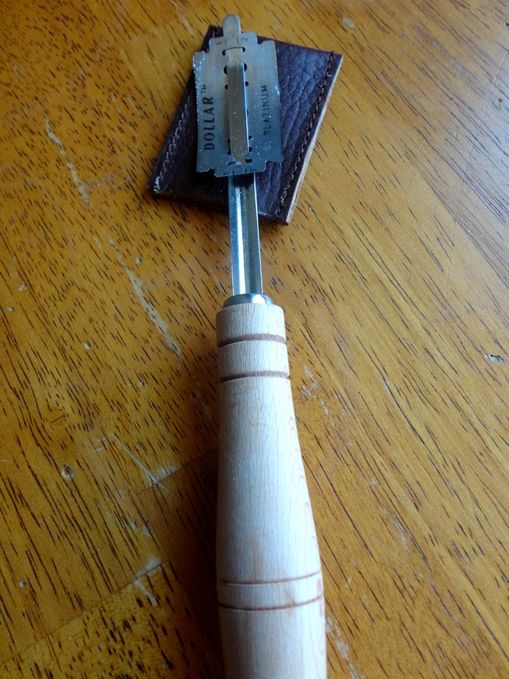 6. Bread Lame There are several tools that can be used to score bread, which is making slashes in the top to allow for a good rise in the oven. Some use single razor blades, or very sharp serrated knives. I, however, have found the best results when I use a bread lame. This is essentially a double-sided razor attached to a handle, giving you extra control when scoring the top of your loaves. I tend to be able to do more elaborate designs, and generally get deeper slashes, ensuring the best oven rise possible. 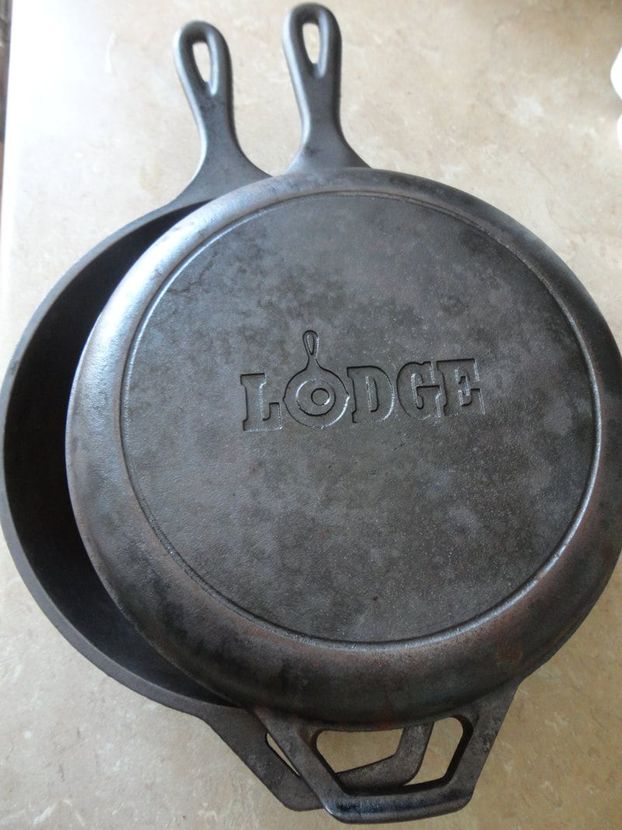 7. Dutch oven or "combo" cooker In a home oven, it can be hard to create steam to get that moist inside and golden, crisp crust that you would find in bread baked in a commercial bread oven. Since you likely don't have steam injection at home, you can duplicate the results in a dutch oven/combo cooker, which traps in steam during the first part of baking, then when you remove the top during the second baking stage, you can get a nice, chewy crust without drying out the loaf. You could 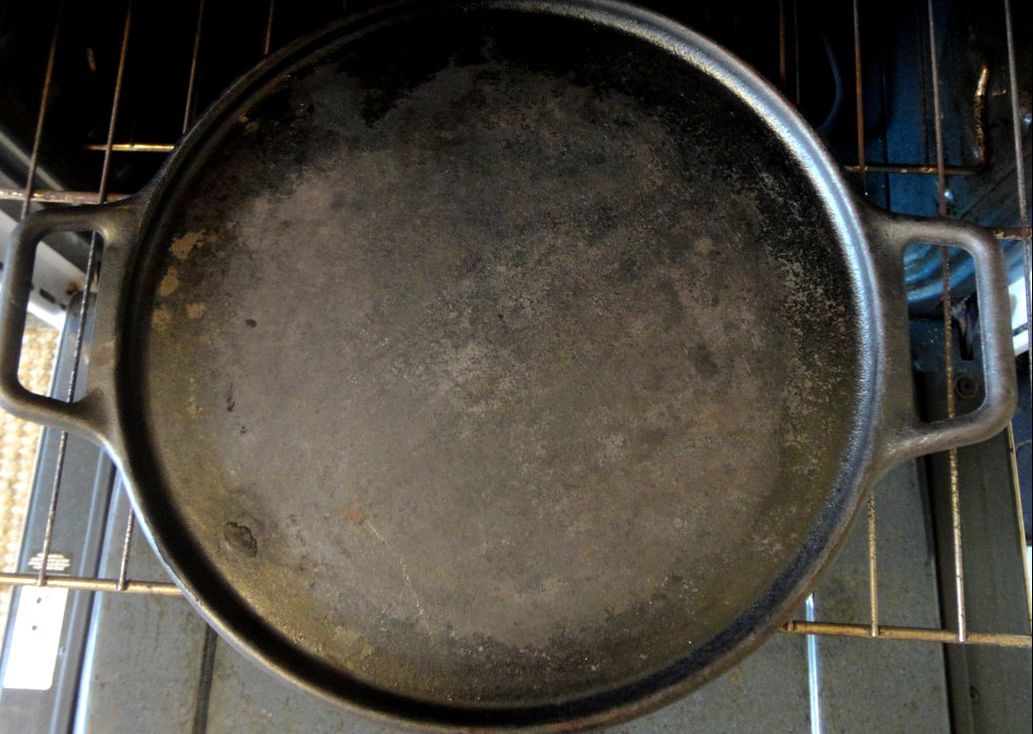 8. Baking Stone or Cast Iron Pizza Pan If you are wanting to make any kind of bread other than a standard boule or batard, then having a baking stone will be essential. This can be used for baking baguette, fougasse, or other fancy loaves, as well as sourdough pizza, which I almost always make on bread day. I use a cast iron pizza pan, but a baking stone works great, too. If you are making baguette or another crusty loaf, you will need to place a pan with water in the lower shelf of the oven when baking to create steam, since it is not a closed vessel. 9. Peel Since the best bakes happen when you put dough right onto a hot pan, using a peel is needed when baking with a stone or cast iron pan. This way, you can slide loaves of bread or pizza pies right onto the pan safely, and also take them out without having to remove the hot pan from the oven. There are beautiful wooden peels available, or you can use a stainless steel version. I tend to use a thin cookie sheet that doesn't have sides, which works pretty well if you are making pizza and don't have a fancy peel! Also, if you are making baguette, there are special wooden baguette boards you can get for handling and flipping those loaves so they keep their special shape. I haven't tried one yet, but I can't wait to do it. 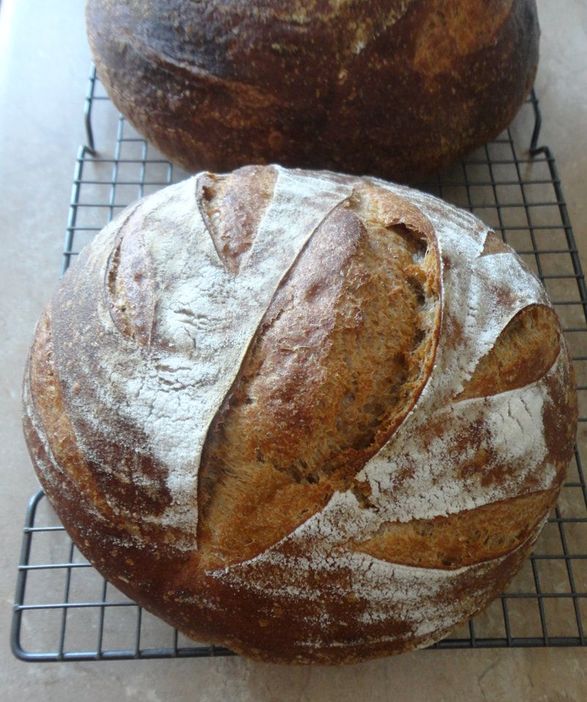 10. Cooling Racks Bread that is properly cooled stays fresh for longer...but I know it is so tempting to tear into a warm loaf of sourdough bread! If you can possibly wait, cooling on a cooling rack is the best way to make sure your bread comes to room temperature without getting soggy on the bottom, like it would if you just rested it on the counter or a tea towel. These are cheap and easy and totally worth it. Other helpful tools, but not totally essential... 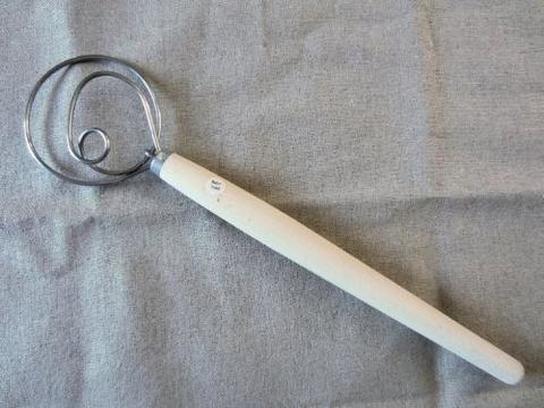 Dough Whisk Great because they look super cool, and they are really helpful for mixing your dough together, dough whisks (the one pictured above is from the Brotform.com website, since I don't currently have one...) are a pretty nice tool to have in your bread-making kit. Also called a brodpisker, the Danish dough whisk is perfect for getting your dough really well mixed in the beginning stages of the bread, ensuring everything is well-incorporated and even, better than just a wooden spoon. Or if that isn't enough of a mixing tool, you could go with the stand mixer... Stand Mixer with Dough Hook
I might be old fashioned, but I really like to mix my dough by hand. That being said, you may find it helpful when mixing your dough together to use a stand mixer with a dough hook attachment. This is especially true for enriched dough, like when making sourdough brioche or cinnamon rolls, when you would wnat to do a lot of mixing to incorporate the butter and other ingredients. This will make things easier, but I odon't have one, and unless you |

Brine & Broth
I am a gut health-focused nutritionist and online health coach based in Southwest Wisconsin. My recipes and philosophies center around traditional, nutrient-dense foods that support robust gut health. Archives
May 2022
Categories |
 RSS Feed
