|
Now that warmer weather is here, I am all about quick meals that don't take a lot of cook time. One of my favorite quick proteins for this season is the "anything + mayonnaise = salad" meal. Chicken salad using leftover rotisserie chicken, egg salad, or tuna salad can make a lunch or dinner come together pretty quickly, as long as you have the main ingredient: good quality mayo. Homemade mayonnaise is so far superior to store bought mayonnaise, no contest. When it comes to things you should *always* make at home, mayo is on the top of the list. It is easy to make and you can ensure the quality of ingredients when you do it yourself, as most at the store are made with processed oils. This includes organic and "natural" brands, as even most organic mayos are made with highly refined oils. Canola oil, safflower, and refined sunflower oil are the most commonly-used oils in commercial mayonnaise because they are cheap and shelf-stable. Most companies, even the natural ones, are not trying to make the healthiest product, but the one that makes them the most money, so homemade is they way to go when oils are involved. Refined seed oils are high in omega 6 fatty acids, and promote inflammation. When you make your own, you can choose anti-inflammatory oils like avocado, olive, and coconut. It is really disappointing to see brands labeled "olive oil mayonnaise," but still contain large amounts of canola or other oils, but are using olive oil for marketing purposes. Don't be fooled and always read labels, folks! Of course, there are companies like Primal Kitchen, Chosen Foods and Sir Kensington's that are making avocado oil mayonnaise, which is a big step up from the canola-based versions. Though made with pasteurized eggs (which some may need or prefer) and not all organic, these are great options for when you just don't have the time to make your own, which I'm sure will happen from time to time. If you can't find these brands near you or just like to DIY, then try this recipe...you won't regret it. Besides more healthful oils, I like homemade mayo because I can incorporate raw eggs yolks. The raw egg yolks are the emulsifier, helping to combine the oil with the lemon juice and vinegar and create a creamy, smooth texture. Raw egg yolks are rich in vitamins A and E, as well as choline, and eating them raw gives you their full nutrition potential. If you are pregnant, elderly or have a poor immune system, you may do better with cooked yolks instead, however. In addition to egg yolks, this also contains fresh lemon juice and two kinds of unrefined oils: olive oil and avocado oil. The avocado oil has a mild flavor, so it keeps the mayo tasting less strongly of olive oil. You could make it with all one oil if you have a preference, but I like the combination a lot. Olive oil is best when not heated, to protect its nutritional integrity, so this mayo is a great way to get it in your diet. Plus, I love the flavor of good quality olive oil to make the mayo really stand out. Besides chicken and other mayo-based salads, this is also great on a BLT or your favorite sandwich, as a dipper for sweet potato fries, on roasted veggies, or used to make creamy homemade dressing. This recipe uses an immersion, or "hand" blender, as that is what I prefer to use at home. However, you can use a regular blender or food processor with and "s" blade if that's what you have. Just drizzle the oil slowly into the hole in the lid of the blender or food processor instead of directly into the jar.
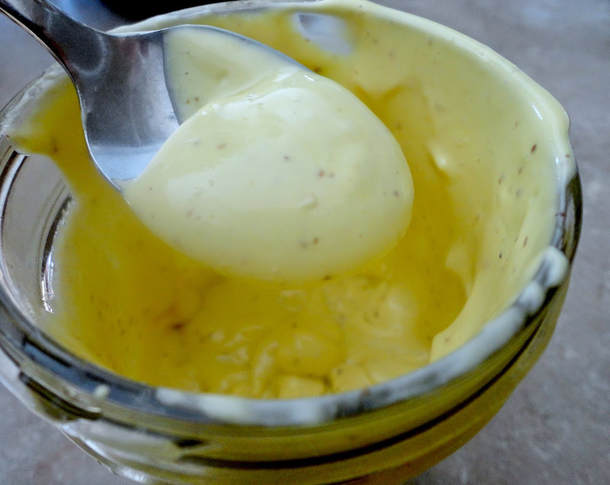
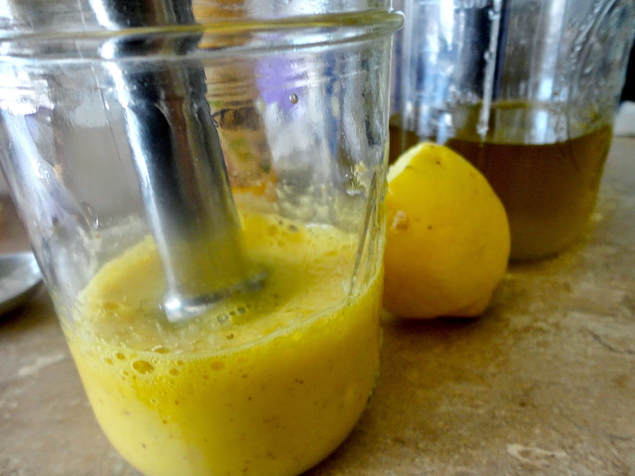
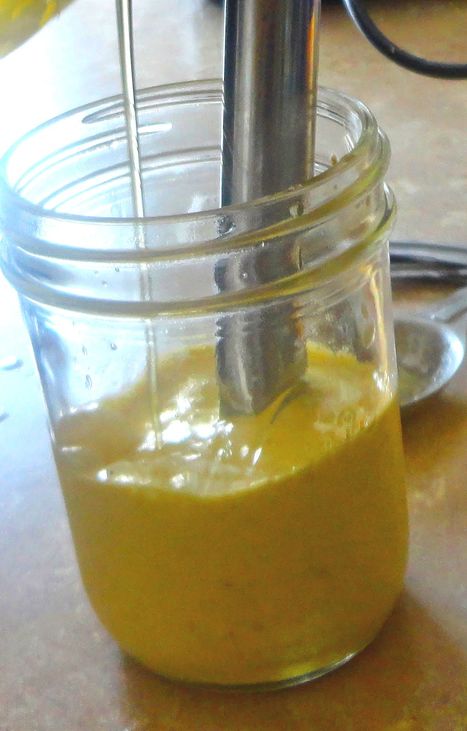
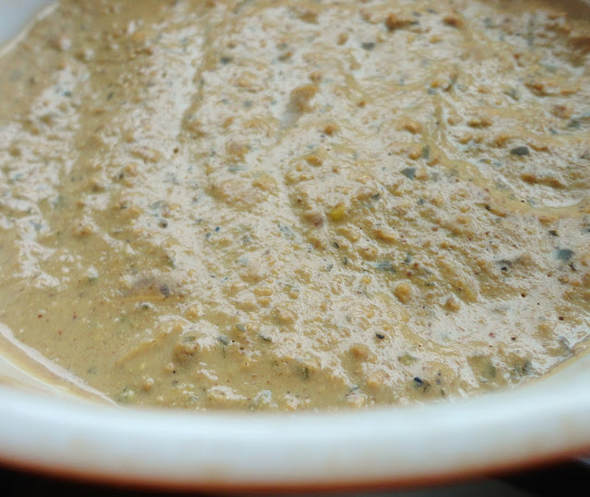
Homemade Mayonnaise with Olive and Avocado Oils Makes 1 Pint 2 pastured egg yolks, room temperature 1 clove garlic, chopped 2 Tbs lemon juice 2 Tbs apple cider or white wine vinegar 2 tsp dijon or stoneground mustard 1 Tbs raw honey 3/4 tsp sea salt 3/4 cup extra virgin olive oil 3/4 cup avocado oil Optional add ins: your favorite herbs or seasonings like rosemary, thyme, green chiles, or scallions In a wide-mouth glass jar, add the egg yolks. Using a fork or whisk, lightly whip the egg yolks until they are foamy. Add the garlic, lemon, vinegar, honey, mustard, and salt. They honey really helps to cut the oiliness of the mayo and bring out a really nice flavor, but could be omitted if need be. Blend these ingredients together until well incorporated. Now comes the emulsion step, which is the most crucial. When pouring your oils into the liquid mixture, you must pour slowly and steadily, to allow the ingredients to combine and emulsify properly. When emulsified, the mayo will come out thick and creamy, with a very light color. If not properly emulsified, also known as "broken" in the culinary world, the mixture will appear chunky and almost curdled. This can be fixed, so don't panic if you are new to this, just use extra care to go slowly. Pour in the oils, one at a time, into the egg mixture, and keep the immersion blender running and in the jar as you pour. The mixture will start to thicken and get creamy. You want to pour with a very thin stream of the oil to make sure the correct consistency is reached. It is much easier, especially if you are a novice at this, to use a liquid measuring cup with a pour spout. This will help you maintain a nice, thin stream as you are pouring, as the slow pour with a thin stream really helps it emulsify well. Once it is creamy and lightly colored, it is good to go. You can season to taste at this point. Put a lid on your jar and refrigerate. This should keep for at least a week or two in the fridge, if it lasts that long from the hungry masses. Trouble shooting: If your mayo "breaks" and starts to look curdled, it can be remedied. Don't freak out. Add 1 more egg yolk to the mixture, along with 2 Tbs water. Blend that in and, just like when you were adding the oil the first time, keep blending that and add olive oil, 1 tsp at a time, into the broken mayo until it becomes emulsified and becomes light and creamy. Optional recipe twist: For a different flavor and fatty acid profile, you could swap one of these oils out for coconut oil. It will need to be liquid when you use it, so warm it to 75 degrees to get it ready to make mayo. At this time of year, it may already be liquid in your cupboard, so you are good to go.
0 Comments
Clear skin that has a natural glow is a pretty universal desire, across all genders and ages. It is a sign of wellness and vitality, so when our skin looks healthy, we look healthy feel good. Unfortunately, the ways to achieve skin that is free of breakouts, blemishes, redness and discoloration tend to be chemical-based. Creams, lotions, serums and cover-ups are pushed on us (usually women) that claim to help us look younger and healthier, but they are actually full of petroleum-based chemicals that often contain endocrine-disrupting ingredients and end up doing more harm than good to our skin. The real way to have better skin starts with healing from the inside out, rather than focusing solely on the outside itself. For this week's Friday 5, I am giving you five tips that involve getting good nutrition, balancing hormones, healing the gut and supporting with herbs, all in order to give you that glowing skin you've been looking for. 1. Balance HPA Axis & Thyroid Hormones Increased stress having a negative effect on your skin is an easy connection to make, since most of us find we have more breakouts when we and under increased stress. Not only does chronic stress throw your hormones out of whack, but it also increases inflammation, so it is a double whammy for bad skin. Keeping your stress level manageable, including mindfulness practices, meditation, plenty of time in nature, adequate sleep and appropriate exercise are extremely important for keeping the hormones of the HPA (hypothalamic-pituitary-adrenal) axis in balance. Keeping stress in check also encourages balanced thyroid hormones, which can also cause acne and breakouts when out of balance. In addition to achieving balance through reduced stress, supporting these hormone-producing glands with nutrition is also necessary. Adaptogenic herbs like ashwagandha, eleuthero, and tulsi can help your body's ability to adapt to and cope with stress. Adequate vitamin C, B vitamins, vitamin A, and magnesium help support the adrenals, and iodine, selenium and vitamin D are needed to maintain healthy thyroid function. Keeping blood sugar in balance with regular meals that contain plenty of protein and fat help with hormone balance, as well as getting adequate carbohydrates--no low carb diets here. Other hormones that, when out of balance, could cause skin problems are estrogen, progesterone, and testosterone. Conditions like PCOS can cause acne on the face and body, so looking to the HPA axis and thyroid hormones is a good place to start to get the sex hormones in balance, as these directly affect them as well. Consulting a dietitian or healthcare practitioner may be called for with more complicated medical conditions such as PCOS or hypothyroidism, as you may want to get testing done to check hormone levels. 2. Heal Your Gut Prioritizing gut health shows up on just about any list that involves improving your health, whether it be allergies, mental health, inflammation, and even better skin. Inflammation in the digestive system and leaky gut can show up not only as digestive symptoms, but also in skin that is more prone to breakouts. These conditions can also come out as eczema and psoriasis as well, as they are auto-immune in nature. Taking steps to improve your gut health, along with getting the HPA axis in balance can dramatically improve eczema and psoriasis symptoms. To start working on your gut health, begin incorporating bone broth regularly, plenty of fermented foods and possibly probiotic supplements, and soluble fiber from vegetables, fruits, nuts, seeds, legumes and properly-prepared whole grains. Some even find topical probiotics to help acne, as your skin has a microbiome as well, not just your gut. Supporting digestive secretions (think stomach acid, bile and enzymes) and liver detoxification with bitter herbs and foods can also be super helpful for clearing up your skin. Think digestive bitters, radicchio, citrus peel, cocoa and any other bitter foods, as the bitter taste stimulates digestion throughout the system. And, what many forget and could be on every wellness list I could think of, be sure to drink adequate amounts of water! Opt for filtered water if at all possible.Y ou may need to take out foods that are causing extra inflammation, such as refined sugars and flours, fried foods and any foods that are processed. You may want to do this with a dietitian or naturopathic doctor in case you need testing for allergies, infections or to follow specific protocols. Eating when you are calm, in rest-and-digest mode, with an emphasis on plenty of chewing and eating slowly, are also important for promoting digestive health. Of course, that ties back in to stress management as well...all of these strategies tie in to the other. 3. Manage Micronutrients There are certain vitamins and minerals that are essential if you are looking to get your skin where your want it to be. These micronutrients play roles in detoxification, collagen production, hormone balance, reducing inflammation and acting as antioxidants. Getting adequate amounts of zinc, selenium, vitamin A, magnesium, vitamin C, sulfur, and vitamin E are all needed for clear, healthy skin. Zinc is one of the best minerals to ensure improved skin, which can be found in beef, lamb, bison, oysters and other shellfish and fish, liver, and pumpkin seeds. Selenium is a powerful antioxidant and is also needed for thyroid balance, which is found in Brazil nuts, almonds, and sardines. Vitamin A is also an antioxidant and is needed for hormone balance. It is fat-soluble and is found in liver, cod liver oil, grass-fed dairy and eggs. Vitamin C is another antioxidant, which also is needed for collagen synthesis. You can get vitamin C, along with other antioxidants and polyphenols, in citrus fruit, cabbage, potatoes, sweet potatoes, green leafy vegetables, bell peppers, and berries. Magnesium plays a role in detoxification and hormone balance, and it can be found in green leafy vegetables, nuts and seeds, and whole grains. Sulfur is also important for detoxification, as it is a precursor to the main antioxidant in the body, glutathione. It is found in eggs, onions, garlic and cruciferous vegetables like broccoli and kale. Vitamin E, another fat-soluble antioxidant and is found in olive oil, nuts and seeds and avocado. Keeping an eye on your micronutrient intake through a balanced, nutrient-dense diet will help keep your body's detoxification processes working well and inflammation low, both needed for clear skin. 4. Drink Your Broth and Get Your Collagen Collagen supplements are all the rage right now, but traditional diets have always emphasized foods that are rich in collagen. The skin, along with other connective tissues like tendons and ligaments, is rich in collagen. Eating foods that are rich in collagen, gelatin, and glycine all help to keep skin healthy and glowing, and may even reduce the signs of aging by keeping wrinkles at bay and skin more taught. These are found in bone broth and the skin and bones of animals, such as sardines, canned or skin-on salmon, chicken skin, and chicharrones. You can also take collagen supplements or make foods with powdered gelatin, like homemade jello, gummies or panna cotta. Glycine, an amino acid, is also needed for gut healing and detoxification, so getting plenty of this in the diet will help your skin in more than one way. 5. Eat Your Healthy Fats Not only do healthy fats make food taste good, but they are also needed for healthy skin. They promote skin elasticity and keep the skin supple, hydrating from the inside-out. They are also needed for proper nutrient absorption. Many of the micronutrients above are fat-soluble, so getting adequate fat is needed to absorb them well. Omega 3 fats reduce inflammation, which are found in fatty fish like salmon and sardines, shellfish, walnuts, flaxseeds, and pastured meat, eggs and dairy as well. Other fats to help the skin are monounsaturated fats, found in olive oil and avocado, healthy amounts of omega 6 fats to balance the omega 3s from nuts, seeds, some meats and eggs, and saturated fats from pastured meat, eggs and dairy. Don't shy away from good fats when you are looking to heal your skin. Balance that with limiting processed oils like canola, soy, vegetable, corn, cottonseed and hydrogenated oils, as well as fats from conventionally-raised animals and fried foods as much as possible. These are all strategies for starting to heal your skin from within, and they are all based around feeding yourself a balanced, nutrient-dense diet and staying well-hydrated. Stress and sleep also come into play as well. Of course, what you put on your skin is important, too. Sticking to organic and all-natural skin care products is essential in addition to these nutrition-based strategies. Find products that are not petroleum-based and don't contain artificial colors, fragrances or anything that might be irritating to the skin and interfere with hormone balance. These can be simple and homemade, like coconut oil as a moisturizer, or more spendy like those you find at a natural foods store. Be sure to get plenty of sunlight, avoiding too much sun exposure and sunburns. Good skin is all about self-care and giving your body what it need, both inside and out!
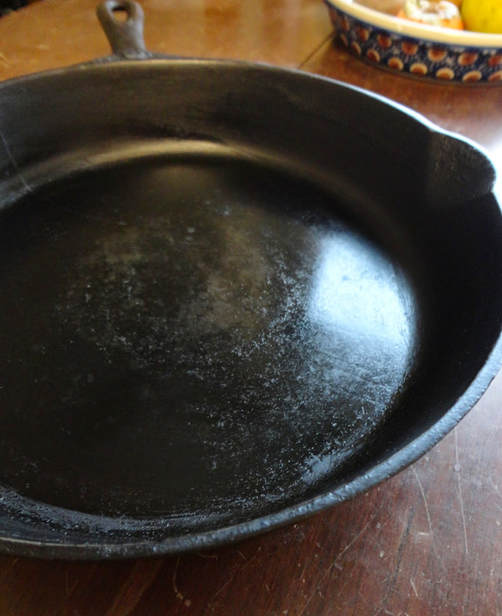
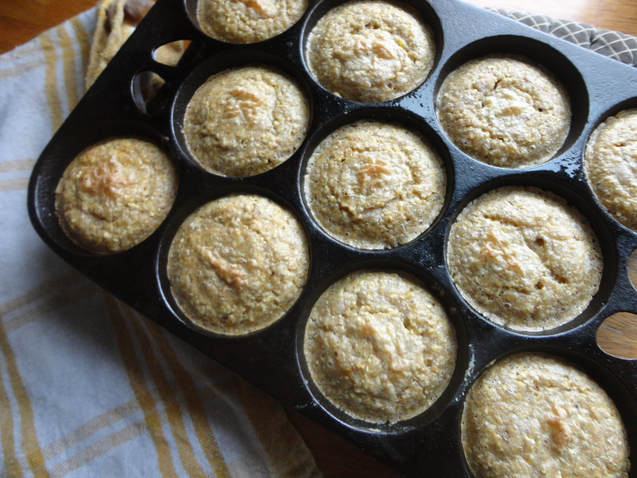
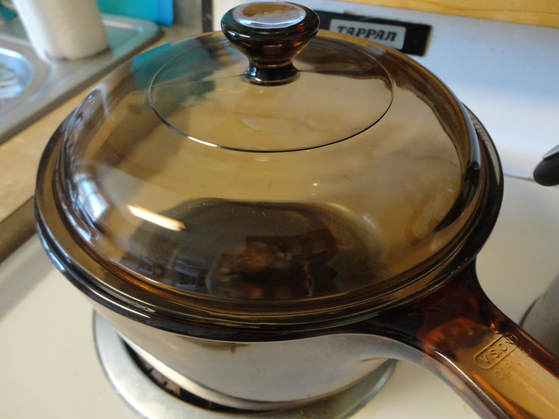
The importance of eating the right foods and its affect on health is becoming more and more clear. Unfortunately, if you are cooking that nutrient-dense, delicious food in the wrong cookware, you may still be falling short of reaching your health potential. How you cook and store your food can have an impact on your well-being, perhaps as much as the food itself. Many types of cookware, all products of modern technology, can actually be harmful. These products, such as non-stick coating, are not benign and unimportant, and should be avoided in a health-minded kitchen. I don't intend to create fear or perfectionism, but I do want bring attention to this issue, as you may have some items in your kitchen that need to be replaced to protect you and your family. Most of the cookware to avoid contains heavy metals that, when consumed over time, can build up to create a toxicity. It is well accepted that these metals have acute toxicity effects, but the chronic effects from small doses over a period of time is starting to become well-known. We have toxic heavy metals showing up all over our lives, from medicines and amalgam fillings to drinking water and food packaging, and even some jewelry. Chronic exposure to heavy metals, as well as other industrial chemicals in cookware, can lead to increased oxidation, leading to inflammation throughout the body. You may find your health actually begins to improve once you remove the sources of these heavy metals and other industrial products in your life. One obvious place to start is with cookware, as it is something you likely use every day. And, if you are working toward health goals but have hit a wall with improving your diet, changing how you cook your food may get you to the next step in wellness. First, we will start with which cookware to avoid. These are made from or are coated with substances that have been shown to be detrimental to health and you should try to find alternatives when possible. 1. Aluminum Cookware Avoiding aluminum in the kitchen is a good place to start, and especially applies to cookware used on the stove top. Aluminum is a cheap material and it is light to ship, so it is popular among people looking for low-cost cookware. Unfortunately, the aluminum, a heavy metal, is released from the pan once it is scratched or cooked with liquids, acids, or heat, and then it would be leached into the food. Cooking on the stove top may lead to more scratches than in bake ware. Scraping the aluminum, including aluminum foil, with a metal utensil is causes increased exposure. Cooking acidic foods in aluminum is also a source of leaching, so stove top use should be avoided if at all possible. Chronic aluminum exposure has been linked to Alzheimer's, dementia, Parkinson's disease and behavioral disorders, as well as issues with reproductive health. If you have aluminum bake ware and don't want to upgrade to a more expensive material, this is a little safer as you are not cooking acidic foods in it and usually they are dry instead of liquids. Until you can upgrade, be sure to only use wooden or other non-metal utensils when removing items from the pan to avoid scratching. This includes metal pie pans, foil, baking sheets and even some ice cream makers. Instead of an aluminum pie tin, go for glass or stainless instead. Same with baking dishes, cake pans, loaf pans and more. Pressure cookers are almost all aluminum, and while I don't think pressure cookers are a healthful way to cook your food in the first place, if you are going to use one please try to find an aluminum-free version. Stainless steel is the best alternative to aluminum if you are looking for metal cookware, and beeswax-based food wrap is a great alternative to aluminum foil. 2. Non-Stick Coating (Teflon) The desire to avoid Teflon, or non-stick, cookware is becoming more mainstream all the time and is no longer just an issue that health food store shoppers care about. A chemical used in making Teflon, called perfluorooctanoic acid (PFOA), has been linked to cancer, infertility, thyroid and heart problems. Some people even report feeling ill due to breathing the fumes that are put off by cooking in a Teflon (polytetrafuloroethylene) pan. Scratching the Teflon surface is especially harmful, as more of the PFOA chemical is released. If you have a non-stick pan that you are still using (until you go get a non-Teflon one!), be sure to not use metal utensils when cooking, as this can easily scratch the pan. Also, do not use it for long cooking times or under high heat, as this also releases more of the chemical and is therefore more likely to lead to health issues. I totally understand the desire to not have our food stick to the pan, but it isn't worth the health effects, and there are alternatives. I think non-stick became more popular when people started being afraid to cook with fats, which are what helps prevent food from sticking in the first place. The solution, then is to use more healthy fats for cooking, which will help prevent sticking. You can also opt for stainless steel or cast iron skillets instead, as well as stainless steel bake ware. If you can only find non-stick-coated bake ware, be sure to put a barrier between the surface and your food, such as Silpat (silicone baking sheets), parchment paper or cupcake liners. That same rule applies to aluminum bake ware as well, so adding a barrier with either material will help reduce health effects. 3. Plastic Though you are likely not doing much cooking with plastic because it melts easily, it does belong in this section, as many people are in the habit of putting plastic containers in their microwaves. This happens with foods storage containers, plates, plastic wrap, and even baby bottles. Of course, I don't advocate the use of microwaves at all, but heating plastic in them adds a whole new level of toxic load. Putting plastic containers in microwaves and heating them releases BPA and phalates into your food, which have been linked to estrogen imbalance and endocrine disruption as well as cancer. Limit plastics in your kitchen as much as you can, including plastic wrap (use beeswax food wrap instead!) and storage containers. Plastic lids for glass jars and storage containers, which don't have contact with the food, may be used on occasion, but anything that will have direct contact should be recycled. Plastics numbered 2, 4 and 5 are safer for storage, but should have limited use and should never be heated. And for goodness sake, get rid of the plastic water bottles and baby bottles. While it can be overwhelming to overhaul the cookware in your kitchen, it is worth it. Luckily, there are so many more healthful kinds of cookware available than there used to be, so it is easier and more affordable than ever to turn your kitchen into a healthier place. Here are the kinds of cookware to look for to keep the toxic load in your kitchen low: 1. Cast Iron This is my favorite type of cookware to use on the stove top. When seasoned properly, it becomes naturally non-stick and can be used for a variety of functions. Besides stove top use, you can also bake in cast iron pans or even use over a camp fire. You can get a variety of different kinds of pans made out of cast iron, such as skillets, dutch ovens, muffin pans, and my personal favorite, waffle irons. Cast iron waffle makers are far superior to non-stick coated ones, plus they look so much cooler! Cooking mildly acidic foods in a cast iron skillet can actually add iron to your food, so if you already have an excess of iron in your body, try to avoid cooking acidic foods in cast iron. I avoid cooking acidic foods like tomato sauce in cast iron because of this, as well as the slightly metallic taste it imparts. But for frying an egg or baking crusty sourdough bread, cast iron is my go-to. 2. Ceramic, Stoneware, and Clay For baking, stoneware is just great. It holds heat really nicely and is light enough that it doesn't cause your baked goods to get too dark. I have a stoneware loaf pan that makes fantastic sourdough loaves or even banana bread. Ceramic cookware can be used for stove top or oven purposes, but can get expensive. Corning Ware, though not manufactured anymore, can often be found online or in thrift stores and are great ceramic products to cook and bake with. Be sure to purchase ceramic cookware that uses a lead-free glaze, and do not cook with anything labeled "for decoration only" as it contains lead. This is also true of slow cookers, as many have lead in the glaze for the crock insert. Companies like Hamilton Beach make lead-free slow cookers, or use a Vita Clay slow cooker instead, that is made with a clay insert instead of ceramic. I love using my Vita Clay for slow cooking as well as making perfect rice every time. Le Creuset makes gorgeous, yet expensive, ceramic cookware like dutch ovens, as well as enamel-coated cast iron and steel pans. These types of cookware can be a great, more natural, choice for your kitchen, but be sure to do your research before buying expensive cookware so you know what you are actually getting. 3. Glass Glass is a great cookware material to use, especially if you know your way around a kitchen. I say this because the biggest problem with glass cookware is breakage, mostly from people "shocking" their pans. If the pan is hot from cooking and cold water is placed in it, it will likely shatter. If you are careful to avoid shocking or breaking by dropping it, you will likely have a great experience with glass cookware. It can be used both for stove top and baking purposes. I like glass for casserole and baking dishes, pie pans and more. This is another product to be sure is lead-free before buying. Though not being cooked in, I also recommend glass for food storage, blender jars, baby bottles, water bottles and anything that is usually made of plastic. Mason and other glass jars, Anchor, Pyrex and other companies make jars and containers for just about any occasion. 4. Metals: Stainless, Carbon Steel, Titanium A good-quality stainless steel skillet can be a great tool in the kitchen, as well as utensils such as measuring cups, knives and spatulas. I use stainless steel stock pots, sauce pans, and skillets (when not using cast iron) on the stove top, and for baking, stainless steel sheet pans and cake pans. Stainless steel gets a bit controversial, as quality has much to do with its healthfulness. Some cheaper stainless steel used can actually leach nickel into food, especially when something acidic is cooked in it. This can cause allergic reactions or toxicity problems in people, so choosing high quality stainless steel, such as series 316, decreases your chances of such problems. Carbon steel baking pans are a good alternative to their Teflon-coated counterparts for something more non-stick and cost effective. Titanium bake ware that is not non-stick can also a also good option, though I tend to go for quality stainless instead, but it is useful for kitchen utensils that are not used directly for cooking, such as food processor blades. 5. Wood
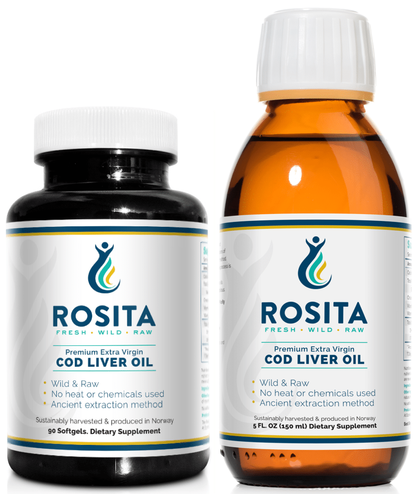
Obviously, you aren't going to be cooking with a lot of wooden pots, but I think wood can be a great material to have in your kitchen. The main cooking you would do involving wood would be bamboo steamer baskets, but you will find wood in other kitchen tools. Wooden cooking utensils are much preferred over any kind of metal in my opinion, and wood makes the best material for a butcher block or cutting board (although you can find some plastic cutting boards that are BPA and phthalate-free for cutting meat and such). You could go one step further and carve your own wooden spoons and other utensils to add a homemade element to your cookware collection. For more on heavy metal toxicity, including in cookware, check out the article Mad As A Hatter, by Dr. Kaayla Daniel, PhD and Dr. Galen Knight, PhD on the Weston Price Foundation website. Remember, what you choose is up to you and your family. It may seem like every option has its pros and cons, and there may be no one perfect type of cookware. Cost may be prohibitive in making changes in the kitchen, so start with what you can. Make whatever decisions are right for you and your family. Most of all, I urge you to be an informed consumer. Know what you are buying, where it is made, and what it's made of; then you can make responsible decisions that make you feel good and more healthful. Vitamin D is such a popular nutrient to focus on in the health world right now. Only in the last decade or two has it started getting the attention it deserves, though people have likely been becoming more deficient over time since the industrial revolution. Also known as the sunshine vitamin, because the majority of our vitamin D comes from the sun, people living in modern societies are severely lacking in this due to so much time spent indoors. We are inside creatures now more than ever, whether in school, at work, or for leisure and recreation, and we are paying the price with our health. We don't have to go outside to grow, hunt or forage our foods, build shelters (unless that is your specific occupation), or commune with others, so our time in the sun is minimal compared to our ancestors. Modern foods are also no longer supplying the vitamin D, as traditional diets once did. If we don't start getting outside and going back to ancestral diets, the epidemic of vitamin D deficiency in the Westernized world will only get worse, which will have many health implications. Because vitamin D acts as a hormone in the body, it has roles in signaling and controlling many functions, and there are vitamin D receptors on cells all over the body, including some gut bacteria. Maintaining a healthy vitamin D status is of vital importance, and its effects are far-reaching. The Many Roles of Vitamin D Mood and Mental Health In my work as a dietitian, one of the places I see the impact of vitamin D deficiency most is in mood and mental health. Though not the only cause, vitamin D deficiency is strongly linked to depression and it is needed to maintain normal mental functioning. One place this is commonly seen is in seasonal affective disorder. During the winter, when sunlight is nowhere to be found, rates of depression go up, largely due to the lack of vitamin D received from the sun. Overall mood is improved with adequate vitamin D status as well, and changes in mood or mental health can often be a sign of a vitamin D deficiency. Gut Health Adequate vitamin D status is needed for a healthy gut, as it maintains a healthy microbial population. Vitamin D deficiency can be involved in developing inflammatory bowel disease and other digestive issues, and scientists have found a connection between certain bacteria in the microbiome and vitamin D receptors. Some digestive issues may be caused or worsened by vitamin D deficiency, so if you are looking to heal the gut, getting your vitamin D status where it should be is a place to start. In the same vein, if your gut health is compromised, you may not be absorbing vitamin D from foods as you should be, so counting on the sun for your D until the gut is healed would be necessary. Thyroid Health and Hormone Balance Vitamin D itself acts like a hormone in the body, so it does play a role in maintaining hormone balance. This includes reproductive hormones in men and women, as well as the thyroid hormones. It is needed to convert inactive T4 to the active T3 form in the thyroid, so a vitamin D deficiency could severely inhibit normal thyroid functioning. If you are one of the many people who suffer from hypothyroidism, keeping an eye on your vitamin D will be important for you. The HPA (hypothalamic-pituitary-adrenal) axis, which maintains hormone balance among these three glands, regulates stress response in the body, and vitamin D is needed in keeping these in check. If you are under extra stress, either physical or mental, or experience sleep or energy issues, vitamin D will be a part of the healing process to get your energy back. Bones and Teeth Probably the most well known function of vitamin D is maintaining healthy bones and teeth. Vitamin D is needed for absorption of calcium, which can then be deposited into bone and teeth tissue. It also keeps the levels of calcium and phosphate balanced in the blood, preventing excess or deficient levels that can cause acute or chronic health problems. Lack of vitamin D can cause rickets in children or osteomalacia (soft bones) in adults, osteoporosis, and tetany. Excess amounts can cause soft tissue calcification and imbalances of calcium and phosphate in the body. In pregnancy, getting adequate vitamin D is crucial in forming healthy fetal bones. This is especially important in making a skull that can adequately grow to fit all of a child's teeth, which can prevent crowing and the need for braces in the future. Vitamin D is needed to prevent cavities, and those who are prone to dental decay and gum disease likely need to have their vitamin D status checked. Supplementing with vitamin D may be needed in healing cavities, or at least paying extra attention to get plenty of sun exposure and foods that are sources of vitamin D. Heart Health, Inflammation and Immune Function Vitamin D is needed to maintain healthy heart function, as it helps with calcium absorption and depositing it into bone instead of soft tissue. This can prevent calcification of the arteries, which is a major cause of heart disease. It also plays a role in preventing inflammation and promoting a healthy immune system, so those with autoimmune disorders or even who are prone to infections should watch their vitamin D intakes closely. Those with allergies or asthma may need to look at this as well, as these are both related to impaired immune functioning. How much Vitamin D is needed? The RDA for vitamin D is 600 IU for adult men and women, and 400 for children, which can be obtained through sunlight, food and supplements. The goal is to maintain serum vitamin D levels 25(OH) D between 30 and 40 ng/mL, as levels over 50-60 and below 30 ng/mL have been associated with negative health effects. When assessing vitamin D status, it is also important to look at intakes of calcium, phosphorus, vitamin A, and vitamin K2, as well as inflammation, gut health, and genetic factors that can interfere with vitamin D status. It can also be helpful to measure parathyroid hormone (PTH) status when getting your vitamin D checked, as it can be affected by vitamin D status as well. Getting adequate vitamin A and vitamin K2, other fat-soluble vitamins, are needed to absorb vitamin D properly and the three vitamins work together in the body to maintain balance of each other. Sources of Vitamin D Sunshine The best source for getting vitamin D is, of course, sunshine. That is nature's plan to ensure we get adequate vitamin D for optimal health. Daily sun exposure of just 15 minutes can improve and maintain your vitamin D status, so if you are worried about too much sun causing skin damage or burning, then you can limit your time in direct sun and still get some benefit. Remember with counting on sunlight as a vitamin D source that sunblock, even the natural kind, blocks vitamin D absorption when it blocks UV rays. Anything that blocks UV-B exposure, such as cloud cover, smog, or even tall buildings, can limit the amount of vitamin D available from the sun. You can also not absorb vitamin D through glass, so sitting in the sun indoors will not do the trick, as glass blocks UV rays. The UV is needed to convert sunlight to vitamin D in the liver, so blocking this with sunblock or even dark clothing, will not allow you to count on it for vitamin D. For some, getting adequate vitamin D is not always possible. During the winter months at more Northern latitudes, such as Wisconsin, there is just not enough sunlight to give us what we need, and we are also almost fully covered up due to it being so cold. If you live at a more Southern latitude, then this isn't such an issue in the winter. The closer you are to the equator, the more sun exposure and vitamin D you will be getting. Special consideration must also be given to people of color, who don't absorb as much vitamin D due do a darker skin tone, so these folks need to take extra precautions if they live more North during the winter months. This is also true for those whose religion or personal preference have them covering most or all of their skin, no matter what time of year. Women of Muslim or Amish faiths are at high risk for vitamin D deficiency, as their skin is almost never exposed to sunlight. Though I don't usually recommend supplementation, unless with real food-based "superfood" type supplements, vitamin D may be needed for some in these situations. During the winter months, you can supplement with 1/2 tsp extra virgin cod liver oil daily to add extra vitamin D. I do not recommend intake above this, as it is very concentrated. The vitamin A helps with absorption and acts as an antioxidant, which helps boost my immune system during the winter, along with the omega 3 and D it contains. Supplementation may also be wise for people of color during the winter in Northern climates or those who are fully covered all year round. Other than acute deficiencies and these particular populations, I believe most people can get adequate vitamin D from sunlight and foods. Food Sources
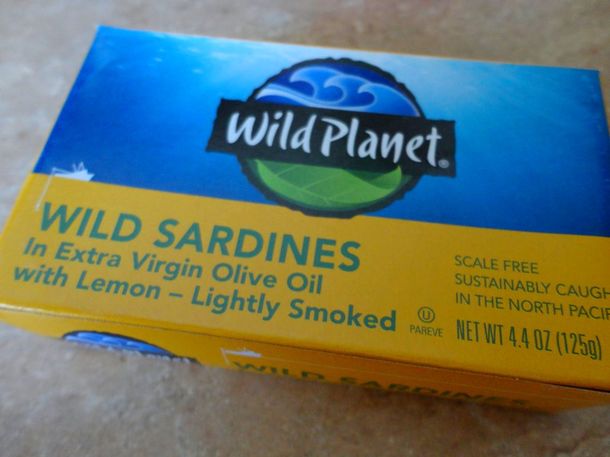
Vitamin D is fat-soluble, so it will always be found in foods that are higher in fat. The best sources are animal foods, as they contain mostly vitamin D3, the more bioavailable form of vitamin D. This is compared to vitamin D2, found in small amounts in mushrooms and some plants, but is much less absorbed in the body. Fatty fish with skin and bones, such as salmon and sardines, are great sources of vitamin D. Beef liver is also extremely high, followed by the livers of other animals like chickens and geese. Having fish 2-3 times per week and 2-3 oz of liver once a week, along with sun exposure, should be enough to maintain your vitamin D status. Again, supplementation may be needed in the winter if sunlight is limited and intake of these foods is low. Pastured egg yolks provide vitamin D as well, as does pastured pork, particularly the skin and fat (think chicharrones, bacon, and lard). Regular intake of these foods will help with your vitamin D status as well. Dairy that contains high levels of vitamin D is fortified to be this way, so I recommend not getting your vitamin D this way, as the fortification is done with synthetic vitamin D. Breakfast cereals and orange juice are often fortified with D as well, so look for this on labels. I generally recommend against fortified foods in general, as nature has provided us with foods (and the sun!) already that are sufficient sources of our nutrient needs. Now that spring is here, we can start to go outside and get the vitamin D we desperately need. I can definitely start to feel that it is time for some sun bathing, so I cannot wait! Make time in the sun a priority, and you will feel healthier and happier right away! Naturally-Carbonated Ginger Ale and Making A Ginger Bug Starter For Lacto-Fermented Homemade Sodas4/16/2018 Before force carbonation and industrial foods, sodas were naturally-carbonated using live, active cultures. Fermentation would naturally produce carbon dioxide, so the bubbles were not added but created through the process. This ginger ale is fermented using a ginger “bug” starter culture. This can be used to create any of your favorite sodas at home, such as root beer or fruit sodas, while adding the benefit of gut-healthy bacteria. Naturally-fermented ginger ale is a great digestive tonic and can be tweaked according to your fondness for spice. If you like really spicy, potent ginger ale, use more ginger, or use less for a milder flavor. Try adding other herbs and spices to create sodas that are delicious actually good for your family! This is the perfect replacement for conventional soda and it goes great in cocktails as a mixer, such as Moscow Mule or Horse Feathers! The starter for naturally-fermented sodas, known as a "ginger bug," is made similarly to a sourdough starter. By mixing small amounts of ginger, unrefined sugar, and water together daily, a culture starts to build. Because ginger is a root, it contains starches and sugars, along with lactic acid-producing bacteria that will begin to facilitate fermentation. The unrefined sugar will also help the fermentation along as well. Once your starter culture is active, it can be used to inoculate homemade sodas to produce natural carbonation through fermentation. You can also make your bug using half ginger and half fresh turmeric root for a different flavor along with the addition of turmeric's potent anti-inflammatory benefits. Ginger Bug Starter 2 Tbs grated ginger root 2 Tbs turbinado or other unrefined cane sugar 2 Tbs filtered water Mix the ginger, sugar, and water together in a small jar. Cover with a cloth and secure in place. Repeat this process everyday for about 5 days, discarding 1-2 Tbs bug before feeding. You will know your starter is active and ready to use when it has become slightly effervescent and it has a lightly fermented, tangy smell to it. Depending on the warmth of your kitchen, this may take a few extra days. When not using your ginger bug, you can store it in the fridge with a lid on it for about 2 weeks. If you will not be using it for longer than that, remove it from the fridge every few weeks and feed a couple of times (which will take 1-2 days). Return to fridge for storage until you are ready to use again. If it has been in storage for a while and you are ready to make soda again, feed it a few times before making your ginger ale so it is active and ready to ferment. Naturally-Fermented Ginger Ale
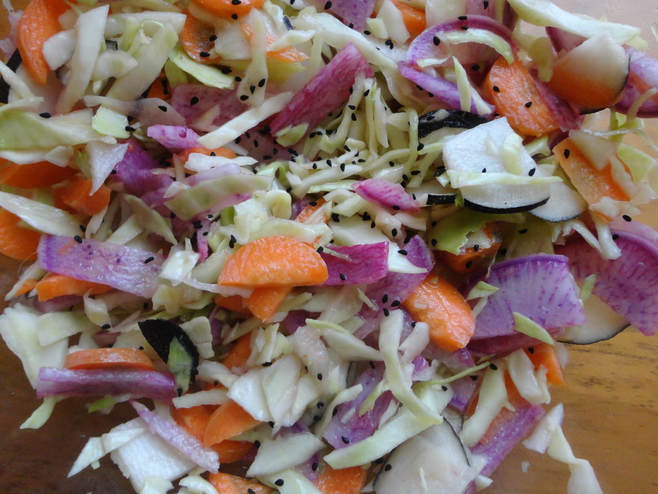
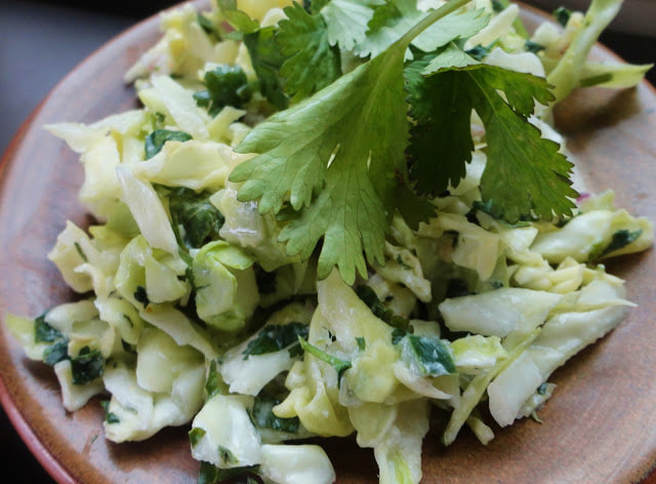
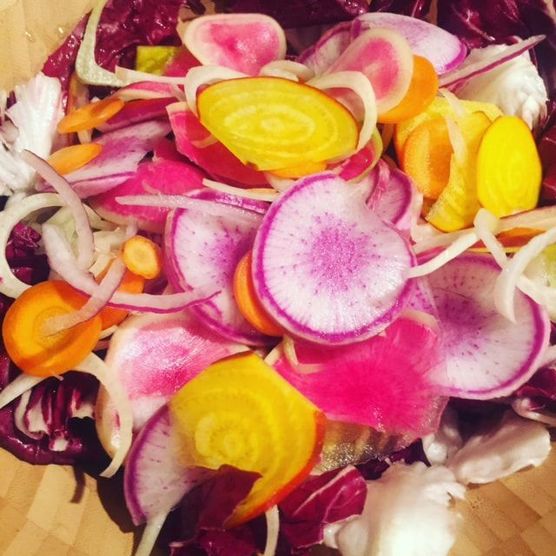
Makes 1 quart 1 quart filtered water 2-4" fresh ginger root, sliced (vary amount based on taste preference) 1/4 cup unrefined cane sugar 1/4 cup active ginger bug Optional additions Lavender-Lemon: 1 tsp dried lavender flowers, 2 Tbs lemon juice Cinnamon Spice: 1 cinnamon stick, 1 tsp allspice berries, 1/2 tsp cloves Bring water and ginger to a boil. If making cinnamon spice variation, add spices at this time as well. Cover and turn to low, and then let simmer for 15-20 minutes. Strain out the ginger and immediately stir in the sugar. Stir to dissolve completely. If making lavender-lemon variation, add lavender flowers and lemon juice at this time. Strain out ginger and other spices. Cool to room temperature and then add your starter liquid. Transfer to a glass jar and cover with a cloth. Let sit at room temperature for 2-3 days to ferment. Once the soda has become bubbly and fermented, transfer to a swing-top bottle. This will allow the soda to ferment under pressure, creating more carbonation. Let sit one more day at room temperature, then transfer to the fridge. If you don't have swing-top bottles, you can re-use kombucha bottles or place a lid on your glass jar to trap some of the carbonation instead. This will keep in the fridge for about 1 month. For root beer: Use your favorite combination of sassafras, sarsaparilla, licorice, cinnamon, star anise, and ginger for a true root beer. Make your soda using the same method, using the roots in addition to ginger for flavoring. Let steep for 10-12 minutes, then drain and add the sugar and 1⁄2 tsp vanilla extract. Use the ginger bug and ferment as listed above. For fruit or herb soda: Alternately, you could add ginger bug to fruit juice or herbal teas to make a naturally-fermented soda of almost any flavor you like. Add active starter culture to sweetened herbal tea or diluted fruit juice (50/50 juice/water works well)and let carbonate for a few days, using the same method as the ginger ale above. We all know we are supposed to eat our vegetables, so most of us turn to salads to add an easy veggie side dish to our meals. While a lettuce salad is all fine and good, sometimes you want to mix it up. This is especially true during the winter and early spring, when really fresh, flavorful lettuces can be hard to come by. During these times, I am also craving veggies sides that are a little more hearty and filling, involving some roots and brassicas. While you could always go with a potato salad (anything plus mayo equals salad where I'm from), one that is more veggie-based is often what you are looking for instead. Here are 5 different kinds of salads you could make to elevate your salad game and mix it up, going beyond romaine and ranch. 1. Cabbage Slaw Growing up in Missouri meant colelsaw was a staple side dish, and slaw is still one of my favorite kinds of salads to this day. Shredded cabbage combined with other fresh veggies and herbs is easy to throw together and it keeps really well, so you can make a big batch to eat throughout the week. Toss it with toasted sesame oil and rice vinegar for an Asian-Style Sesame Slaw, mix with cilantro, lime and sour cream for a version that goes great with tacos, or go classic with a mayonnaise-based dressing and plenty of shredded carrots. 2. Cucumber Salads Cucumbers are my least favorite vegetable, but it seems that everyone else loves them so I will include it here. When you can get fresh cucumbers, an easy salad is not far away. Toss thinly sliced cucumbers and onions in an olive oil and red wine vinegar dressing, or mix in with a creamy yogurt sauce for a Greek-style side dish. In the summer when tomatoes are at their peak, you could mix wedges of fresh heirloom tomatoes with your cucumbers and plenty of feta and lemon juice, or add day-old sourdough chunks for a nice panzanella salad. Bon Appetit has recipes for great smashed cucumber salads on their website, which are not only beautiful, but add a whole new salad-making technique to your repitoire. 3. Shaved Radish and Root Salads Thinly-sliced radishes and other roots are a trendy veggie side dish right now, and it seems obvious why: they are gorgeous. A mandolin makes this job easier, but be careful to watch your fingers. Shaved radishes, carrots, beets, turnips or any root you like can be tossed with some garlic, olive oil, white wine vinegar and herbs for a simple and delicious salad. Throw the mixture on a bed of radicchio and your side dish will steal the show. 4. Moroccan-Style Carrot Salad A bit slaw-like in nature, a Moroccan-Style Carrot Salad is super easy and tastes best when carrots are at their peak sweetness. Toss shredded carrots with olive oil, garlic, lemon juice and salt, then add in raisins and you are most of the way there. You could even jazz it up by adding some spices like cumin and cinnamon or Tahini-Yogurt Sauce if you want. Serve alongside some slow-roasted meats and homemade flatbreads, and dinner is complete. 5. Massaged Kale Salad
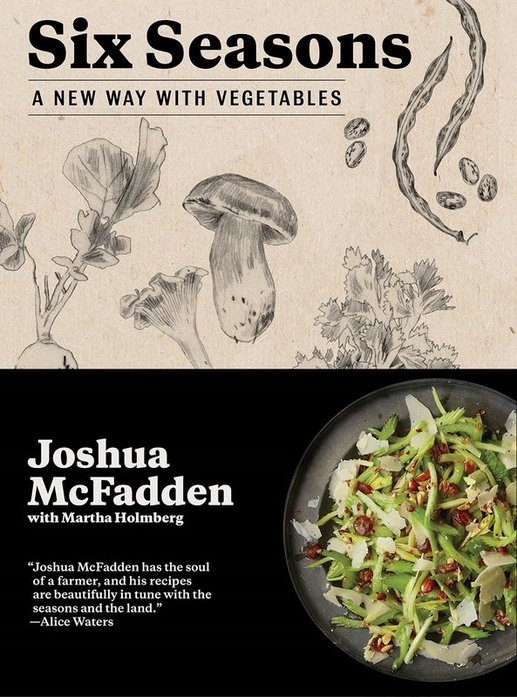
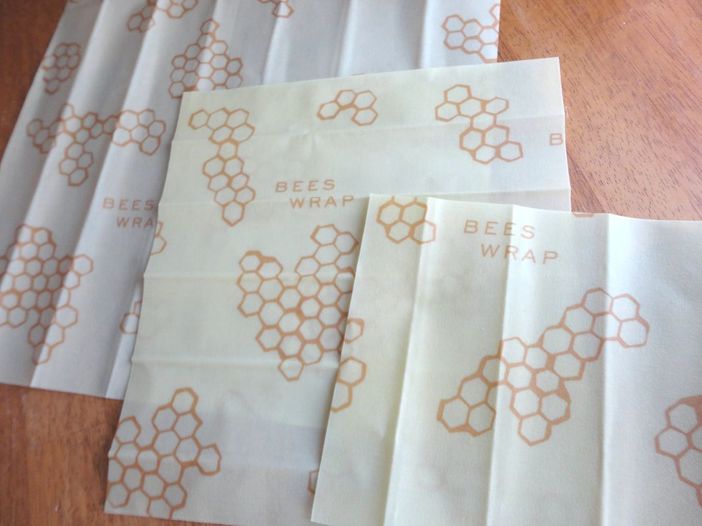
Kale salads do not need to be boring or indigestible. I usually opt to have my kale cooked, but when raw kale is massaged, it can make a fantastic salad. Rubbing olive oil and lemon juice, or other acid of your choice, in with finely-shredded kale leaves breaks down the kale a bit, making it more delicate in texture, along with bringing out more of its flavor. Add in some shredded parmesan, toasted nuts, raw garlic, or whatever else you like for a fiber-rich and tasty vegetable side that will silence kale haters. Joshua McFadden has a really nice recipe for a kale salad (called "The Kale Salad That Changed It All") in his book Six Seasons: A New Way With Vegetables that even uses toasted breadcrumbs, the smart man he is. For more lettuce-free salad inspiration, check out more in Six Seasons from Joshua McFadden, Plenty and Jerusalem by Yotam Ottolenghi, along with his recipes for winter salads on The Guardian website, and The Art of Simple Food (I and II) cookbooks by Alice Waters. These are all very smart people who know how to make great vegetables taste even better. For anyone looking to make their kitchen a healthier place, it is important to look beyond just the food that is being prepared. While organic, unprocessed food is one side of the healthy eating coin, the ways in which the food is cooked and stored are also key. You don't want to be storing your nutrient-dense food, which took time to source and prepare, in plastic or aluminum foil. Thus, an essential kitchen storage tool for me is beeswax food wrap, such as Bee's Wrap. Not only is it a more sustainable option because it is reusable, but it is also free from petrochemicals and heavy metals. Plastic wrap, found in almost every kitchen in the modernized world, is single use and can leach phthalates into your food. Phthalates are endocrine-disrupting chemicals found in plastics and personal care products, which can interfere with hormone balance. Keeping hormones regulated is an essential piece of the health puzzle for PCOS, thyroid disorders and HPA axis regulation. Eliminating any extra contributors to hormone imbalance is a good step toward improved disease prevention and overall health, but it is not easy. In the modern world, we are inundated with endocrine-disrupting chemicals on a daily basis, from pollution, plastics, pesticides, and personal care products, also known as the 4 P's from Ayla Withee, MS, RD of Boston Functional Nutrition and the podcast Real Food Radio. She did a great episode on the effects of these chemicals on fertility and pregnancy, as petrochemicals can create estrogen dominance , so avoiding these is especially important for reproductive health. Aluminum foil is also not a great storage option, as high levels of aluminum in the body can negatively affect the brain and central nervous system, as well as the reproductive system. I avoid this in my cookware as well as limiting the use of aluminum foil as much as possible. So if the options for food storage the we grew up using are off the table, then what do we use instead? A more ecologically-friendly and health-promoting option, naturally. Products like Bee's Wrap or Abeego (no, they aren't paying me to say this, I just want you to be healthy!) can be used to cover and store many foods instead. These are made from cotton that is dipped in a mixture of beeswax, jojoba oil, and tree resin. The beeswax keeps water out and moisture in, while providing anti-microbial properties and remaining breathable, which can help prevent mold. Jojoba is also anti-microbial, but it also gives the wrap some flexibility and more water-protecting quality. The resin helps to make the wraps slightly sticky, so that they hold their shape when covering something. I have tried to make my own version at home, but could not find tree resin to use, so they only worked moderately for food storage.
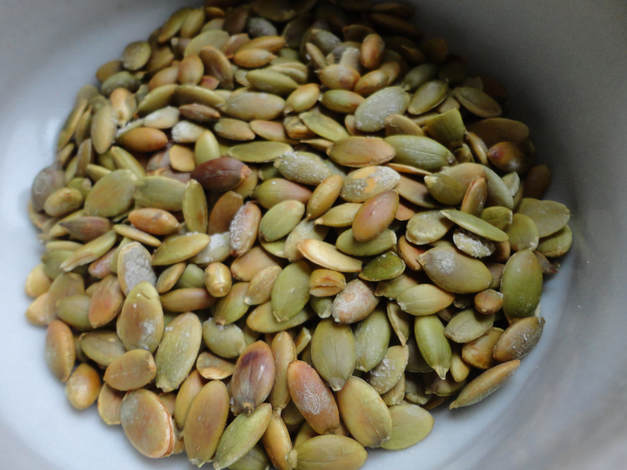
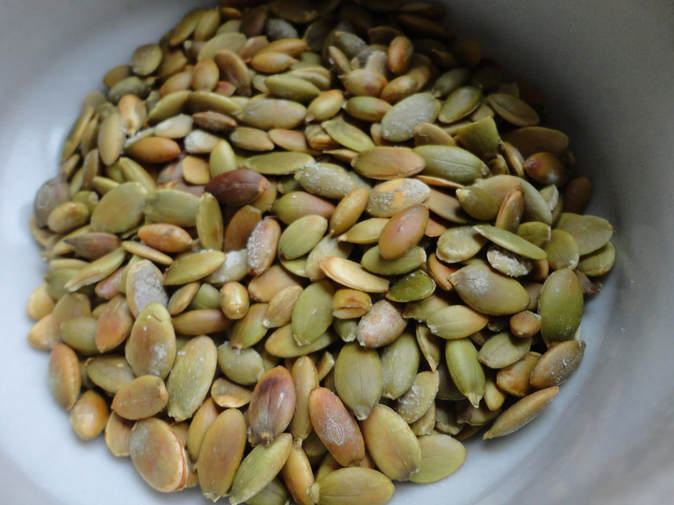
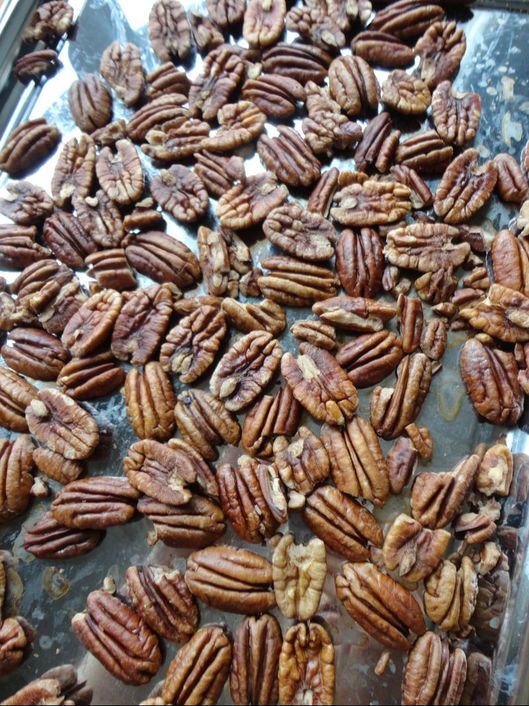
You can find cotton/beeswax-based food storage online or at health food stores. They come in a variety of sizes, from smaller pieces that are great for half a lemon or avocado, up to large sizes that are perfect for keeping your homemade sourdough fresh. Many brands also make sandwich versions that have a closure, making them perfect for school lunches. They can also be used to cover the top of a bowl of leftovers or pan of brownies to take to a potluck. To re-use them, simply wash with natural dish soap in cool water, dry and use again. The package says to replace after a few months, as they loose some of their ability to keep a good seal over time. These aren't the best option for meats or wet foods like soup, so I opt for a glass jar or food container in those cases instead. Of course, there will be the occasional use of aluminum foil in my kitchen, such as covering a casserole while it bakes to keep it moist, but I am careful to avoid contact with the food and then toss it instead of using it to store the leftovers. A zip-top bag has its place now and then, too, but the goal is reducing the amount of plastics, harmful metals and other chemicals in your kitchen, not being perfect. Having natural food wrap and glass food storage containers on hand is an easy way to reduce the toxic load in your kitchen, while also being more mindful about the environmental impact of single-use items, keeping yourself healthy in the short and long-term. Nuts and seeds can be a great way to add protein, healthy fats and minerals to your diet. Because of their prebiotic fiber content, they are also beneficial to the microbiome, helping with gut health and much more. While these little powerhouses are great sources of nutrients like zinc and magnesium, much of the minerals are bound in the nut due to their phytic acid content. Phytates bind minerals, preventing them from being absorbed, so reducing the amount of phytates is key for making nuts a nutrient-rich food. Along with phytates, nuts are also high in lectins, which can be irritating to the digestive tract and cause inflammation for many. Here is a previous post I did with more information on anti-nutrients, including lectins and phytic acid. The solution to getting the most nutrition possible out of nutrient-dense nuts, while preventing inflammation and GI distress, is to prepare them properly, which removes the majority of the phytic acid content. Soaking or sprouting nuts are the best ways to reduce the phytate content. Adding heat, such as toasting or putting into a stew, also reduces the amount of phytate present. While sprouting is a great option, soaking nuts in mildly acidic, salted water, and then toasting them, is the easiest way to make your nuts and seeds more healthful. Toasting the nuts also brings out more flavor and gives them a satisfying crunch, making them more delicious as well. After cooking, store these in the fridge for a quick and easy snack, or throw onto whole milk yogurt, on top of a salad, or add into a homemade trail mix. This will work with any nut or seed you like. My favorites are pumpkin seeds and pecans, but variety in your nut intake is the best strategy for getting as many different nutrients as possible. Once prepared, you can use these nuts to make your own nut butter or grain-free nut flour, such as almond flour, that has fewer anti-nutrients and promotes better digestion. Puree in a blender for a creamy nut butter, or pulse in a food processor to make a flour. Soaked and Toasted Nuts Makes 2 cups For soaking: 2 cups raw nuts or seeds (organic if possible) 1/2 tsp sea salt 1/2 Tbs apple cider vinegar For toasting: 1/4 tsp sea salt Optional seasonings: Black pepper, cinnamon, cumin, chili powder, rosemary, thyme, curry powder To Soak: In a medium bowl, cover nuts with cool water. Stir in the salt and vinegar. Cover with a lid or cloth and let soak for 12-24 hours. For cashews and smaller seeds like sesame or sunflower, I usually only soak for 12 hours, but I soak almonds, walnuts, pumpkin seeds, Brazil nuts or pecans for a whole day before cooking. To Toast: Drain the soaked nuts and rinse. Preheat oven to 350 F and let the nuts dry a bit while the over preheats.
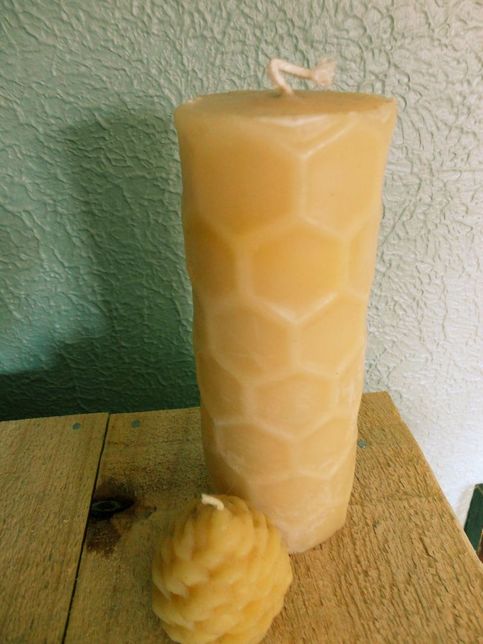
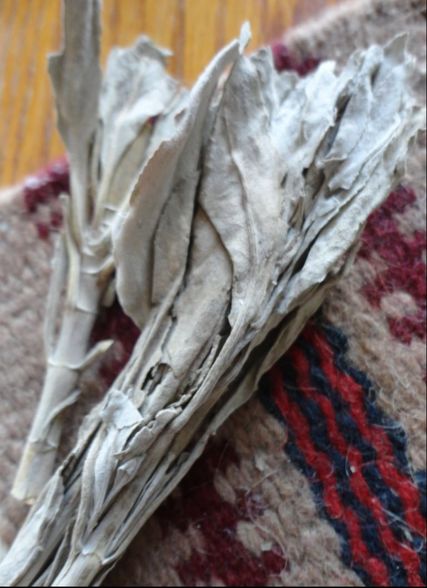
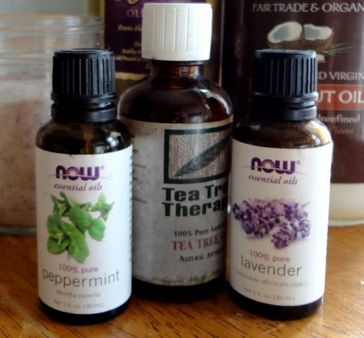
Toss with salt and other seasonings, if using. If you are going to serve them right away, or within a day or two, after toasting, you could add olive oil or coconut oil for more flavoring. If storing for eating over a few weeks, I usually omit any oil, as they have a longer shelf life and stay crisper. Spread in an even layer on a baking sheet. Bake for 15-30 minutes, depending on the size and type of nut or seed you are using. Stir halfway through to cook evenly. You will bake these until they have dried out completely and have just started to brown and become crispy. Once they start to brown, remove them from the oven and let cool on the baking sheet; they will continue cooking for a bit once you remove them, so be careful not to overcook or burn them in the oven. Once cool, transfer to an airtight container and store in the fridge or freezer. I store mine in a Mason jar in the fridge for a quick snack, but you could throw them in the freezer for longer-term storage. These will keep for several weeks under refrigeration, or a few months in the freezer. Most people think about spring cleaning as the time to de-clutter and clear out unwanted items from the home, but it is also time to clear out the house from stale, stagnant air from being closed up all winter long. A deep clean during this time is beneficial for getting rid of stuff and refreshing your home as well, getting your space and your body prepared for the renewal of spring. Clean air in the home can help improve the lives of those with allergies and asthma, as well as promoting a calmer, more peaceful setting. Pollution from outside and inside the home can come from many sources, including cars,and environmental pollutants, body care and cleaning products, dirty vents, and flame retardants on furniture, can be very problematic for people with compromised immune systems or other health problems. Your home has its own microbiome, so any product or chemical that compromises the balance of beneficial microbes in the air can have a negative effect on health. This is especially important for those who have health conditions and need to be as free from chemicals as possible. Forget about Febreeze and stinky scented candles that actually make the air less pure by putting toxins into the air. Anything with artificial fragrances will contain endocrine-disrupting chemicals like parabens, having the opposite effect that you are going for. Purifying the air in your home naturally, instead of with chemical cleaners and fragrances, will actually make you and your family healthier. For today's Friday Five, here are 5 natural ways to purify the air in your home or any space where you spend a lot of time. This will help you to breathe fresh, clean air and enjoy being in your home even more. 1. Himalayan Salt lamp: Himalayan salt lamps emit negative ions into the ambient space in the room. Negative ions are associated with improved health, better mood, and even protection from electromagnetic fields (EMF's) from computers and cell phones. The salt lamp attracts moisture (salt loves water), and the warmth of the lamp causes it to evaporate, emitting those negative ions. The use of salt lamps has been linked to improvement in symptoms of allergies and asthma as well. As a bonus, they are also very relaxing due to their warm glow. Their light is on the red/orange end of the light spectrum, as opposed to harsh fluorescent lights that emit blue light, which can be more calming and less disruptive to sleep. Here is a great article all about the science of the salt lamp for a more in-depth look at how it works. 2. House plants: Bringing the outdoors inside can have many health benefits, including air purification and improved mood. Plus, if you are re-potting your plants as they grow, you will get the benefits of earthing and a microbiome boost from having your hands in the soil. Here's a list of ten of the best house plants to use for purifying the air in your home, most of which can be found at any greenhouse or store that sells house plants. Indoor house plants help to balance the humidity in the air and purify it from toxins. Aloe vera, snake plant, and peace lilies are all known to help remove impurities in the air, making breathing easier and healthier in the home. Plus they bring a sense of peace and calm into the room as well. I am starting to see more indoor plants in public spaces, too, and this trend not only looks great and makes a space more tranquil, but the health benefits are becoming more mainstream, too. Try to have some in as many rooms as possible in your own home and give them away as awesome housewarming gifts to others. 3. Beeswax candles: Conventional candles are typically made with petroleum-based paraffin and hormone-disrupting fragrances, which put off toxins in the air. These fragrances and additives can trigger allergic reactions in sensitive individuals as well. Beeswax candles, on the other hand, actually work as air purifiers, having the opposite effect of their commercial counterpart. Beeswax candles can release negative ions, like a salt lamp, and can pull allergens and toxins out of the air, helping those with allergies and asthma. Beeswax naturally smells wonderful and is much better for the environment than soy or petroleum-based candles, benefiting the space even outside of your home. Much like the salt lamp, the glowing light emitted from candles is superior to artificial lights that fall on the blue end of the light spectrum, creating a calming effect. Check out this post from Empowered Sustenance for more information on why to only use beeswax candles in your space. 4. White Sage: Smudging your home with white sage is a helpful way to purify the air. The smoke from the burning sage clears the air and doubles as incense because of the wonderful natural fragrance. Traditionally used in Native American ceremonies for rituals of purification and cleansing, white sage is still used today for similar purposes. Be careful if you or someone in your home has asthma or allergies, however, as some can be sensitive to the smoke of the burning sage. Try a small amount if you think you or someone in your home may have a sensitivity before introducing it on a regular basis. 5. Essential Oils: Diffusing essential oils into the air is often thought of as a way to add pleasant fragrances without harsh chemicals. Though this is true, many essential oils also act as air purifiers as well. Made from the distillation of plant materials, these concentrated oils can be warmed in an oil warmer or diffused to be released into the air. This study showed that certain essential oils, including eucalyptus, tea tree, lavender and peppermint, can be beneficial in treating upper respiratory infections. They may also be useful for those will allergies and asthma as well. Be careful when using essential oils, as they are extremely concentrated, and consult a doctor before using if you have medical conditions or are sensitive to smells. In addition to using these natural solutions to purifying the air in your home, one of the best ways to clear the air is often overlooked: open your windows! Closed windows prevent natural air flow through the rooms that would naturally help to clean out toxins and allergens in the air. This can even be done during the fall and winter months by taking advantage of any sunny or even slightly warm days that you may have. During the warmer hours of the day, try to open at least one window to get the air moving. It is so ingrained in our culture to be closed up in our homes and use heating or cooling to regulate our temperatures inside, so we don't often let the windows stay open to let the sun and air do their natural job of purification. Don't be afraid to let in a little chilly air when it isn't warm outside, especially if it's clean air.
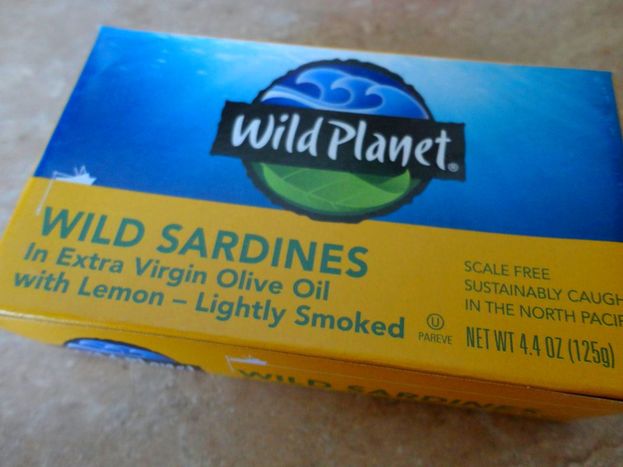
In addition, be sure to clean out the ventilation systems regularly in your home and make improvements needed to get cleaner, better air flow in the home when windows cannot be opened. As much as all of these suggestions can be used to purify and clean your air, you will still need to do regular cleaning of these systems as a preventative measure. Keeping pollutants out of your home in the first place is also important in keeping the toxic load inside your home low. Use low toxin paints, natural fabrics, organic cleaning products and body care products to prevent adding these toxins in the air. Decrease the frequency of new furniture and cosmetic remodeling in your home, as many of these things can produce off-gasses, which is a form of indoor pollution often overlooked, whic can very negatively affect your health. It is very important to get rid of carpet and stick to hardwood or tile, as carpet can not only off-gas, but can also trap dust, mites, mold, and all sorts of other allergens that can act as irritants. Regularly dust and sweep, clean ducts and get mold treated as soon as possible. Be sure to get a professional to remove lead pain or asbestos--don't try to do it yourself--to improve the air quality of your home. These natural air purifiers are wonderful, but you have to get rid of toxins in the home as well to truly improve your air and health. Of course, if you have serious allergies or asthma, adding air purifying machines or humidifiers/de-humidifiers may also be needed to maintain balance and healthy air for you, in addition to natural air purifying solutions. Retinol vs Beta-Carotene (or, why we need animal foods) Vitamin A is a powerful antioxidant and benefits the body in so many ways, yet it is not emphasized in the mainstream nutrition world. I did not come to find out how important it was until well after college, especially the real sources of vitamin A and the essential role of animal foods. It was not until I started researching traditional diets and real food nutrition that I started to learn the many roles of vitamin A and how to get it in an ancestral diet. When most people think of vitamin A, they think of carrots and vision. This is only a tiny piece of the puzzle, however. True vitamin A, also called retinol, is fat-soluble and comes from animal foods, not plants. There is a misconception around vitamin A, where it is believed that the best sources are carrots and other orange foods, but those are actually rich in beta carotene, a precursor to retinol. Plant foods contain carotenoids, which are great antioxidants, but must be converted into true vitamin A in the body to be fully utilized. This process requires adequate fat intake, so those on a low-fat vegan diet would likely be deficient. Average conversion of beta-carotene to retinol is around 2-28% (28% is on the very generous end), meaning those who consume all of their un-converted vitamin A from plants would have a very hard time meeting their vitamin A needs, and conversion could be even lower if someone is in poor health. Genetic variations and medical conditions such as cystic fibrosis and hypothyroidism can lead to poor conversion, with a large percentage of the population having almost no conversion capability. Having low amounts of vitamin D and zinc in the diet can also contribute to a vitamin A deficiency, even if you are eating plenty of vitamin A. To obtain the necessary amount of vitamin A , you will want to ensure you eat a diet rich in animal foods, along with adequate dietary fat for proper absorption and a lifestyle that includes plenty of outdoor time for vitamin D. The Role of Vitamin A Adequate vitamin A intake is so important because it has many essential functions in the body. It is well known as an antioxidant, so getting enough is necessary for protection from free radicals. This oxidative can come from pollution, plastics, stress, illness, and other environmental and dietary factors. The antioxidant activity of vitamin A can help prevent inflammation, disease and potentially cancer in the long-term. Besides an antioxidant, vitamin A also has a role in RNA synthesis and the digestion of protein. It is needed for the absorption of minerals, especially calcium and phosphorus, so a lack of vitamin A can lead to poor bone and dental health. People working on healing their cavities and re-mineralizing their teeth have to ensure they get enough vitamin A in their diets for this reason. This fat-soluble vitamin also plays a role in fertility and reproductive health. During pregnancy, vitamin A is part of the growth and development of the fetus, including cell differentiation and helping create a healthy skeletal structure. Weston A. Price, the dentist who studied indigenous tribes, noted that the diets of those who were not introduced to modernized foods had diets rich in vitamin A. Their offspring had mouths that had plenty of room for teeth, and incidences of cavities were low. These children did not have the need for corrective orthodontics or invasive dentistry because of their healthful diets, which would be helpful for many parents with children today, who very commonly need dental and orthodontic work. Recommended Intakes for Vitamin A The recommended daily intake for vitamin A (retinol) is 2300 IU for adult women and 2600 IU during pregnancy, 3000 IU for adult men, with the upper limit (UL) being 10,000 IU daily for both sexes (2000 IU for children). Deficiency symptoms include night blindness and other eye or vision problems, hyperkeratosis (small red bumps, usually on the upper arms and legs), and possibly poor immunity, allergies and infertility. Lack of vitamin A could not only be caused by insufficient dietary intake, but also poor absorption due to some prescription medications. Toxicity, usually caused by over-supplementation of retinol, can lead to bone and joint pain, osteoporosis, nausea, dizziness, organ damage or even death. It is important not to mega-dose with vitamin A supplements for this reason, and to only get the amount your body needs, along with balancing vitamin A intake with vitamins D and K2. Supplements that provide vitamin A in the form on beta-carotene are generally safer at higher doses, but this still is not necessary. I usually do not recommend synthetic vitamins unless a specific medical issue requires it, and I exercise extra caution when the supplement contains pre-formed vitamin A (retinol). Adequate intake can be obtained from the diet, if planned properly. Where To Get Vitamin A The best food sources of vitamin A, as I have stated, are from animals. Liver has the highest amount, with egg yolks, milk fat, seafood and bone marrow also being rich sources. During the winter, you could supplement with small doses, I use 1/2 tsp daily, of extra virgin cod liver oil to provide extra vitamin A and D, though this may not be necessary for everyone. Having approximately 3 ounces of liver once or twice a week, such as pate, braunschweiger, or liver and onions, is a good way to make sure you get enough true vitamin A in the diet. Sardines, fish eggs, and other fish or shellfish at least twice a week is also beneficial, as these provide vitamin D and calcium along with the vitamin A. Regularly consuming pastured egg yolks, butter, whole milk or other dairy products, bone marrow and broth will help to meet the rest of your needs, along with vitamin K2 and saturated fats for proper absorption. Carrots, bell peppers, sweet potatoes, dark greens and other colorful vegetables will contribute beta-carotene after conversion to offer some vitamin A as well. A diet that includes plenty of orange, yellow and green vegetables along with the animal foods will provide carotenoids, as well as fiber, vitamin C, and minerals. As with all nutrients, I encourage people to meet their vitamin A needs through food instead of supplementation whenever possible. By adding in some super foods like egg yolks and sardines on a regular basis, and properly planning a balanced diet that is rich in animal and plant foods, you can meet your needs and work toward optimal health. If you are set on eating a plant-based diet, please take extra care to eat foods high in beta-carotene, while getting lots of good fats and sunshine for vitamin D so that you can convert it as much as possible to retinol. Also, if you have a medical condition or take a prescription that may interfere with your vitamin A status, it may be beneficial to see a dietitian to help make sure you are getting your nutrient needs met.
|
Brine & Broth
I am a gut health-focused nutritionist and online health coach based in Southwest Wisconsin. My recipes and philosophies center around traditional, nutrient-dense foods that support robust gut health. Archives
May 2022
Categories |
















 RSS Feed
