|
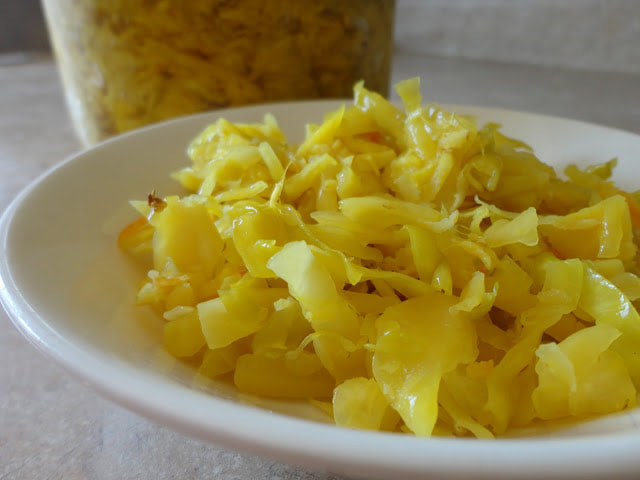
This is my new favorite sauerkraut recipe, because it is super flavorful and a beautiful golden color. It reminds me of sunshine, hence the name "sunnyside" kraut, which is perfect now that the sun is starting to come back. This is made with anti-inflammatory foods like ginger and turmeric, which also promote digestion. The beets are great for the liver and help with the methylation process in the body due to their betaine content. Foods like sauerkraut that are acidic and made with unrefined salt are important in helping your body to make proper stomach acid. This kraut is a great digestive promoter and immune supporter because of the probiotic content, which goes a long way in supporting a healthy microbiome. A little tart and sweet, it goes well with almost any food. I love mine on over-easy eggs at breakfast, but it is also great with sausages, fish, or on a salad. Sunnyside Sauerkraut
Makes 2 quarts 1 large head green or napa cabbage (about 3 pounds), shredded 2 large golden beets, grated (about 1 lb) 2" ginger root, grated 2" fresh turmeric root, grated (if you can't find fresh, use 1 tsp powdered) Zest and juice of 1 lemon 2-3 Tbs sea salt, or to taste In a large bowl, combine the cabbage, beets, ginger, turmeric, lemon and sea salt. Massage the salt into the veggies to soften them and begin to release their water. Taste for saltiness, and add if you like it a little saltier. Pack into glass jars or a fermenting crock, filling the container and packing it down with a wooden spoon. This removes air bubbles and lets you fit more cabbage in, as well as helping to push up the brine to cover the vegetables. Continue to fill and pack the container until all the veggie mixture is gone, or until the container is completely full, leaving an inch or so of room for brine. Press down with your hand until the brine covers the vegetables by about 1 inch. You can use a fermenting weight, such as "Pickle Pebbles" at this point if you want to ensure the brine stays above the kraut. Cover with a lid on your jar or cloth if using a crock. If using a jar with a lid, do not screw on too tightly. Unscrew and then return the lid every day or two to "burp" the kraut, as pressure from CO2 can build up from the bacteria and could cause the jar to break. This also lets you check the surface regularly for mold and to ensure the kraut stays below the brine. Let sit about 2 weeks, depending on the temperature of your kitchen and taste preference. Refrigerate after it is fermented to your liking. This should keep at least 1 year in cold storage.
1 Comment
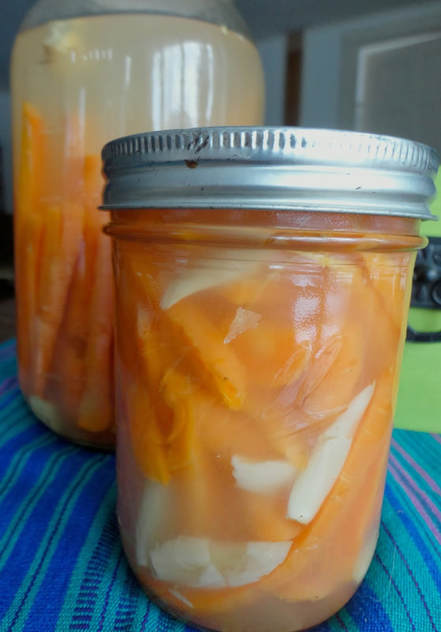
I am a big of fan of these Pickled Carrots with Garlic because they are so simple to make and are incredibly tasty. Be careful, though...they can come with some major garlic breath, which is totally worth it! These are nice to make in the winter time, when there are not many other local foods available. When I call these "pickled," I mean that they are lacto-fermented, so the pickling process happens through adding a starter and letting them ferment to develop their tangy flavor; no vinegar is used at all in making these. I will often demonstrate these when I am teaching Fermentation 101 classes, as they are easy to put together and are a great introduction into making your own lacto-fermented vegetables at home. These carrots are a perfect snack food, as they lend themselves to snacking as a nice junk food alternative. They also work well as a condiment or side dish to any meal, especially if you are trying to get more fermented food into your diet. I love that fermented foods can taste so good and be so beneficial for your digestive health! This recipe is so simple to make, and once it's all put together, you can just leave it to do its thing until it is ready. I use liquid whey to lacto-ferment these carrots, which I get by straining full-fat plain yogurt through a strainer lined with a tea towel. The liquid that drains through is whey (very different from whey protein powder, obviously), which is full of lactic acid producing bacteria, making it a great starter culture for a wide variety of vegetable ferments. I like to use whey when I am fermenting with a brine (as in this recipe), but not when I am making something like sauerkraut that makes its own juices. I find those don't need any extra starter added. If you are dairy-free, you can still make this recipe, just omit the whey and allow your carrots to ferment for a few extra days. You could also use other cultures to act as a starter for a dairy-free version, such as a splash of sauerkraut brine. If you aren't a garlic fan or just want to change it up, you can use ginger instead, described in the alternate recipe below. Those are great on a salad or inside some homemade sushi rolls! Pickled Carrots with Garlic
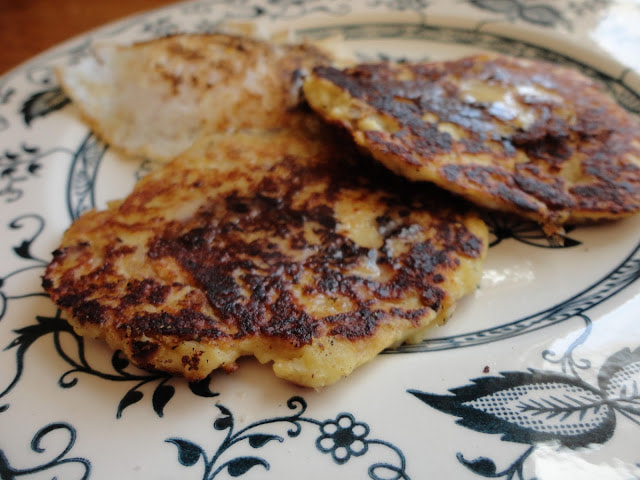
Makes ~2 quarts 1- 1 1/2 lb carrots, cut into sticks or coins 12 cloves garlic, crushed 1-2 Tbs sea salt, to taste 4 Tbs liquid whey (optional)--use liquid from strained yogurt as described above Filtered water Place carrots and garlic in a half gallon jar, or divide into 2 quart jars. I like to put the carrot sticks in the jar vertically so it looks nice and it also fits more in the jar. Add salt and whey or other starter culture. Fill jar with filtered water, leaving about 1-2” headspace. The carrots should all be submerged in the liquid. I like to place a glass fermenting weight (I use Pickle Pebbles) on top of the vegetables to ensure they stay submerged, which prevents mold and yeast from forming on the surface. Place a lid on jar (I typically use the plastic lids for Mason jars) and let sit about 1 week to ferment. Taste them at around day 3, and then gauge how "done" they are. If you like them as is, you can use them at day 3. If you go for a more tangy, fermented flavor, let sit a few more days up to a week or so. Burp the jar by opening the lid slightly, and screwing back on loosely, every few days to let out gas buildup and check for surface mold or yeast. Refrigerate when they are done fermenting. These will keep in the refrigerator for several months. Alternate Recipe: Pickled Ginger Carrots Substitute 3-4" fresh ginger, chopped, for the garlic. Follow the rest of the directions as written. The cold weather is making me crave something a little heartier for breakfast...something I can slather with butter. Enter these Potato Pancakes with Apples and Parsnips. These were born from leftover mashed potatoes, which always seem to be destined for future pancake form. The combination of the starchy potato with the sweetness of the apple and parsnip makes a great alternative to simple potato pancakes, and they are great at breakfast or any time of day. These would be great with just potatoes as well, but the extra flavors really take these over the top. Try these topped with maple syrup, smeared with apple butter or. But don't forget the butter, whatever you do. Of course, you can go more savory with these as well, topped with sour cream, or seven served alongside some tasty pastured meat and sauteed greens, maybe drizzled with a nice brown gravy. Either way, give these a try for an easy gluten-free side dish that everyone will love. Potato Pancakes with Apples and Parsnips Gluten/Grain-Free Makes ~18 pancakes For the mash: 1 lb russet or yukon gold potatoes, diced (I don't peel, but you totally can) 1 lb parsnips, diced 1 lb apples, diced 1 medium shallot, minced 4 Tbs butter 3/4 tsp salt, to taste 1/4 tsp nutmeg Combine the potatoes, apples, parsnips, and shallot in a medium sauce pan. Cover with water. Bring to a boil over medium high heat, then cover. Turn heat to medium and let simmer for about 30 minutes, until the roots and apples are tender. Drain through a colander and return to the pot. Add the butter, salt and nutmeg. Mash with a potato masher or wooden spoon, or if you like a smoother puree, blend in a food processor. I like mine chunky so I just do it by hand. Serve warm as a mash or let cool before using in pancakes (they are great to use the next day for this purpose). For the pancakes:
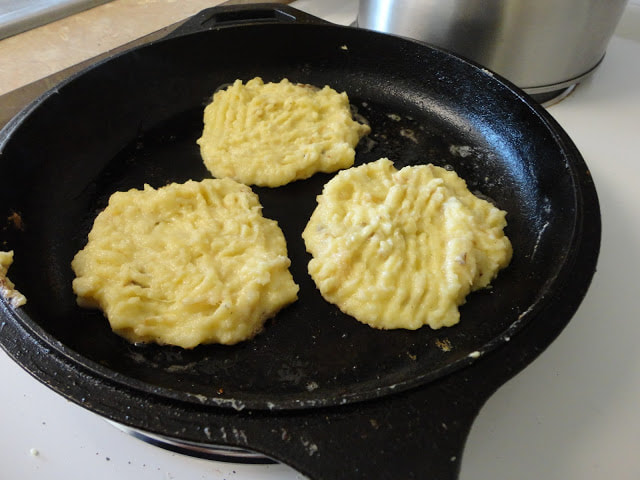
1 mashed potato recipe from above 3 eggs, beaten 1/3 cup almond flour 1/3 cup arrowroot flour 1/4 tsp salt Butter or other fat, such as bacon grease, for frying In a mixing bowl, combine the mash, eggs, flours and salt. Stir well to fully incorporate. Heat a skillet over medium heat and melt your butter or other cooking fat. Scoop 1/3 cup of your pancake mixture into the pan, and spread the batter to about 4" wide. You can fit about 3 or 4 in a large skillet. Let cook 5-8 minutes on the first side, until nicely browned and stable enough to flip. Flip the pancakes over and let cook 5-8 more minutes on the second side, until browned on the bottom and slightly firm. They will still be quite soft, but should have much less give to them. If they need a few extra minutes on a side, leave them on longer and just check for too much browning or sticking. Set aside while you repeat with the rest of the batter, keeping warm until ready to serve. |
Brine & Broth
I am a gut health-focused nutritionist and online health coach based in Southwest Wisconsin. My recipes and philosophies center around traditional, nutrient-dense foods that support robust gut health. Archives
May 2022
Categories |


 RSS Feed
