 Is chess pie "pretty?" No. Is it insanely good? Yes! To borrow from chef David Chang's term, I'll call this pie "ugly delicious," and highly recommend it to you next time you need (yes, need) to make a pie. We had a hankering for pie and, as shown in the previous post, an abundance of maple syrup that we were also itching to use in a dessert. Thus, chess pie was the dessert of choice. Chess pie, if you aren't familiar, is a traditional Southern dessert that is essentially a custard pie. This is the perfect pie to make when you are between seasons, as we are right now, when we are post-apples and winter squash and pre-rhubarb and strawberries. The custard in a chess pie is unique because it is made with buttermilk and has a bit of cornmeal in it to help thicken and set the custard. It is typically made with cane sugar, but maple syrup (or honey) works really well, too. My favorite part of chess pie is the golden, crispy crust that forms on top from the caramelized sugar, providing a richer, caramel flavor on top and a contrasting texture. I did a deep dive into different chess pie recipes, such as those from the Kitchn, Sean Brock and Christina Tosi's version she calls "crack pie," then played with the ratios to make the filling I liked best and adjusted everything as needed to use a liquid sweetener like maple syrup. For the crust, I used the all butter crust in Samin Nosrat's Salt, Fat, Acid, Heat, which I adore, but you could use any crust you like, including a lard-based crust or gluten free crust. Pie crust is basically my one baked good I don't try to sneak sourdough or sprouted flour into...the occasional regular pie crust (still with organic flour and a bit of whole spelt) is fine once in a while. For the gluten-free folks, you can sub gluten free all purpose flour, such as Bob's Red Mill, for the regular flour in the filling. You could also try using all cornmeal instead of a mixture of cornmeal and flour and see how that goes; in that case, I would add a bit of cornstarch to the mix to lighten it up. Unfortunately, we were pruning our apple tree while this pie baked, and I failed to hear the timer, so it got about ten minutes over-baked. That is just fine for the filling but the crust was over-done...we certainly still ate it without complaint, however. We just had ours extra crispy.   A few recipe notes: This recipe is for a deep dish pie pan; if you only have a regular pie pan, simply decrease the filling ingredients by 1/4. When making the custard, add the buttermilk as the very last ingredient and pour the custard immediately into the crust and bake right away; because the buttermilk is so acidic, it can cause the filling to curdle if mixed in too early. This is not a blind-baked crust, so go ahead and pour your filling into an unbaked crust and bake it from there. Once baked, which should take about an hour or the custard is just set (the Kitchn chess pie recipe says the custard will read 200 F when ready), let the pie rest at least an hour before slicing and serving. It is so good when still a little warm, right at that hour mark, but it is also amazing cold. Perhaps even better? I am a huge fan of cold pie, so I strongly suggest you try at least one slice cold, for me. Maple Buttermilk Chess Pie
Makes 1 9" Deep Dish Pie 1 Pie Crust, homemade or store-bought,chilled Filling: 1 cup pure maple syrup 1/2 cup granulated sugar, plus an extra tablespoon for sprinkling 6 eggs 6 Tbs butter, melted and cooled slightly 1 Tbs vanilla Optional: 1 tsp maple extract 4 Tbs flour 4 Tbs fine cornmeal 1/2 tsp sea salt, plus an extra pinch or two for sprinkling 1 cup buttermilk (or 1 cup whole milk + 1 1/2 tsp apple cider vinegar whisked together and let sit for 15 min) Preheat oven to 350 F. If making your own buttermilk, whisk together the milk and vinegar 15 minutes before beginning and set aside. Roll out your pie crust and fit into a deep dish pie pan. Refrigerate your crust while you make the custard. In a mixing bowl, whisk together the maple syrup, sugar, eggs, melted butter, vanilla, and maple extract (if using) until well combined. Sprinkle in the flour, cornmeal, and salt, stirring vigorously to remove any lumps. Set your pie pan on the counter. Whisk the buttermilk/milk+vinegar mix into the filling mixture and pour immediately into the crust. Put right into the oven. Bake for 30 minutes, then carefully sprinkle an extra tablespoon of sugar on top of the filling to create a crust. Bake another 20-30 minutes until the filling is set. It may slightly jiggle but should not be liquid at all. Remove from the oven and sprinkle the top with a pinch or two of good quality, flaky sea salt. Let cool for an hour before slicing and serving. Store leftovers in the fridge, where it will keep for 2-3 days.
0 Comments
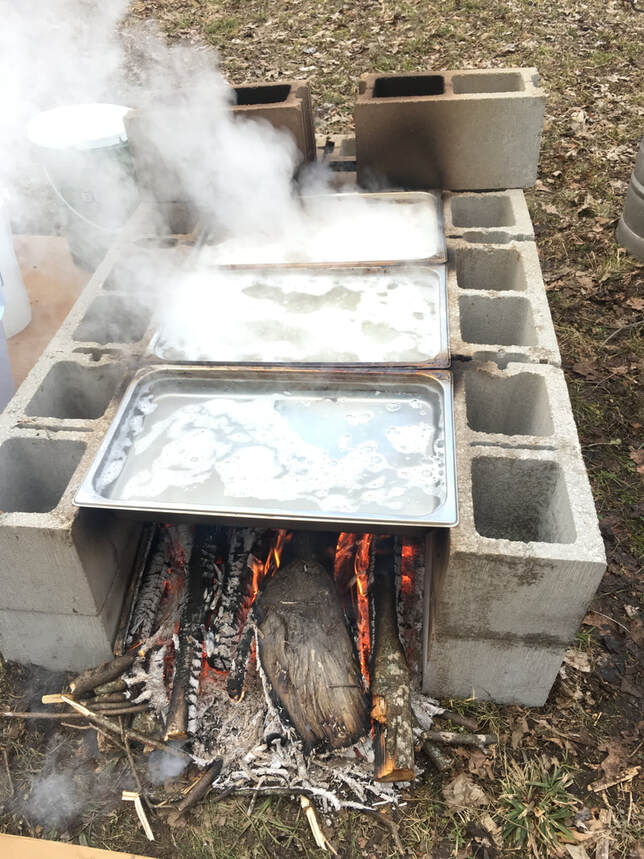 This past week or so has been really weird. With the COVID-19 scare and folks staying at home more to prevent contact with others, it has been stressful and just plain old different around here. Working from home, seeing clients virtually more often and home schooling have all changed our rhythm, but it has not been all bad. I have certainly slept more, gotten more chores and home/farm projects done than I usually do, and I can appreciate those things. What I really needed, though, was something to ground me and keep me occupied to remind me of the most important things to me, which are time in nature and with my people. Right now, the circle of "my people" is much smaller, but we sure made the most of our time together this weekend, out in nature, making maple syrup. This helped to remind and anchor me to what is important and to step away from media and technology to experience real life again, feeling more resilient and capable than I did just a few days ago. Sap season and spring could not have come at a better time, as it turns out. Weather-wise we finally had some decently sunny and warm-ish (ok, it was in the 40's) days that lent themselves well to being outside all day long. Limiting time in public spaces and with friends also made this the perfect time to spend two full days boiling down sap and just living in the present, facing tasks that need to be done. Plus, it was so fun and rewarding, which were much appreciated gifts right now. Besides the seasonal and current cultural reasons to spend such an enormous amount of time on a project, there are plenty of other reasons why we wanted to make our own maple syrup. We live in a part of the country where maple trees are native here, and the people native to this land made maple sugar to provide quick energy and a high concentration of minerals for longer than we know. Maple trees release their sap only for a short time each year, as the thaw begins in the transition from winter to spring. When nights are below freezing and days are above, the freeze/thaw cycle causes the contraction and expansion in the tree's vascular system. This change in pressure pushes out the sap during the day; this sap can then be cooked down to remove enough water and caramelize the sap's sugar to become syrup. This period of time when sap is flowing, known as "sap season," only lasts from when the first freeze/thaw days start occurring until the leaf buds appear on the trees. That means it could be only a few weeks, up to a couple of months, where this sweet nectar can be harvested. By making our own maple syrup, we are part of a food tradition that is unique to only some areas of the country, connecting us to people who had the wisdom to use nature's gifts thousands of years before we were ever here. This is also part of our efforts toward becoming more independent as a household, as being able to make as much as we can from our own land helps us work toward more food security and the ability to feed ourselves as much as possible. Maple sugaring, besides all of that, is the true sign of spring arriving and life renewing once again, which is certainly something I want to celebrate and be a part of. 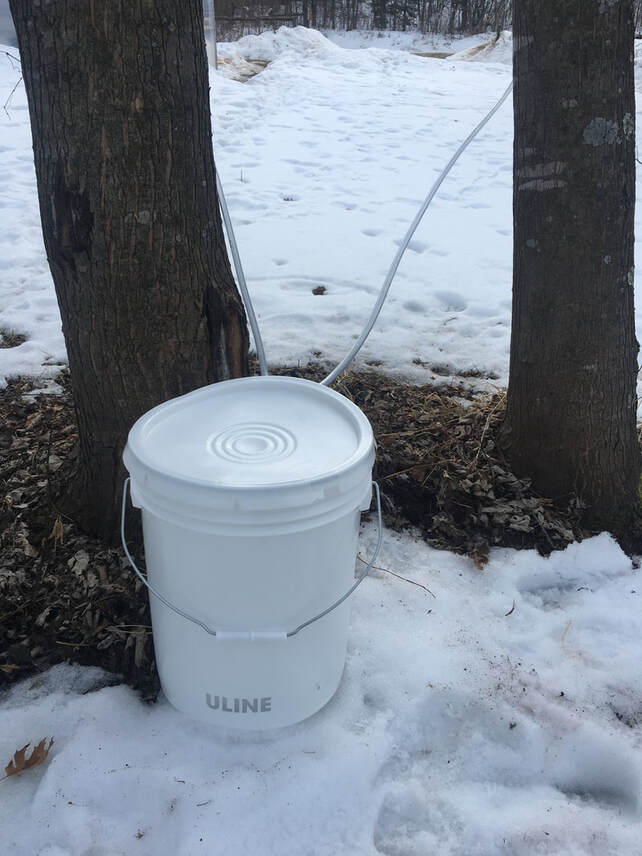 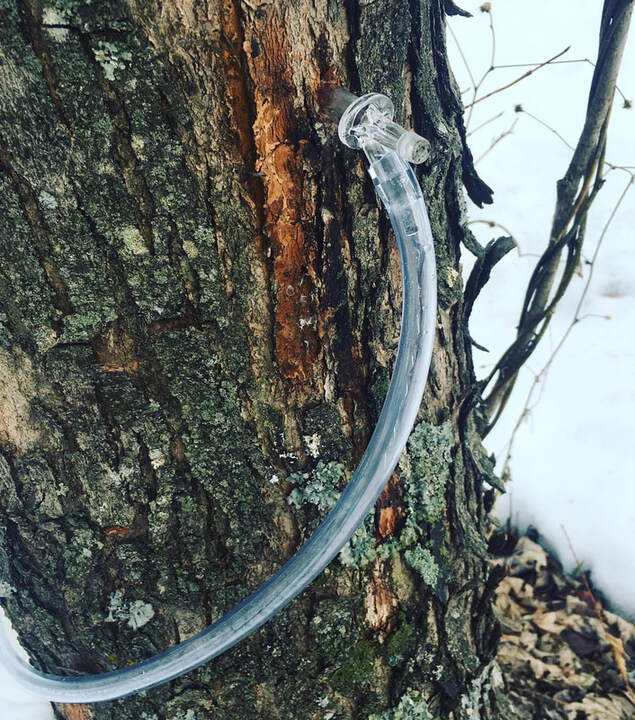 While I have tapped maple trees in the past, I had never done the whole process of making maple syrup start-to-finish, and certainly not from trees that were on my land. Previously, I had tapped trees and brought it to others to cook down into syrup, as I did not have the land or resources to do all on my own. This was mine and my husband's first time venturing into this task, but we were excited to jump in and give it a try. We had twelve taps around our property, which we tapped using plastic taps with lines that flowed into 5 gallon buckets. Some home sappers (is that a word? you get my meaning) use metal taps, metal pails, or even special sap bags that hang directly from the taps, but this worked really well for us. Plus, the equipment was light enough for us to haul around by hand, even when filled with 5 gallons of sap. Needless to say, I got pretty strong doing all of this maple work! We collected sap from our tress over the last few weeks before deciding this was the perfect weekend, due to the upcoming weather, to cook it all down at once. Since our tapping efforts spanned a few weeks, we strained and pasteurized the sap right after collecting it each day, and then kept it outside to stay chilled (it is still cold here). We used an outdoor (homemade) rocket stove cooker to heat it to pasteurizing temperature, in order to prevent spoilage until we were ready to boil it down. We strained it through a stainless steel mesh strainer prior to this, as the bucket lids had a small opening and a few leaves or bugs would get in occasionally. Raw maple sap has the two things microbes love the most to cause food spoilage: water and sugar. So, we decided to heat it to keep it good for a few weeks so we would not lose any sap. We did not cook it down as soon as we got it, as the cooking part takes so much time and effort, we wanted to do it all at once and not have to spend so much time on the cooking throughout the last few weeks. Now that our sap season is mostly over here, and we collected about as much sap as we would like to spend the time cooking down, it was time to make syrup. Larger operations, such as commercial syrup companies, use reverse osmosis and electrically-powered evaporators to cook down their huge amounts of sap into syrup, but we used fire and muscles to get our (much smaller) job done. To cook down (aka evaporate) the sap into syrup, we used the homemade evaporator idea from Samuel Thayer's book, Incredible Wild Edibles. This is an outdoor smoker set-up made with cinder block frame, where the fire is housed between two rows of cinder blocks just wide enough for hotel pans to sit directly over the fire. A hotel pan is basically a large stainless steel chafing dish used in restaurants. We got ours, which were 2 1/2" deep, off of a restaurant supply website. In addition to the fire pit, there is also a chimney at the back of the pit, which you can see in the pictures. We are actually going to rearrange these blocks to turn this part of our yard into a bbq smoker, so we can enjoy cooking outdoors with fire and eating delicious smoked meats after this! The plans we intend to use look quite similar to this set up, so it should not be too difficult; I will of course write a post about that when we build it! 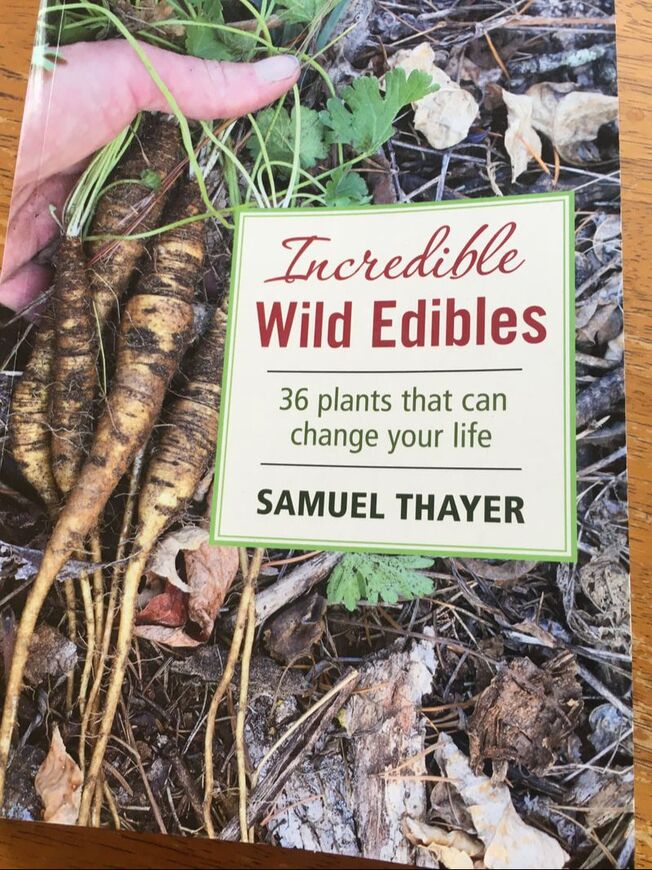 Essentially, these shallow and wide pans sit over roaring fire to gradually evaporate as much water out of the sap as possible. There are multiple pans to increase efficiency, with the front pan having the least heat under it and containing the least cooked-down sap, to the back pan, which is over the hottest part of the fire and contains to most cooked-down, thickest sap. We started by making a roaring, super hot fire, with a few inches of sap in each pan to get it going. Then, we would ladle sap from the middle pan to the back pan and front pan to the back pan to continue cooking the sap down. Uncooked sap would be added to the front pan to start cooking down, and we just kept this process going for about 10 hours for two days until it was all cooked down. As we ladled from on pan to the next, we were straining the sap, as a very windy few days caused a lot of ash and debris to fall into the pans, and we did not want this to get in our syrup. We had to keep the fire blazing the whole time, which took a lot of tending, as we needed all of the pans to be at a rolling boil constantly. Since the goal is to evaporate all of water, a good, strong boil is necessary. The back pan with the most cooked sap only got emptied 4 times, twice per day, as it just kept cooking down and caramelizing more and more, so we could just keep adding sap from the middle pan to it and it did not overflow. We finished cooking it down into proper syrup inside at the end of the night, as we could control the temperature much better to get it to the last stage of caramelization. Since our main goals for those two days were to keep the fire fed enough for the pans to be boiling at all times and to keep the sap progressing through the sequence of pans to get more and more evaporated. All of this meant gathering wood and adding wood to the fire almost constantly. This truly took all day, as the evaporation does not happen quickly; it takes 40 or so gallons of sap to make 1 gallon of syrup, so a lot of water had to be lost. We were so tired at the end of those two days, plus we ended up going to bed at 1 in the morning after all of the cooking and jarring was done for the day. The long nights and chopping/hauling wood all day was exhausting, but it is truly the best kind of tired a person can be, after exerting your body, being outside all day and really accomplishing something. 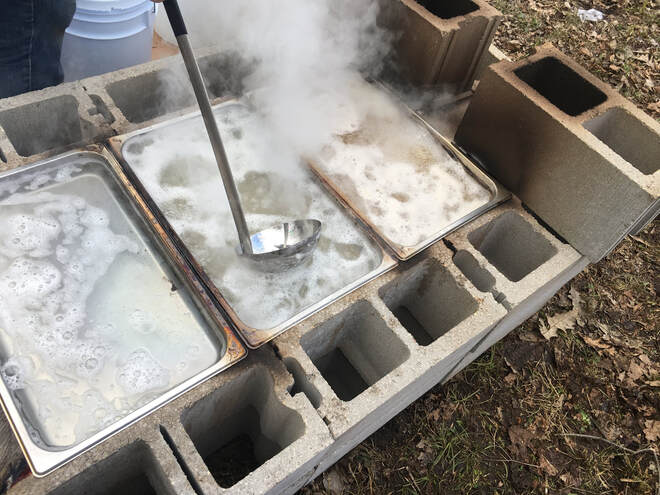 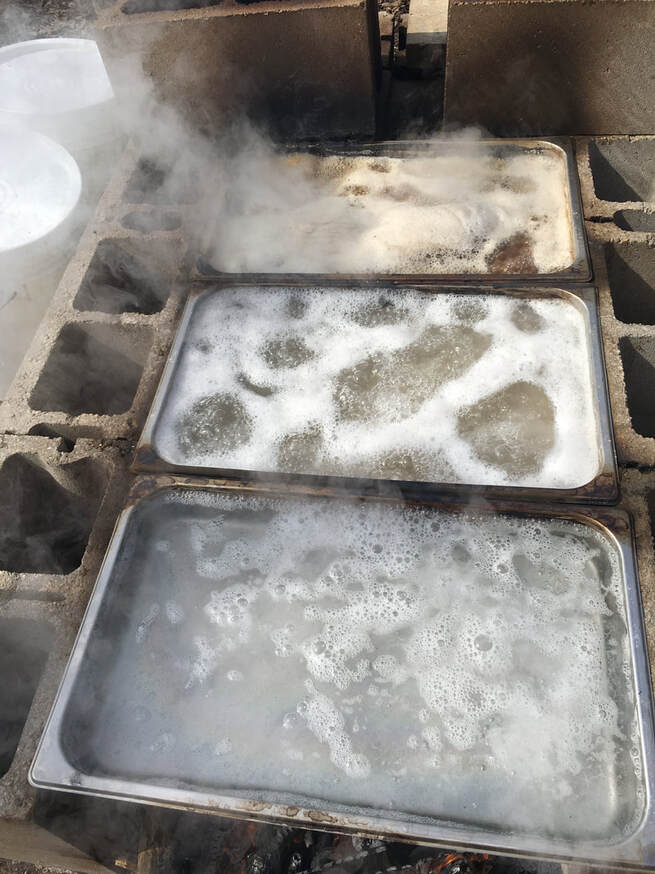 Notice the difference in color, thickness and foam among the three pans, front to back!  This was about 1/8th of the wood that we used throughout the two day cooking period....all done by hand tools and hauling in-hand. My arms are spent today! As mentioned above, we "finished" the syrup making on the stove top at the end of the day, as getting the sap to the exact right temperature to create syrup is key, and an open fire makes temperature control pretty difficult (especially when you are tired and not as sharp as you were in the morning!). Once the back pan was nearly full and had cooked for about 6-8 hours, always adding to it every 10 minutes or so front the second pan, we strained and ladled it into a stock pot, then finished it inside. The fire took it to about 210-214 degrees F outside, but "syrup stage" is at 217 F where we live (not at elevation). At that point, enough water has evaporated and the sugar has caramelized to make a sweet, viscous syrup. Some people use a syrup hydrometer to test the syrup's "done-ness," but we just went purely by temperature, measured with a digital kitchen thermometer. Once we brought it inside, it took about an hour at a rolling boil on the stove until the syrup hit 217 F. It had also reduced by about 1/3 in volume, and all of our windows were fogged up from all of the moisture that had evaporated over that time. The sap acted similarly to other candy making, where the temperature will hold in the 212-214 range for quite a while, in fact, for most of that hour on the stove, until just enough water is cooked out and then it hits 217 seemingly all of a sudden. We had to watch the boiling sap very carefully with our tired eyes to ensure it did not boil over or that we did not miss the exact point where it hit 217 F. If it got too much hotter it could turn into another candy-making stage after syrup, which we did not want. After it hit the syrup point, we let it cool a bit to 195 F, then transferred the syrup to glass jars and hot-packed them to seal the jars. This ensures the sap will be shelf-stable until opened, so it doesn't spoil; alternately, you could just refrigerate the syrup once made instead of canning it this way, but that would take an incredible amount of fridge space that we absolutely do not have. We can store these jars of syrup around to use all year, until next sap season, in our cupboard or root cellar for safe keeping. 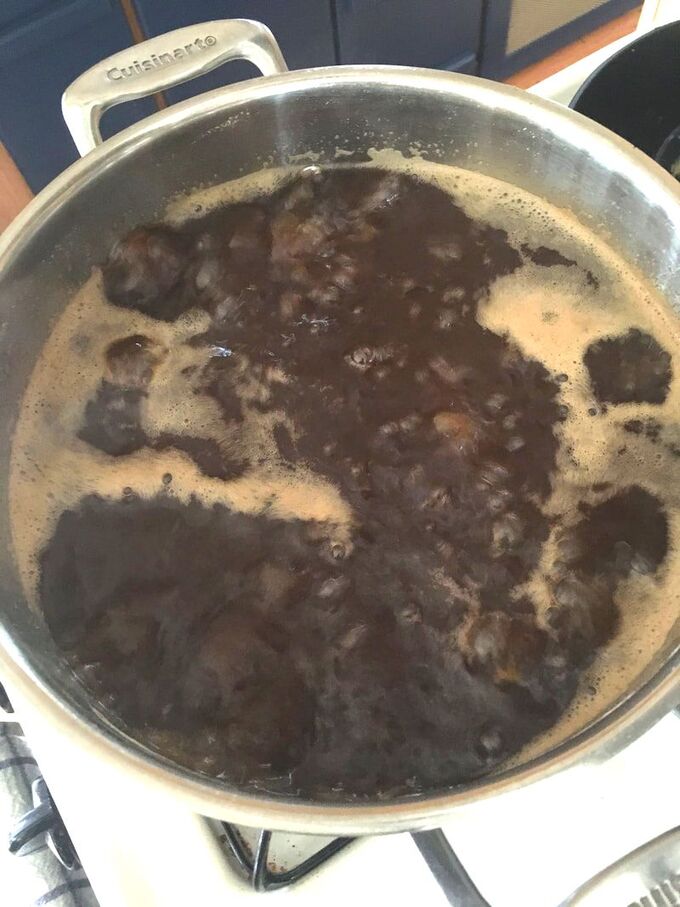 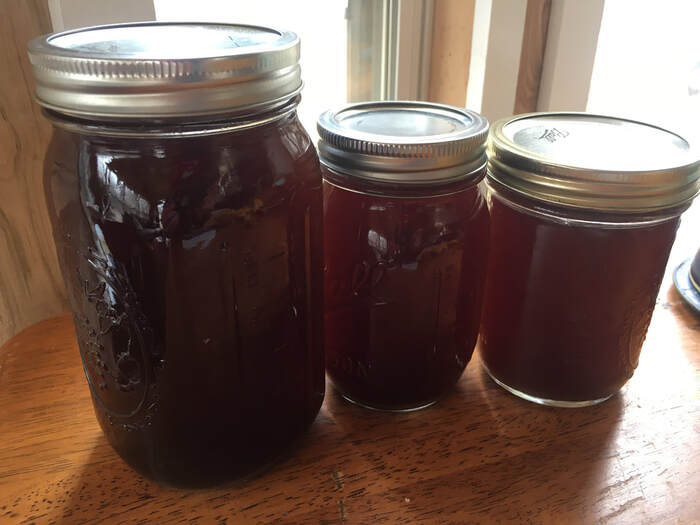 This syrup-making process was super hard work but was incredibly fun, spending time using our bodies outside to make something from our land to feed ourselves something so sweet and delicious. We totally thought we would be sitting casually, tending the sap and drinking beer, like it was a bonfire, but it was so much more work that we imagined. Next time, we plan to spend one whole day gathering the fire wood and setting up the fire box, then there can be two full days dedicated to just cooking the sap and tending the fire, so we don't have to run around so much while we cook. We definitely felt that this was a two-person job, even if one person was just getting water and snacks while the other cooked! While we cooked and worked our butts of, we also did lots of talking, drinking coffee, snacking, observing nature, breathing fresh air and appreciating our lives. With the still-cooking sap, we made hot tea to keep us warm and nourished during the day. Our tea was inspired by Indian golden milk, as we steeped herbs like turmeric and ginger in the hot sap, stealing a bit from the first two pans, then added a splash of coconut milk for some creaminess. Sipping this by the fire made the perfect wood chopping break. You can also just drink the hot sap plain for a delicious sap tea if you prefer, or splash a bit into your coffee or hot toddy as you tend the fire, depending on what time of day it is. Even though it was an exhausting weekend, I am grateful for all of it, especially after a long, hard sleep. Our lungs and sinuses are bit smoky and congested today, and our faces and hands are utterly cracked, dry, chapped and burned from the combination of cold, dry wind, more sunshine than we have been used to getting, and all the heat from stoking the fire, but it was totally worth it. Now, if I can scrub my body and clothes enough to get out the strong smell of smoke, that will be the real miracle in all this. 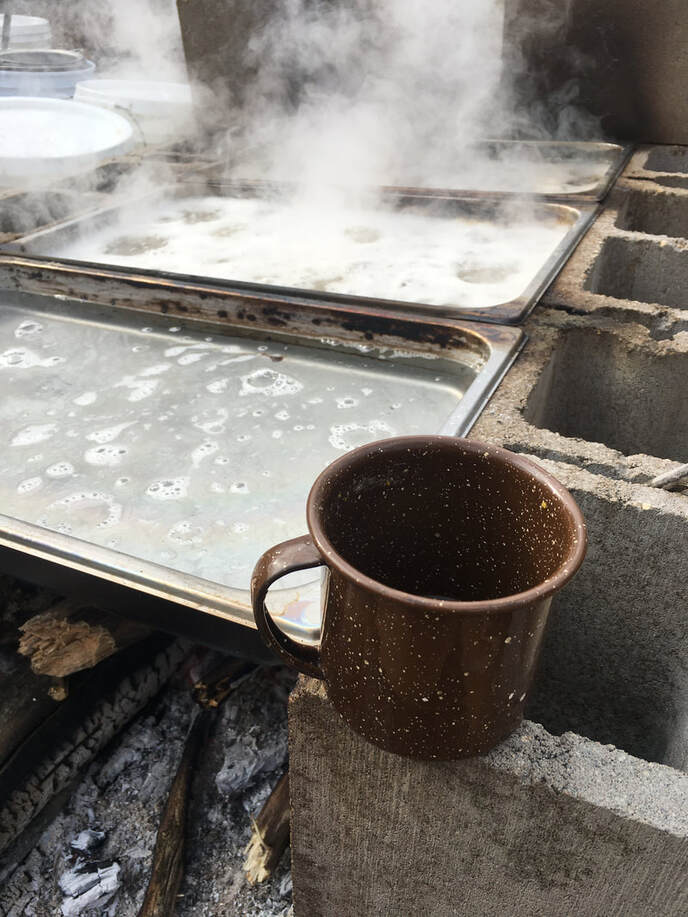   Keeping warm late at night by the fire in my Honcho Poncho! For more information maple syrup, including a bit more history, nutrition and uses for this natural sweetener, check out my most recent article in the Spring edition of Edible Madison, from my column, "Digging In." I have included two recipes, one sweet and one savory, for using maple syrup as well. Whether you make your own or find some high-quality maple syrup (hopefully from a local producer, depending on where you live), I highly recommend maple as a staple sweetener in your kitchen. If you do ever get the chance to wild-harvest and/or cook down your own maple syrup, I could not encourage you more to take that opportunity...what a gift from the earth and what a delicious food you can help create! 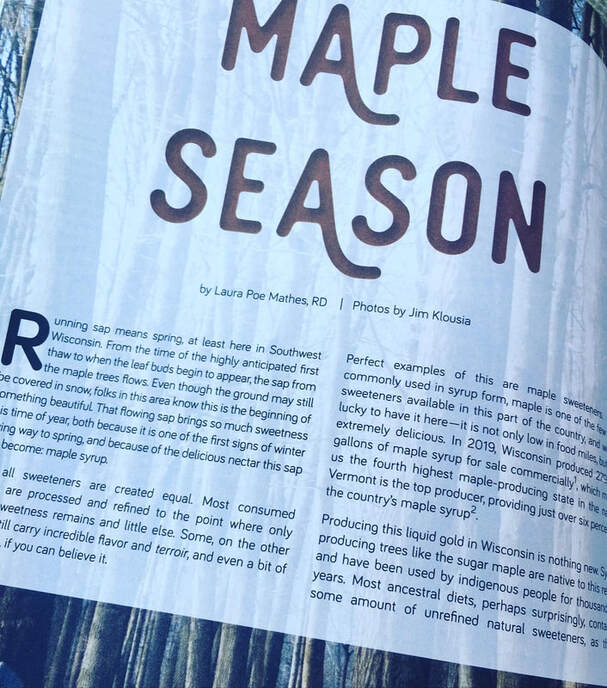 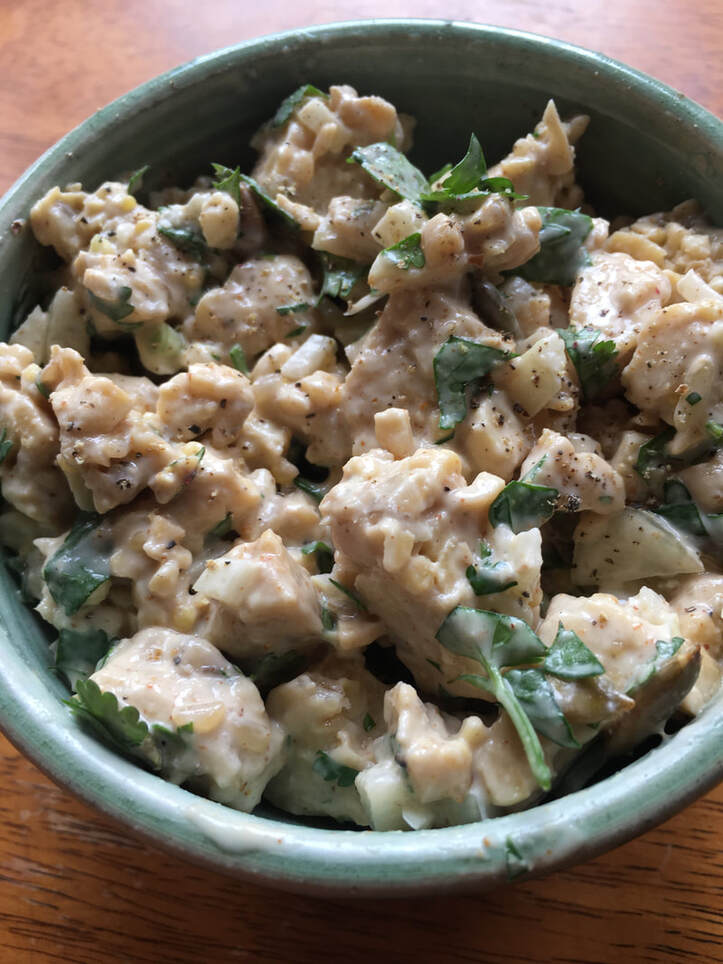 What is tempeh? For those unfamiliar, tempeh is an Indonesian dish that uses a white fungus to ferment soybeans, resulting in a cake-like structure that has the soybeans packed tightly together. More specifically, it is cultured using rhizophus spores, which help create the white mold that coats the outside of tempeh but also the mycelium structures that bind the beans together instead of remaining separate units. Lactic acid and yeast fermentation are also occurring, but the rhizophus are responsible for some of the distinct tempeh characteristics. This unique structure and texture lends tempeh really well to dishes where it can hold its shape and soak up lots of flavor, such as stir fry or simmered in bbq sauce. It has a nutty, rich flavor that most other legume-based items can lack without some serious other ingredients added in. It is much different from tofu, both in how it is made, but also its flavor and texture, as it is much more flavorful and has a toothsome bite to it. Yes, I enjoy tempeh every so often and definitely did not go vegetarian or anything. No worries there! Even an avid meat eater and promoter of all things animal-based likes a little tempeh now and then. I generally do not eat soy in my diet except for the occasional tempeh, shoyu, or miso. What these foods all have in common is that they are fermented. Other soy-based foods are typically very processed, such as soy milk or soy protein powder, and I avoid these as much as possible. Fermented soy foods, however, are not only less process but the amounts of anti-nutrients that soybeans contain are greatly reduced. This is true with any fermented or properly-prepared legume, but is especially important with soybeans. This makes the beans more digestible and more nutrient-dense as well. Fermented soy products are very traditional foods in many cultures, such as miso, natto, and shoyu in Japan, fermented tofu in China, or tempeh in Indonesia, and they offer probiotic benefits in addition to being more digestible. Even with the improved nutritional quality of traditional soy foods, I tend to limit them in my meals, as too much soy can still contribute excess goitrogens to the diet. These can cause down-regulation of the thyroid and increase the body's need for iodine when consumed in large amounts. Plus, I eat a lot of meat and other animal foods, so I don't really need plant protein sources in any considerable quality. Shoyu, natto and miso are used as garnishes, with amounts so small that they don't add up to a high goitrogen intake. Plus, these are probiotic-rich fermented foods and add more diversity to the microbiome, adding another layer of goodness to them! Unless you have a soy allergy, it is totally fine to have small amounts of fermented soy in the diet, taking care that it is made with organic, US-grown soybeans that have not been treated with herbicides or made using genetic modification. With all that said, let's make some tempeh salad! My love for tempeh and, especially, tempeh salad, is a holdover from my long-ago vegan days. When I craved chicken salad, this is what I would have instead. Now, I still eat it because I just love it and sometimes want something different in my meals. I use real mayonnaise instead of fake vegan versions today, of course! If you wanted to add more protein and some animal foods to this recipe, you could even make it with half tempeh and half chicken for a hybrid meat- and plant-based protein salad. Tuna or hard boiled eggs would also go well if you wanted to throw those in there instead of chicken. I typically serve this for dipping with sprouted crackers, made into a sandwich on some sourdough bread, or on top of a bed of greens for a meal-sized salad. You can, of course, go nuts with what you do with it. Tasty Tempeh Salad Yields: 2-4 servings TIme: 15 minutes Ingredients: 1/2 cup water 1-8 ounce package organic tempeh, cubed 1/2 Tbs soy sauce (can sub fish sauce or coconut aminos for soy-free version) 1/4 cup red onion, small diced 1 clove garlic, minced 2 stalks celery, small diced 1/2 cup flat leaf (Italian) parsley, chopped 1/4 cup chopped, toasted walnuts or other nut or seed (the one pictured above has pepitas...use what you got) Optional: 1 cup red grapes, halved 1/4 cup mayonnaise 2 Tbs dijon mustard 2 tsp lemon juice 1 tsp red wine vinegar 1/2 tsp sea salt, to taste 1/8-1/4 tsp black pepper, to taste Directions: 1. In a small pan, combine the cubed tempeh with the water and soy sauce. Let simmer abut 10 minutes, until most of the water has cooked out. Remove from the heat and set aside to cool. 2. While the tempeh cools, mix together the onion, garlic, celery, parsley, nuts and grapes, if using, in a mixing bowl. Stir well to combine. 3. In a small bowl, whisk together the mayo, mustard, lemon, vinegar, salt and pepper. 4. Add the cooked and cooled tempeh to the vegetable mix and stir. Add the dressing to the tempeh mix and stir to coat completely with the sauce. 5. Let chill a few hours before serving for best results, though you can feel free to serve right away if you like. This will keep for up to a week in the fridge. If you are interested in making your own tempeh at home, with organic soybeans or other legumes and grains, you have to check out the book Miso, Tempeh, Natto (& Other Tasty Ferments) by Kirsten Shockey. This fermentation cookbook is full of amazing ideas for fermenting beans and grains at home, using different methods such as fermenting with koji and other spores. It even features a gorgeous picture of tempeh on the cover! This is an awesome skill to have in addition to lacto-fermenting beverages and vegetables, and this book helps you step-by-step along the way. There are also ideas for how to use these ferments in your meals, which is helpful whether you make them yourself or purchase them at the store. I took a koji fermentation class with Kirsten last fall and was so inspired! I did not make the tempeh for the recipe above, but hope to venture into that land someday. Find her book online (which is the reference for the info on tempeh up top) and follow her on social media, at @fermentworks, for even more awesome ideas for how to make and use legume ferments such as tempeh! 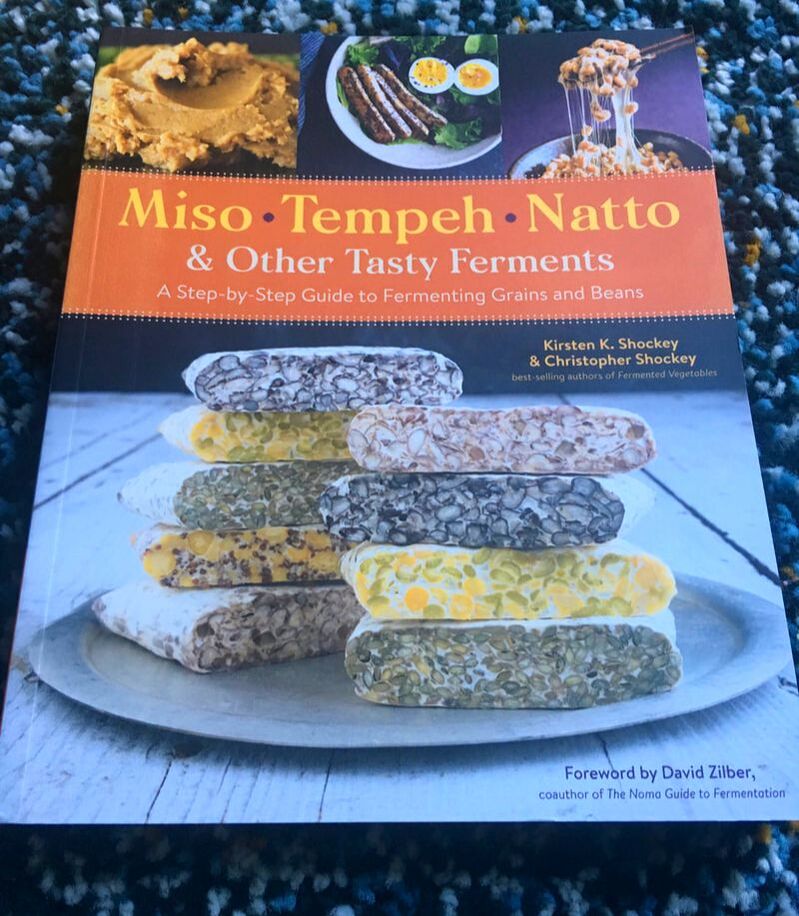 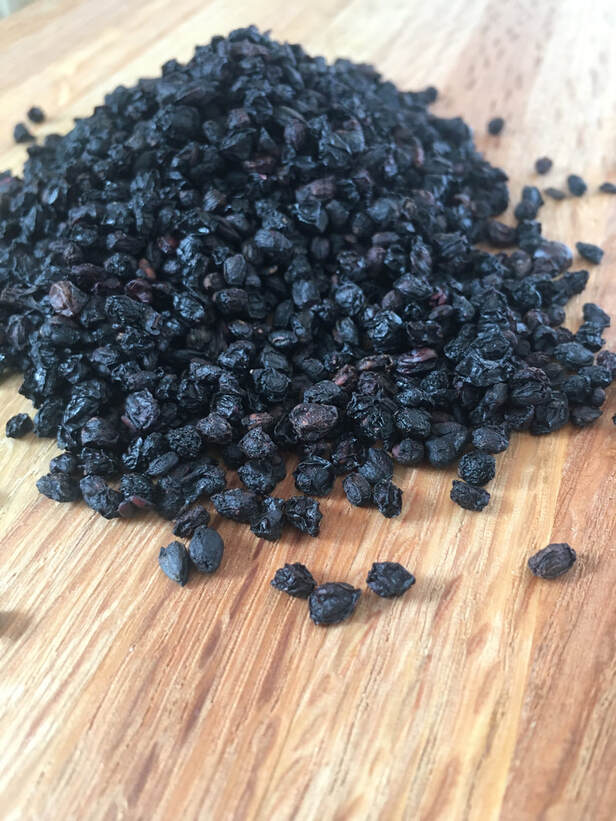 There is a lot of talk about immunity and infection going around lately due to recent outbreaks of certain illnesses, so I am here to bring a message that promotes hope and resilience over fear and panic. We can take an active, rather than passive, role in our health which can not only make us feel empowered but also give us a sense of peace. During a time when so many are susceptible to disease, there is plenty we can do to help protect ourselves and boost our immune systems using natural, traditional remedies. We are in charge of our own health, no one else can do it for us. Certainly, a diet rich in whole foods that provides all of your micronutrient needs and plenty of antioxidants is a place to start. Including traditional foods like fresh, organic fruits and vegetables, eggs, meat and organ meats, raw dairy, healthy fats, bone broth, fish and shellfish (such as oysters) and properly-prepared nuts and seeds will go a long way in keeping your body resilient and having its nutrient needs met. Bumping up your intake of probiotic-rich foods such as sauerkraut, kim chi, yogurt, and kombucha can help build your body’s defenses through beneficial microbes. If you are concerned about improving your microbiome for better immune function, you could also add in a probiotic supplement, especially if your intake of fermented foods is not consistent. Chris Masterjohn, PhD, in his Guide for the Coronavirus, recommends supplemental zinc, garlic, and echinacea, with plenty of vitamin C and copper from foods, to promote resistance to this virus and the necessary immune support you may need right now. <This post was editied on 3/17 to include Chris' new recommendations.> Besides diet, a healthy immune system also needs plenty of sleep, healthy ways to cope with stress, adequate hydration, and as much time out in nature as possible. Diet and lifestyle factors cannot be overlooked when it comes to creating a robust immune system, and we must look to our ancestral principles for how to carry these out. Another tool that we can use, which our ancestors would have utilized to make them more immune to illness, would be herbal medicine. The traditional, or “folk,” remedies employed a vast number of wild herbs that held healing properties, and science is finally beginning to catch up with what traditional cultures knew: herbs contain active compounds that have real effects on the body. There are many herbs and formulas that have been shown to have anti-viral, anti-bacterial, and immune-boosting properties, and I have been loading up on these at our house lately, including my homemade Fire Cider (click the link to make yourself!). One of my favorite herbs to use during cold and flu season is elderberry. Studies are now showing that elderberry extract has anti-viral properties, and elderberry has been used as an immune remedy for ages. I have made a big batch of this recently, in order to keep our defenses up, and this is always a nice herbal ally to have on hand during cold and flu season. 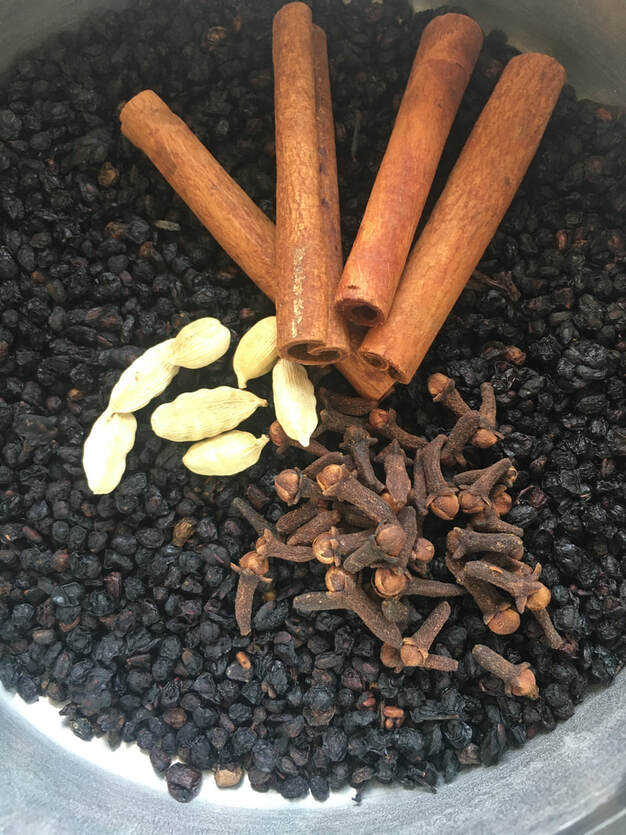 Elderberry can be taken as a tincture, tea, or capsule, but my favorite way to use elderberry in a medicinal way is by making a syrup. It tastes delicious, making it easy for the whole family to take, and other medicinal herbs can be added as you like. To make a syrup, you simply cook your dried herbs in water until the liquid has reduced by about half. Many recipes call for a 3:1 ratio of water to dried herb, but I have found a 4:1 ratio works better for me. Once cooked down, you will strain this concentrated liquid, known as a decoction, and add honey in an amount equal to your liquid. If you like your syrup a little less sweet, you can reduce the amount by a bit. The honey not only makes it taste sweet and wonderful, but also adds its own medicinal aspects, including antioxidants and throat-soothing properties. Be sure to use raw honey for this syrup, as only honey kept in its raw state has these qualities. Once made, you will need to keep this in the fridge to prevent spoilage, where it will keep for a few months. Feel free to add any immune-boosting herbs you like to your syrup; I have listed my favorite below in the recipe. 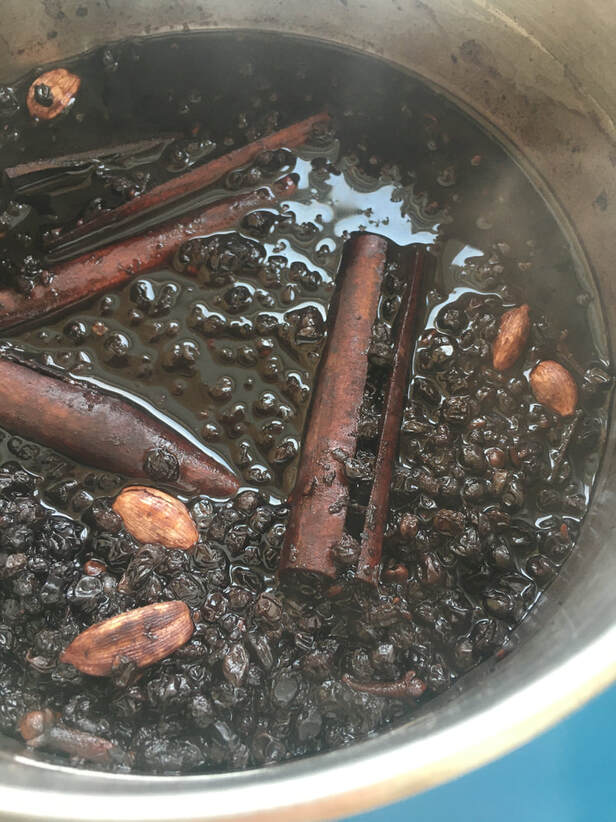 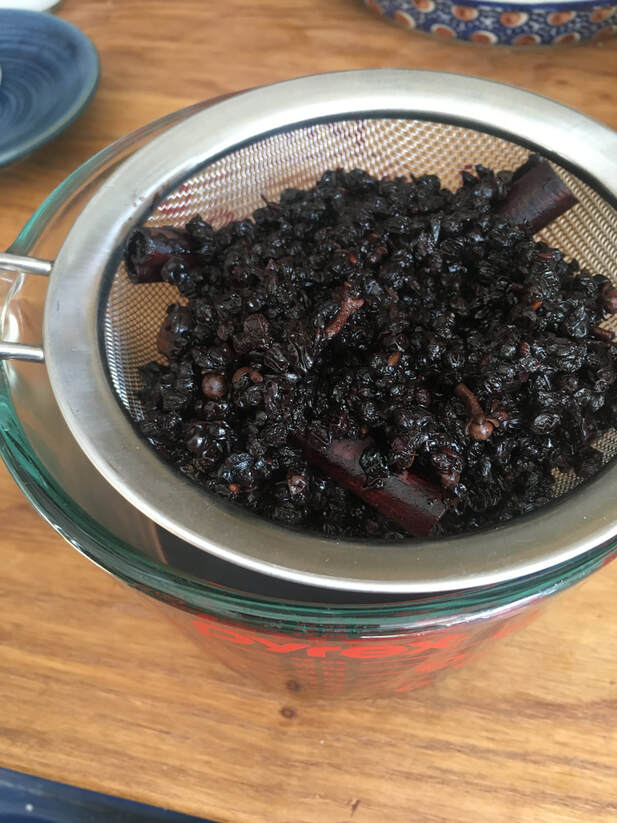 Elderberry Immune Syrup Makes about 3 cups 3 ounces dried elderberries (about ¾ cup) 2-3” fresh ginger, chopped (or about 1 ounce of dried ginger root) 4 cinnamon sticks 6 cardamom pods, crushed 1-2 tsp whole cloves Other additions: dried echinacea root, thyme, orange peel, rose hips 20-24 ounces filtered water 1- 1 ½ cups raw honey Weigh out your herbs using a kitchen scale, measuring in ounces. Place in a small sauce pan. Multiply your weight of herbs by four, then use that number for the volume of water added to the herbs. Bring the water and herbs to a boil. Turn heat to the lowest heat possible and cover; let simmer for 20-30 minutes. Check regularly to prevent sticking or boiling over. You will know the decoction is ready when the liquid has reduced by about half. Strain out the herbs and measure out your liquid. Measure out your honey in a ½-1: 1 ratio to your liquid, depending on how sweet you like your syrup. Let cool slightly so the honey does get too heated, then whisk in your honey until dissolved. Transfer to a glass storage jar with a lid, then label with the name and date. Keep in the fridge for storage, where it will keep for 1-2 months. Take 1-2 Tbs as a dose, or as recommended by your own healthcare provider, hopefully one that is knowledgeable about herbs. 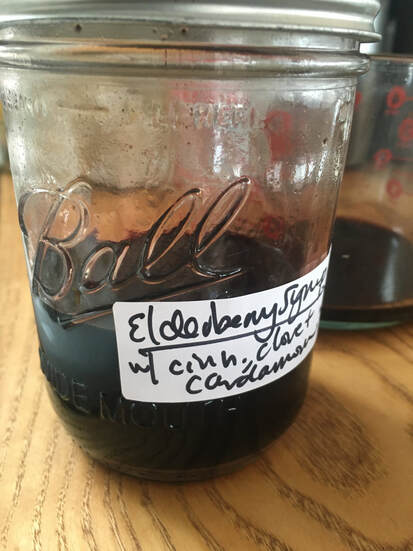 As with any post on this blog, this is for informational purposes only and does not constitute medical advice. It is not intended to substitute the advice of your doctor or medical professional.
I am a huge fan of dairy. Specifically pastured dairy products like raw milk and cultured items like yogurt and kefir. I believe it is a nutrient-dense food that, for many, can provide the body with much-needed nutrients such as calcium and vitamin K2. These nutrients that make dairy so unique and desirable are even more important during periods of growth and development, such as pregnancy and breastfeeding, childhood and adolescence. Many athletes and bodybuilders, also with very high nutrient needs, rely heavily on dairy for their special nutritional needs. But dairy consumption in recent years has seen a steep decline, despite how much it has to offer. Due to allergies, intolerances, and even dietary fads, many people today are removing dairy from their diets for, some with success and others not so much. This guide is meant to help those who wonder if dairy may actually be doing more harm than good in their diet, helping to determine if dairy is actually the culprit and, if it needs to be removed, how to do that without missing out on the nutrients missing with eliminating dairy. Do I think everyone needs to go dairy-free, or that dairy is somehow "unnatural" to the human diet? Absolutely not. When Weston A. Price traveled the world to study indigenous diets and healthy outcomes, he found many cultures that consumed dairy. This was not always from cow's milk, however. People from all over the world figured out how to use dairy as a good source of nutrition thousands of years ago, which came from goats, sheep, camels, yak, reindeer, and more, in addition to cows. There is now evidence of humans consuming dairy from different species for over six thousand years, proving that human resourcefulness in harnessing the nutritional power of dairy is nothing new, and is frankly just as "natural" to us now as farming, raising livestock, gardening, fermentation, cooking, and many other dietary practices not seen in other animals. Of course, I only advocate consuming dairy from animals that are treated well, are raised outside, are fed a natural diet on pasture, and are not given unnecessary chemicals. When cows are raised in this way, they are not only happier, but their milk is more nutritious. Then, when left raw and/or allowed to ferment to create yogurt and other products, it is even more healthful. Real milk contains calcium, potassium, phosphorus, vitamins A and K2, many B vitamins, protein, healthy fats and cholesterol, iodine, and even probiotics, so it clearly cannot be all bad. However, it is true that not all people can tolerate dairy and some, in fact, are allergic. This is not everyone, but it is very common now in many dietary circles and paradigms to hate on dairy. As I showed above, dairy is not necessarily a dietary villain, and automatically assuming it should be eliminated is not always the right thing to do. So, do you need to go dairy-free? And, if so, how can you do this healthfully? Here is a guide to get you started. First, off figure out if dairy is actually a problem for you. How will you know? Consider your ancestry. As mentioned, many cultures had dairy, all over the world. Depending on your particular ancestry, you very well may tolerate dairy just fine. Dig into traditional diets, such as those studied by Weston A. Price, to see if dairy foods, from whichever animal, is something you genetically are set up for. Get allergy testing done. Figuring out if you have an actual allergy is a good first step. If you are truly allergic, then eliminating dairy is absolutely necessary. However, if you get allergy testing that comes back negative, consider testing then for lactose intolerance. If both come back negative, but some types of dairy still don't seem to work for you and symptoms persist, keep doing your dietary detective work. Aside from testing, if you already know you get a distinct reaction, perhaps in the gut, sinuses, skin, etc. right after consuming dairy, then you already know taking it out is appropriate and you can move on to the foods section below. If a true allergy or intolerance isn't "proven" by lab tests, but you sense you may not tolerate dairy, start by eliminating only processed dairy, such as pasteurized, homogenized milk and cream. Especially avoid ultra high temperature (UHT) pasteurized milk, filtered milk, and any products made with these such as half and half. In this step, start by keeping in butter, ghee, raw milk and cream, full fat yogurt, kefir, and aged cheeses. Try this for 2-3 weeks. If you still notice an adverse reaction to milk, or have symptoms without an identified cause, try other species of milk, such as goat and sheep, instead of cow's milk. Raw goat or sheep milk, butter, cheese, yogurt, and kefir are all available either directly from farmers or at health food stores. Try these dairy products from animals other than cows, to see if symptoms improve or you generally start to feel better. If you find you have a poor reaction to raw, unprocessed cow dairy and dairy from other animals, then elimination may need to be the next step. In this case, take out all dairy from all species for 4-6 weeks to see if total elimination begins to improve symptoms. The cause for an inflammatory response to dairy, unless explicitly allergic or lactose intolerant, is usually found in the gut. Leaky gut can cause a negative to reaction to dairy, though it is itself a harmless food. So, during this elimination phase, start to work on gut-healing. This may include getting lots of probiotic foods and supplements, if fermented foods aren't tolerated, as well as generous amounts of bone broth, organ meats, egg yolks, and pastured animal fats. Look at how other lifestyle factors may be damaging your gut health as well, including stress, sleep, exercise, chronic dieting, and lack of time spent in nature. Consider using a gut-healing protocol such as the GAPS diet or working with a practitioner in person as well, who can help work on your unique body. These are only general guidelines, not meant to diagnose or treat anyone; if you feel some serious healing needs to happen, find someone to work with you can help you specifically. After this period of elimination and gut healing, see if you have healed enough to add in dairy again. Start gradually, adding dairy back in step-by-step to see if it is well tolerated again. Begin by adding in goat or sheep milk and dairy products, then try raw milk or cultured cow dairy products. If you find you tolerate any of these, great! You may be able to eat dairy again, especially in its natural form, either raw or fermented. If symptoms come back with adding in these foods again, it may be best to keep it out indefinitely, perhaps trying again in a year or so after doing more gut healing. Whether during the 4-6 week dairy-free time, or if you are compelled to leave out dairy indefinitely, there is more to be considered once you take this out. For those whom dairy is not an option, extra attention must be given to some other areas of the diet. You cannot just eliminate an entire food group, especially one that provides some very necessary nutrients, and not replace them. I see so many people not getting enough calcium because they took out dairy without mindfully replacing what it gave to the diet. I am very concerned there will be an increase in cases of osteoporosis when the current generation of young people, eschewing dairy, start to age. This is an important issue to address now, as bone health is best taken care of proactively, not when a bone breaks or tooth decay begins. Mindfully including foods and/or supplements rich in calcium and other minerals, along with fat-soluble vitamins, will ensure that your diet remains nutrient-dense and complete, and also relieves the burden dairy may have on your body if not well tolerated. If you are going to consume dairy alternatives, such as when no animal's dairy works for your body, be very picky and read labels closely. Most milk alternatives, like soy or oat milk, are extremely processed and provide very little nutrition. Yes, some are enriched with synthetic vitamins, but even these do not fully replace all that whole, raw, grass-fed dairy can offer in the diet. If you decide to consume these, I recommend you only use them on rare occasions, and select brands that are soy-free, refined oil-free and as minimally processed as possible. Those made from nuts and seeds, rather than grains and soy, are better choices. Still, they are not nutrient-dense, real foods, so you must be sure you are replacing what is missing by taking out dairy.
So, if you aren't eating any dairy, what might you be missing? Here is a list of foods you will need to emphasize in order to replace dairy's nutrients. Nutrients of Concern and Foods to Replace Them Calcium: I would be hard-pressed to find someone who doesn't know dairy is a good source of calcium, so this one is pretty obvious. However, this is a huge gap I see in the nutrient intake of almost anyone who decides to remove dairy. Our bodies still need 1000-1500 mg of calcium per day, whether we tolerate dairy or not. A lack of calcium in the diet is associated with poor density, including risk of osteoporosis, as well as tooth decay, irregular heartbeat and more. What to eat instead: Fish with edible bones (a major source of calcium in traditional diets that did not contain dairy), such as sardines or salmon, which are the best non-dairy source of calcium and should be included at least twice a week in the diet. Besides fish bones, some plant foods offer bioavailable calcium, but most are in amounts that are much lower than animal sources. These plants include: cruciferous vegetables and dark leafy greens, and absorption is increased if the vegetables are cooked; beans and nuts; winter squash; seaweed; and blackstrap molasses. No matter what combination of foods you use, they need to add up to around 1000 mg per day of calcium, or up to 1500 for pregnant and nursing women. Potassium: Needed for healthy blood pressure, heart rate, muscle contraction, and electrolyte balance, potassium is actually difficult for many to get enough of in the diet. Dairy is a surprisingly good source, so if you start to take this out, begin to replace it with the other main sources in the diet: fresh fruits and vegetables. What to eat instead: Especially good sources are potatoes, sweet potatoes, bananas, avocado, berries, tomatoes, greens, plantains and coconut water. Lean meat will also supply some, but I encourage relying on fresh fruits and vegetables for this, as I encourage meat with fat on it for the other nutrients it provides. Vitamin K2: Pastured dairy is a fantastic source of vitamin K2, which is needed for calcium signaling, sending it to the bones rather than soft tissues and arteries. This promotes healthy bones and teeth, while protecting the heart, brain, kidneys and other tissues from calcification. While butter and cheese are delicious and easy sources of K2, not everyone can consume these and, luckily, there are some other great sources available. Because this is a fat-soluble vitamin, eating plenty of fat is needed to absorb this properly, no matter where you get it form. What to eat instead: Poultry livers, such as goose, duck, and chicken are some of the best sources of vitamin K2. Two servings of liver per week is adequate to meet many of your body's needs, emphasizing poultry livers for the K2 if you don't consume any dairy. Natto, a fermented soybean product, is also rich in K2, while other fermented foods can provide trace amounts. B vitamins: B vitamins are needed for numerous functions in the body, including energy metabolism, nervous system function, and methylation. Dairy is a good source of many of the B vitamins, including B12, B6, B2 (riboflavin), and B7, pantothenic acid (when raw), so these deserve some attention if dairy is out. For vegetarians and vegans, or those for whom meat may not be readily available or in their price range, these may need to be supplemented with a good B complex as well. What to eat instead: B12 is not always an issue when going dairy-free, as it is present in all animal foods, so getting plenty of meat, organ meats, and eggs can supply plenty of B12. However, if you have limited meat or egg intake for various reasons, then pay special attention to B12 and consider supplementation. B6 is abundant in unprocessed foods, so eating enough of these will help meet your needs. B6 is rich in meat, organ meats, beans, and legumes, and in smaller amounts in some vegetables and fruits. B2, also known as riboflavin, is rich in raw milk, as it is susceptible to damage by heat. Non-dairy sources of riboflavin include meat, fish and shellfish, organ meats, legumes, and whole grains. Dairy is not necessarily the best source of B7, pantothenic acid, but it is a contributing source for many. If removing dairy, be sure to consume plenty of seeds and nuts, liver, meat, fish and shellfish, eggs, and generally unprocessed foods. Clearly, all the B vitamins that would be provided by milk are able to be found in other foods. Give extra attention to liver and organ meats, bone broth, muscle meat, fish and shellfish, eggs and whole grains to ensure all of your various B vitamin needs are met sans dairy. Iodine: While we typically think of foods from the sea as the best sources of iodine, dairy foods actually contribute a good deal of iodine to the diet, especially for those not consuming iodized salt. If you are excluding dairy and don't eat iodized salt, which I recommend to avoid, then getting adequate iodine must come from sea foods, both plant and animal in origin. Iodine is essential for healthy thyroid function and hormone balance, especially for fertility and pregnancy, so it cannot be overlooked. What to eat instead: Consuming two servings of fish or shellfish and two servings of seaweed per week should be adequate to meet your iodine needs without dairy. Many fruits and vegetables will contain trace amounts, but seafoods are definitely the most dense source of iodine, and the fatty fish like sardines also provide selenium, also needed for a healthy thyroid. Cholesterol and Healthy Fats: Cholesterol and fat are essential in the diet, and full-fat dairy can be a great source of these in the diet. All full-fat dairy will contain cholesterol and arachidonic acid, while grass-fed dairy not only supplies these, but also has small amounts of omega 3 fatty acids. Dairy also provides conjugated linoleic acid when full-fat and grass-fed. Without dairy supplying these in the diet, it is necessary to consume plenty of animal fat from grass-fed animals in its stead to replace these health-promoting fats. These fats needed for hormone protection, healthy inflammation response, satiety, healing and wound repair, brain health, skin health, and even absorption of fat-soluble vitamins, like D and K. With so many essential roles in the body, we must get plenty of other fat when dairy is out, and "non-dairy milks" will simply never replace dairy in this category, so other animal fats must fill this role. What to eat instead: For cholesterol, eat at least 2-3 eggs per day, along with animal fat like tallow or lard. These also provide arachidonic acid, as will fatty cuts of meat and fat-rich bone broth made from pastured animal bones, along with conjugated linoleic acid. For omega 3 fatty acids are abundant in fatty fish and shellfish, so two servings of these per week will be beneficial. Other fats to include to replace butter and dairy fat include coconut oil, avocado oil, and olive oil, but emphasize rendered animal fats and egg yolks for even more benefit when dairy is excluded. Because the absence of dairy can leave such a huge nutritional gap in the diet of many, that dairy-free milk replacements simply cannot compare to when used to replace it in the diet, supplements may also be needed. Getting plenty of the other foods discussed above to ensure your body is getting what it needs is of course the first step, but adding in food-based supplements can also be needed, especially if your diet is limited in any other way besides excluding dairy. Probiotics from cultured dairy like yogurt and kefir What to eat instead: fermented vegetables like sauerkraut and kim chi; small amounts of cultured soy like tempeh, shoyu, miso, and natto; fermented vegetables like kvass, water kefir, and kombucha; non-dairy yogurt on occassion, made from cashews, coconut milk, or almond milk--avoid soy- or oat-based yogurts Some supplements to consider when going dairy-free include: Bone meal: This provides a bioavailable source of calcium, and can be taken in powder or capsule, form. I recommend this highly if you remove all dairy and are not able or willing to regularly consume fish with edible bones (such as canned salmon or canned sardines) and do not eat a lot of beans, nuts, or green vegetables, such as a low-carb dieter. Vitamin D3 with K2: These fat-soluble vitamins work together with calcium and several other minerals to ensure good bone health. If you aren't eating dairy and don't want to eat liver 1-2 times per week, then adding in this supplement is a must. If you live in a Northern climate, this is probably a good idea to supplement with, even if you do eat dairy, during the winter months. Liver Capsules: If you don't eat any liver, adding in a desiccated liver capsule supplement can also help meet some of your needs, especially if you can't get them from dairy. It provides B vitamins, iron, and small amounts of vitamins D and K2. Unlike the supplement mentioned above, it also contains vitamin A that would be missing without liver or dairy. Cod Liver Oil: Cod liver oil supplies vitamin A and omega 3 fats, both found in full-fat pastured dairy, so it can be a great supplement for the dairy-free folks. This also supplies small amounts of vitamin D. Be sure to purchase a good quality brand for your cod liver oil, looking for extra virgin or fermented virgins if it fits your budget. Kelp: I only recommend adding a kelp-based iodine supplement if you are dairy-free and also don't regularly consume animals and/or plants from the sea. If you don't eat dairy but get two servings each of fish or shellfish and seaweed, you may not need to supplement with this. If both dairy and seafood are off the table, you need to supplement with iodine in this case. A traditional, nutrient-dense food like quality dairy, from many different animals, is such an important part of many diets. Unfortunately, modern processing practices, poor gut health, immune dysfunction, and the assault on our bodies from environmental toxins make it so not everyone can enjoy this food with good health outcomes. In this case, be sure to take extra care to meet your body's unique nutritional needs, and you can live a happy, healthy life, all while being dairy-free! 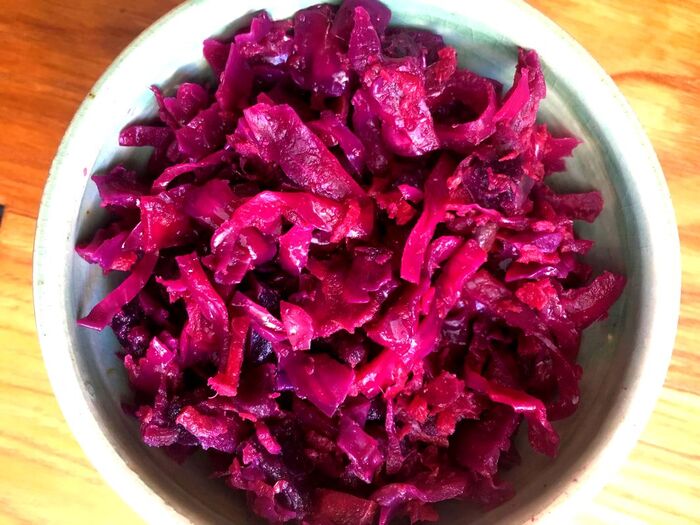 I am always looking for new flavors of sauerkraut to make, and I just so happened to have some extras of these goodies that needed to get used up in my fridge. Inspired by a juice blend at a health food restaurant and juice bar I worked at in college, the delicious combination of carrots, apples, and ginger add a nice sweetness to balance out the tart and slightly bitter flavors of the sauerkraut itself. Adding fruit to fermented vegetables is nothing new, and is a common addition to some types of kim chi in Korea, which also sparked inspiration for this combo. When adding fruit to your ferments, be sure to keep a closer eye on your jars than usual, as the higher sugar content of this kraut may tend toward mold or kahm yeast. Keep everything submerged below the brine to prevent this, shorten the fermentation time a bit, and you are good to go. Feel free to use red or green cabbage here and scale the recipe up or down as desired, always keeping the ratio of salt to vegetables 1 tsp to 1 lb. Serve this kraut on a brat, alongside breakfast sausage, on a toasted ham and cheese sandwich, mixed in with coleslaw, tossed in a green salad, or even use as a post-cooking addition to crispy roasted potatoes. Anywhere you want to add both sweet and tart flavors, this is your guy. 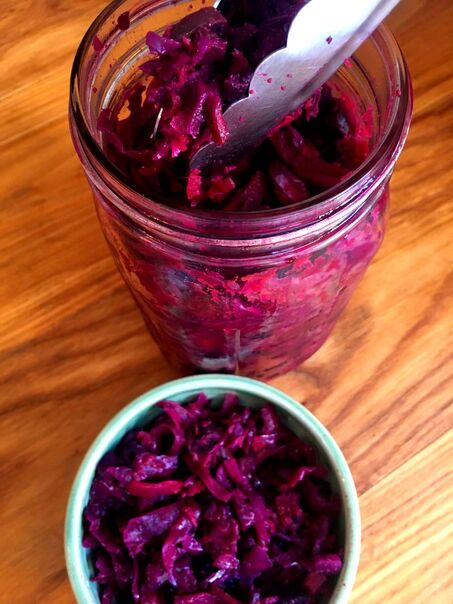 Carrot-Apple-Ginger Kraut Makes 2 quarts 1 medium head cabbage, about 2-3 lbs, shredded 1 lb carrots, grated 1/2 lb apples, finely diced 2" fresh ginger root, grated (or to taste) 4 1/2 tsp sea salt (may need a bit more or less; use ratio of 1 tsp salt per lb of vegetables) In a large mixing bowl, set on top of a kitchen scale and tared, combine the cabbage, carrots, apples and ginger. Based on this weight, add the corresponding amount of salt, using the ratio 1 tsp fine sea salt to 1 lb of vegetables. Stir in the salt and massage into the veggie mix. Massage the salt in for 5-10 minutes, until the cabbage softens significantly, the volume of the veggies reduces by about half, and juice is easily wrung out of the mixture when squeezed. Pack the salted cabbage mix into glass jars or a ceramic fermentation crock. Press the mixture in tightly, allowing you to fit as much as possible in the vessel, while also removing any air bubbles present. Pack and press until the jar is filled to its shoulders, not all the way to the top, and until a distinct layer of brine rises above the vegetables. If not much brine is present, continue with the process and check the jar after 24 hours. By this time, the salt will likely have pulled more water out of the vegetables and fruit, creating plenty of brine. Place a fermentation weight on top of the mixture, keeping it submerged well below brine throughout the fermentation process. Put a non-reactive lid on top, screwing on very loosely to prevent breakage. Set on your counter at room temperature, out of direct light or extreme temperatures, and let sit to ferment for 5-10 days. Check regularly for mold or yeast, pressing the weight to keep the veggies submerged if needed. When done fermenting, remove the weights and transfer the kraut to the fridge. It will keep for about 1 year under refrigeration.  What aren't eggs good for?? Having clear, glowing skin is a outward sign of good health, and something most of us probably strive for. But really great skin is made from the inside out, and requiring a nutrient-dense diet and other healthy habits. A wide range of issues can cause skin to be less-than-optimal, including: acne, rashes, psoriasis, eczema, rosacea, puffiness, redness and more. Certainly, food allergies and sensitivities can be at play for some people, in which case removal of these foods for a time or forever may do the trick. For many, however, the key to better skin lies in what is missing in the diet. While all having varying root causes, all of these come down to three basic issues that can be fixed with a more traditional diet: inflammation, hormones, and the microbiome. Here are some nutrients and foods to include to help improve these three key ares, especially if you are looking to achieve clearer, better looking skin. Fat-soluble Vitamins: Fat-soluble vitamins, which need plenty of fat for proper absorption, are essential for robust hormone health. The fat-soluble vitamins A and E not only help with improving hormone balance, but also act as antioxidants to protect skin from damage, including from the sun, and from inflammation. Vitamin A helps keep skin moist and smooth, and vitamin E is needed for healthy cell membranes, protecting skin from the outside world. All of the fat-soluble vitamins, especially A and E, from traditional foods are a must in any skin care regimen. Foods to include for fat-soluble vitamins: liver from pastured animals and extra virgin or fermented cod liver oil for vitamin A; eggs for vitamin A and cholesterol; nuts, seeds, olive oil, and avocado for vitamin E Healthy fats and Cholesterol: Skin issues are often linked to an imbalance in reproductive hormones, all of which are built on a backbone of cholesterol. Other fatty acids also help with decreasing inflammation, as well as ensuring adequate of the vitamins mentioned above. EPA and DHA are omega 3 fatty acids that promote healthy skin and decrease inflammation, which arachidonic acid, an omega 6 fatty acid, is needed to prevent eczema and other inflammation in the skin. A low fat diet is not going to bring you the best skin possible, but healthy, traditional fats certainly will! Foods to include for cholesterol and healthy fats: eggs yolks, pastured meat and wild-caught shellfish for cholesterol; wild-caught fatty fish like sardines or salmon, as well as cod liver oil for omega 3 fatty acids; eggs, dairy, and animal fat such as tallow or lard for arachidonic acid. Address the gut and the microbiome: Much of what comes out in our skin starts in the gut, so keeping our microbiome diverse and balanced, teeming with beneficial microbes will help us break down and digest our food better, prevent inflammation, and keep skin happy. Including plenty of fermented foods and probiotic supplements adds to the beneficial bacteria in the body, while soluble fiber acts as prebiotics, feeding those bacteria to thrive and grow. If your gut is very sensitive and high fiber foods cause GI distress, try adding more fermented foods that aren't vegetables, such as cultured dairy, legumes, or beverages. It is also necessary to include bitter herbs that promote liver detoxification, which not only supports digestion but also helps balance hormones. Of course, removing inflammatory foods like refined flours, oils, and sugars will also help to improve the gut as well. Foods to include for microbiome: sauerkraut, kim chi, beet kvass, and other fermented vegetables; root vegetables, dark green leafy vegetables, alliums, fruit, legumes, nuts and seeds, sprouted or soured grains; yogurt, kefir, and other cultured dairy; raw milk; bitter herbs like dandelion root, sassafras root, burdock, or yellow dock root. Consider the thyroid: Hypothyroidism, or an under-active thyroid, can be an underlying cause of some skin issues such as acne. If blemishes and other skin problems persist for you, consider having your thyroid checked by your doctor. To promote healthy thyroid hormone production, be sure to include adequate amounts of iodine, selenium, magnesium, vitamin D, B vitamins, and zinc in the diet. Stress also impacts the thyroid, so this may be another area to address along with diet if your thyroid is not functioning optimally. Foods to include for thyroid health: wild-caught fish and seafood, and seaweed for iodine; fish, shellfish, nuts, seeds, and beans for selenium; meat, organ meats, whole grains, and fresh produce for B vitamins; green leafy vegetables, properly-prepared grains and legumes for magnesium; sprouted seeds, red meat, liver and oysters for zinc; and wild-caught seafood, pastured pork, full-fat dairy, and plenty of sunshine for vitamin D. Collagen-rich foods: Skin and connective tissue all need collagen to be strong and supple, so including plenty of collagen-rich foods is essential for healthy, youthful skin that is more resistant to wrinkles, aging, stretch marks and more. Traditional diets that include all parts of the animal are the best way to get in these foods. Our bodies can also synthesize some collagen as well, which we make from vitamin C. Nose-to-tail eating and plenty of fresh produce ensures you get the collagen you need to have radiant, youthful skin. Collagen-rich foods to include: Bone broth, organ meats, meat or fish with skin and bones present; berries, cabbage, citrus, peppers, cherries, and other fresh fruits and vegetables for vitamin C. Vitamin B3 (Niacin): One of the main symptoms of a vitamin B3 deficiency (also known as pellagra) is dermatitis, which can be as mild as a rash or can become more severe with a prolonged deficiency. There are many risk factors for insufficient B3 in the diet, s be sure you are getting enough of this vitamin or consider testing if you experience frequent rashes, painful, itchy, swollen or red skin. A supplement may be needed if the deficiency is severe, in which case consulting a healthcare provider is the best course of action. Niacin-rich foods to include: Fatty fish like sardines or salmon, liver, nutritional yeast, peanuts and other nuts and seeds, pastured meat, fresh vegetables. Water: It is a no-brainer that adequate water intake is needed for good looking skin. When skin is well-hydrated, it looks more supple and is less likely to dry or crack. Get enough water to meet your body's needs without over-hydrating. Start with at least 64 ounces of water or other beverages per day to see if your skin doesn't start to look better. Caffeinated and alcoholic beverages don't count toward your 64 ounces, but herbal tea, mineral water, or kombucha will all count, helping keeping you hydrated. Beverages to include: At least 64 ounces daily of spring water or purified water, mineral water, herbal tea, kombucha, or water kefir 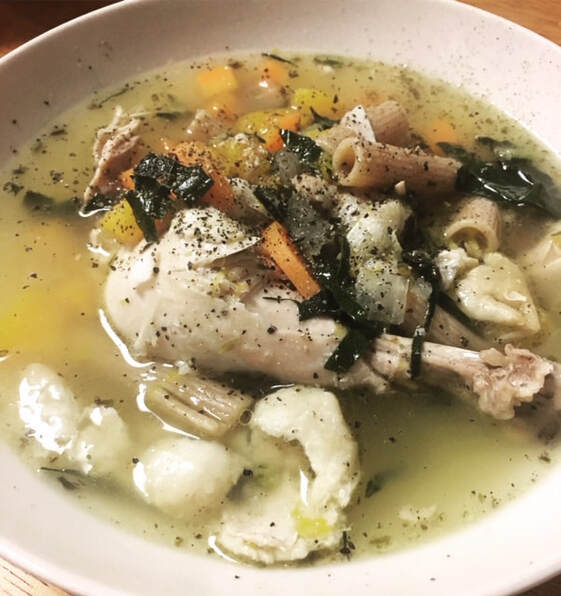 Bone broth in everything! Topical considerations: While healthy, clear skin begins by improving the diet and decreasing inflammation, some topical treatments can be helpful for improving symptoms while your body heals from the inside out. If you have sensitive skin, or if the skin is irritated or broken out in anyway, don’t clean with soap or cleansers. Simply rinse with water and pat dry, which helps keep your body's natural oils in place to act as a barrier for the skin. If you must use soap, try to find one containing tallow as the main fat source for the best moisture barrier. If acne is present, you can use clay masks or occasional gentle scrubs, but only if you see improvement after using them and they don't cause further irritation. For almost any skin condition, a topical probiotic spray or cream can help, by improving the microbiome of the skin. Products like Mother Dirt are great for providing balance to the skin while you consume probiotics in the diet as well. Avoid lotions or creams with any petroleum-based products in them, such as mineral oil. Animal fats are the preferred type of oil for human skin, as we are animals, too! If you need a soothing topical application, consider beef tallow or emu-oil containing balms and salves, which are much more nourishing for the skin than plant-based oils. Vintage Traditions and Texas Tallow are two tallow balm brands I have tried and enjoyed, and Montana Emu Ranch makes really nice emu oil-based products. The only plant oils that I would recommend are cocoa butter or shea butter due to their fatty acid makeup, and products containing jojoba in combination with animal fats will also work well. Other lifestyle factors to consider: Whether increasing inflammation, affecting hormone balance, or influencing the body's natural detoxification processes, there are other health habits that can impact skin health besides diet. Of course, always look at nutrition to start, but also consider these other areas if diet alone does not improve your symptoms, which is a very likely possibility. Other areas to address for better skin include: sleep, stress, sweat, and sun. Here's the basic breakdown for these factors: Sleep: more is better Stress: less is better, of course Sweat: This helps your body detox and decreases inflammation...passive sweating via sauna or active sweating via exercise are both beneficial here Sun: adequate sun exposure not only provides vitamin D for hormone health, but the UV light can actually improve some conditions, such as eczema, and UV light therapy is even used by some dermatologists 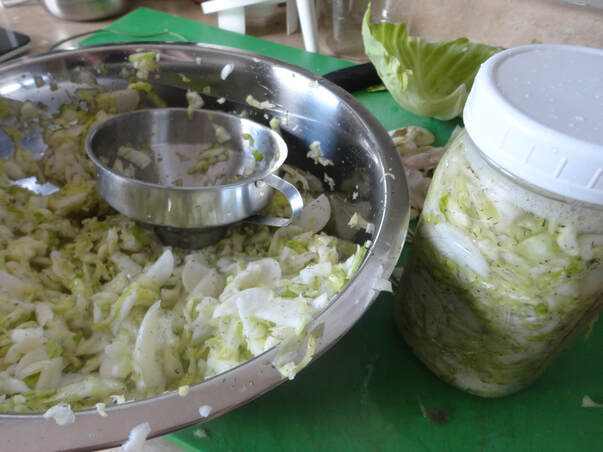 Fermented Vegetables To The Rescue! This may be a lot of information to digest, so I will whittle it down to a list of ten essential foods to include if you are looking to improve your general skin health and appearance, or to address specific conditions. Of course, there are many things to consider, including allergies, environment and other health conditions, as well as the four lifestyle factors mentioned above. But, adding these foods in is a great place to start. I didn't include water here, so just drink more of it, ok?
Top 10 foods for Skin Health: 1. Liver: Eat 3-4 ounces of liver from any pastured animal, once or twice a week to get the nutrients you need. This is basically a multivitamin all by itself. Liver provides vitamin A, B vitamins, vitamin D, zinc and copper, and supports methylation. If you aren't down with liver, consider adding in a freeze-dried liver supplement, such as those made by Ancestral Supplements. 2. Eggs: Eat 2 pastured eggs or just the egg yolks per day. These provide vitamins A and E, B vitamins, arachidonic acid and cholesterol for hormone health. 3. Fatty fish: Just two servings of fatty fish or other seafood will give you plenty of EPA and DHA, essential omega 3 fatty acids. These foods also provide collagen if the skin and bones present, such as in canned sardines or salmon. Fish also provides B vitamins, protein, iodine and selenium for thyroid health. Be sure to get wild-caught instead of farm-raised. If you aren't able to get fish in the diet regularly, consider supplementing with an extra virgin or fermented cod liver oil to provide the omega 3's you might be lacking. 4. Extra virgin olive oil: Real, good quality olive oil is a great source of monounsaturated fat and vitamin E for healthy skin and hormones, and it provides antioxidants such as polyphenols to decrease inflammation. Use it in dressings, dips, sauces and more, but be sure what you're buying is the real deal to actually get the nutritional benefits EVOO offers. Avocado oil is a good substitute, especially if using in a recipe where you want a more neutral-tasting oil. 5. Fermented vegetables: I love and recommend all fermented foods, but for the skin, fermented vegetables like sauerkraut, kim chi, and lacto-fermented pickles give you so much of what you need. Because they are fermented, they are full of probiotics, but are also prebiotic, feeding those good bacteria with their fiber, and they also are a good source of vitamin C for collagen production. 6. Bitter Greens: The bitter compounds in foods, including vegetables like arugula, collards, mustard greens, radicchio, and frisee, promote liver detoxification and digestive health. They are also rich inf fiber for the gut microbiome, and are good sources of magnesium and folate as well. Toss these with some olive oil and lemon, and you have a skin-healing side dish ready to go. 7. Bone broth: What healthy, traditional food list would not include bone broth? It is one of the best sources of collagen for supple, youthful skin, and it is healing for the gut and decreases inflammation. Broth provides glycine for methylation, as well as minerals and B vitamins for hormone health. If you have something going on with your skin you would like to improve, see if adding at least one cup of bone broth (sub meat stock cooked for less time if your gut is super sensitive) per day doesn't start to make improvements. 8. Raw and/or Fermented Dairy (full-fat): Raw milk is superior to pasteurized milk, as its B vitamins and minerals like potassium are undamaged and still intact. Along with B vitamins, raw milk is also a good source of vitamin A and healthy fats for your hormones. Raw or fermented, both forms of dairy will provide gut-healing probiotics as well. For the dairy sensitive, substitute cultured coconut milk, such as yogurt or kefir, or try dairy from animals other than cows, such as sheep or goat instead. 9. Pumpkin Seeds: Pumpkin seeds are rich in fiber for the gut, vitamin E, B vitamins, healthy fats, and are a great source of zinc, all needed for skin health. Any nut or seed, especially when soaked or sprouted, are important to include, but pumpkin seeds are particularly good. If you are allergic to nuts or seeds, oysters are an even better source of zinc; just be sure to include more beans and legumes to get plenty of soluble fiber if nuts are out for you. 10. Beef tallow or Lard: Rendered animal fats are superior to processed industrial seed oils like soybean or canola in so many ways. Seed oils are pro-inflammatory, not something we want for skin health, while tallow and lard are nutrient-dense and unprocessed. These provide arachidonic acid, which is needed to prevent issues like eczema, as well as saturated fat and cholesterol for nutrient absorption and hormone health. Plus, beef tallow is commonly used as a topical remedy, making it great for skin both internally and externally. 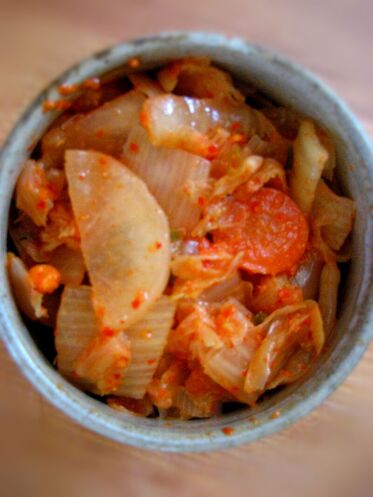 This method for making kim chi starts with soaking the napa cabbage in a salt water brine, then massaging the vegetables, mixing with a chili garlic paste, and packing the vegetables into jars to ferment. I was inspired by the book Fermented Vegetables by Kirsten and Christoper Schokey for this method, then put my own twist on it to taste. This essentially combines the dry salt method in making sauerkraut with the brine method used for making pickled vegetables, in that you do make and use a brine, but most of it is drained off before massaging the cabbage and packing it into jars. This is certainly not the most authentic kim chi recipe out there, but it is super delicious, still full of probiotics, and is easy to both obtain ingredients for and to put together, especially for beginners to fermentation or specifically to kim chi. The bright red color for kim chi is known comes from a special type of Korean chili flake called gochugaru. You can find these in specialty stores, Korean markets, health food stores or online, but do try to use this if you can both for color and flavor. They aren't as hot as crushed red pepper flakes, and they add a bright, fruity flavor as well. You can increase the heat here to taste by adding fresh or dried hot peppers if you like. Be sure to massage and pack using food safe gloves to prevent burning your hands if you can find some. I use fish sauce, usually Red Boat brand, in my recipe, but feel free to omit it or substitute shrimp paste instead. Adjust the fermentation time to your taste preference. I suggest 2 weeks here, but if you like a milder flavor, let it sit for less time. Once fermented to your liking, transfer to the fridge, where it will keep for up to a year. 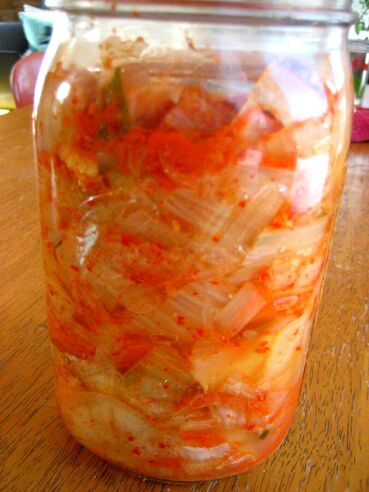 Kim Chi with Napa Cabbage
Makes 2 1/2 quarts 1 large head napa cabbage, cleaned and halved Brine: 1 cup salt to 1 gallon filtered water; will need about ½ gallon here 2 medium daikon, thinly-sliced 4 medium carrots, thinly-sliced 1 bunch scallions, sliced 4" ginger, coarsely chopped 6-8 cloves garlic, chopped 1 hot pepper, sliced 1 Tbs Korean chili powder (gochugaru) or 1 1/2 tsp crushed red pepper 2 tsp fish sauce Dissolve salt in warm water to make brine. Place cabbage in a large mixing bowl. Completely cover with the prepared brine and place a plate on top to keep the cabbage fully submerged. Let this sit at least 4 hours or up to overnight in the brine at room temperature. The cabbage will begin soaking up the brine during this time, which is why no more salt is added to the recipe for fermenting. Remove cabbage from the brine, draining in a colander. Save the brine aside for later. Chop cabbage as coarsely or finely as you like (I prefer bigger chunks, but either way is fine) and add to a large mixing bowl. Mix in sliced daikon, carrots and scallions. Massage well to begin softening the vegetables, about 5 minutes. In a blender, combine the garlic, ginger, hot peppers, chili flakes/powder and 1 cup reserved brine. Puree until well-mixed, creating a thick paste. Mix into vegetables with gloved hands. Pack the vegetable mixture into jars or a ceramic crock, pressing vegetables down until all air is remove and the brine rises above them in a solid layer. Place a weight on top of the vegetables to keep submerged during fermentation. Cover with a lid, screwed on not too tightly if using jars, and let sit at room temperature for 5 days, up to 2 weeks. Transfer to the fridge when fermentation is complete, where this will keep for up to 1 year. 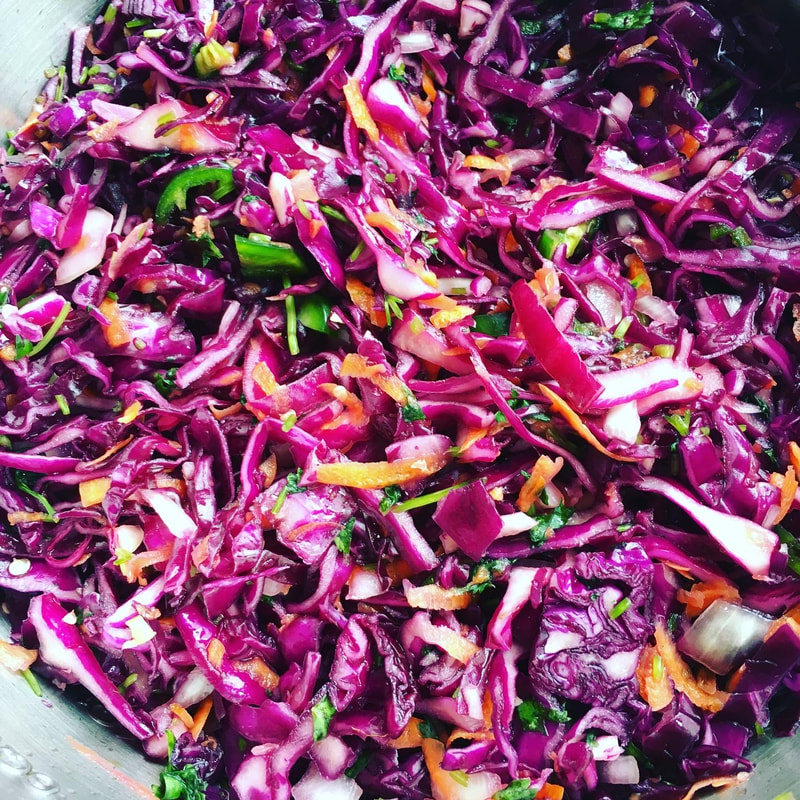 Curtido is a fermented cabbage slaw in the style of sauerkraut, but hailing from El Salvador rather than Europe. I love that so many traditional foodways included different forms of fermented cabbage...not only does it unite us, but they are all so tasty and easy to make! Besides the typical shredded cabbage, this ferment also contains lime, jalapeno, carrots, onion, garlic, cilantro, and oregano. This delicious blend of herbs and veggies add acidity, heat, and texture to the usual cabbage-based kraut, while still providing lots of probiotics and prebiotics to help improve the microbiome. Traditionally, curtido is served on pupusas, thick masa tortillas stuffed with meat and/or cheese. It is also wonderful on tacos or other Central American-inspired dishes, scrambled eggs, mixed in with salsa or sour cream for a chip dip, grilled meats, or salads. As always, this ferment is also perfect eaten straight out of the jar. Feel free to decrease or increase the amount of hot pepper or use a different pepper besides the jalapeno, depending on how much heat you like or what peppers you have on hand. I always use red cabbage for my curtido, but green cabbage will work just as well here. Once fermented, curtido will keep for about one year in the fridge, so you can make a big batch and eat it over several months. Curtido (Salvadoran-Style Sauerkraut) Makes about 3 quarts 1 large head red or green cabbage, shredded (about 3 lbs) *Save outer leaf aside, keeping whole to act as a carrier 1 large red onion, small diced 3 large or 6 small carrots, grated (about 1 lb) 6-8 cloves garlic, minced 1-3 jalapeno pepper, sliced (seeds removed to reduce heat if preferred) 1 bunch cilantro, stems included, minced Zest and juice of 1 lime 1 1/2 Tbs dried oregano 3-6 tsp fine sea salt, based on weight of vegetables Equipment needed: 3 quart-sized glass jars with plastic/non-reactive lids or 1 gallon ceramic crock Fermentation weights for each vessel, optional Cutting board and knife Canning funnel Wooden spoon or "kraut pounder" for packing jars Kitchen scale and measuring spoons 1. Place a large mixing bowl on a kitchen scale and tare to zero. 2. Place the shredded cabbage, onion, carrots, garlic, peppers, cilantro, lime, and oregano in the bowl. Stir to combine. 3. Add the sea salt, the amount depending on the weight of the vegetable mixture. Use 1 tsp sea salt per pound of vegetables; this should use about 2 Tbs of salt, but adjust to the exact amount you have. 4. Massage the salt into the vegetables, squeezing them to break the cell walls and release their stored water. I recommend wearing food-safe kitchen gloves for this, due to the hot peppers. If these are unavailable, follow the next step omitting the pepper, then add it after massaging to protect your hands. This softens them and allows them to be packed more tightly into jars for fermentation. This step may take up to 10 minutes; alternately, you can let the salted cabbage sit on the counter for a few hours to start to soften. This will help to minimize the amount of time spent massaging the cabbage. The vegetables are ready to pack into jars if you can easily squeeze liquid from them and the volume has reduced by about half. 5. Now we pack the salted, massaged veggies into jars or a crock for fermentation. I use 3 quart-sized jars for this recipe, but a ceramic crock will also work. For either method, fill your vessel with vegetables to the top, then use a wooden spoon or "kraut pounder" to pack the mixture tightly into the jar. This removes air bubbles and allows the brine to rise above the vegetables, keeping the fermentation anaerobic. Continue this process until your jar is filled to its "shoulders," where it begins to curve toward the mouth of the jar. Do not fill all the way to the top, or it will overflow as it expands during fermentation. 6. Press the vegetables down until a layer of brine rises to the top. Place the saved whole cabbage leaf over the top to keep smaller pieces of vegetables from floating and possibly molding. Put a fermentation weight, if using, on top of this, which helps to keep the vegetables submerged in the brine throughout the fermentation process, also preventing molding and promoting anaerobic fermentation. Cover with a non-reactive (such as plastic) lid, not screwed on too tightly. Repeat with two more jars, or until all of the vegetables are packed and ready to ferment. 7. Let sit at room temperature for 5-14 days to ferment. It is "ready" when it has fermented to your liking. It will become more sour and "fermented" tasting the longer you let it sit, so adjust the time to your taste preferences. I find the sweet spot to be 14 days for taste and probiotic content, with an ambient temperature of about 68 degrees. It will ferment more quickly the warmer your kitchen, so keep this in mind when fermenting. There is no right number of days for fermentation, it is ready when you are; taste it after a week or so and see if you like it as is or want to ferment longer. Some people let it go up to 21 days, but 14 days is about where I usually stop the fermentation process. 8. Remove the weight and transfer to the fridge, where it will keep for about one year. 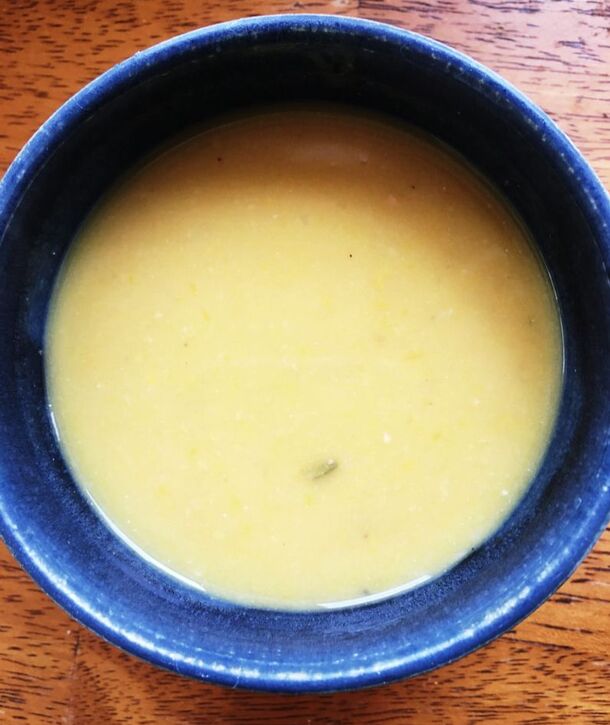 Soup season is in full swing here in Southwest Wisconsin. While I typically prefer a hearty, meaty stew, sometimes you want a smooth and creamy soup instead. This pureed soup combines collagen-rich bone broth with sweet winter squash, lentils, and the tangy, creamy flavors of goat cheese and sour cream. Packed with vitamins, minerals collagen, fiber, and amino acids, this is extremely nutrient-dense as well. This soup can become a main dish paired with some crusty sourdough bread and butter, or serve as a side to a grilled cheese sandwich or big salad. If you already have lentils soaked and some prepared bone broth on hand, this makes a great weeknight dinner. If not, this is an easy meal to prep for a day ahead of time. Simply soak the lentils and cook the bone broth the day before you want to make this, and it will come together easily when you're ready to cook. The result is a pureed soup that is creamy, filling and comforting that the whole family will love. I puree my soup using an immersion blender, but you could serve this as a chunky soup if you prefer something with a bit more texture or don't have an immersion blender. Winter Squash Soup with Lentils and Chevre
Serves 6-8 2 Tbs butter or other cooking fat such as duck or beef fat 1 medium yellow onion, diced 3-4 cloves garlic, minced 3 lbs winter squash such as delicata, butternut or buttercup; peeled, seeded and diced 2 quarts bone broth (chicken or beef would work great) 1 sprig fresh rosemary 2 cups lentils, soaked 12-24 hours before cooking 1 tsp sea salt Black pepper, to taste 8 ounces chevre goat cheese 1/2 cup sour cream or full-fat Greek yogurt In a medium stock pot, heat the butter or cooking fat. Once melted and hot, add the onion to the pan and saute for 5-10 minutes until cooked down and becoming golden brown. Add the garlic and winter squash, cooking for another 5 minutes to begin to soften the squash. Add the bone broth, rosemary, lentils, salt and a bit of pepper to the pot. Bring to a boil, then cover and reduce to low. Let simmer for about 30 minutes, until the squash and lentils are cooked thoroughly and are very soft. Stir regularly to prevent sticking during the cook time, adding extra water or broth if needed. Stir in the chevre and sour cream until melted in, about 2-3 minutes. Carefully blend using an immersion blender* until smooth and creamy. Season with salt and pepper to taste before serving. *If you don't have an immersion blender, I don't recommend trying to blend hot soup with a regular blender, as this can cause burns. In this case, either serve as a chunky soup or let the soup cool and puree using a standard blender, perhaps making this a day ahead of time. Then, reheat the pureed soup before serving and dinner is ready to go. Transfer any leftovers to the fridge, where they will keep for approximately 5 days. |

Brine & Broth
I am a gut health-focused nutritionist and online health coach based in Southwest Wisconsin. My recipes and philosophies center around traditional, nutrient-dense foods that support robust gut health. Archives
May 2022
Categories |
 RSS Feed
