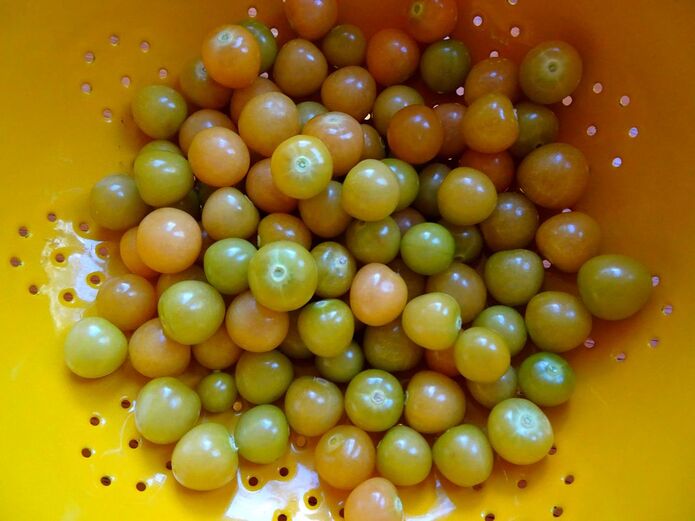
 By far my favorite thing we grow in our garden are ground cherries. Also called cape gooseberry or husk cherry, are in the same family as tomatillos, and similarly have a husk encasing them as they grow. Once they are ripe, the ground cherries turn from light green to a rich yellow color. They will typically fall off of the vine and the husk will appear dry, being very easy to remove, much like a tomatillo. Unlike the tomatillo, ground cherries are quite sweet and are perfect for turning into preserves or pie filling. While they are mostly sweet, these little nuggets of flavor have a bit of a savory quality to them, lending them well to roasting and adding to salsa, chutney or other savory sauces. They have a sweet flavor that, to me, tastes like vanilla, and they are wonderful either eaten raw as-is, or cooked and used in various dishes. I add a bit of vanilla to my preserves to complement those vanilla notes and I often add a bit of ginger as well for something different. 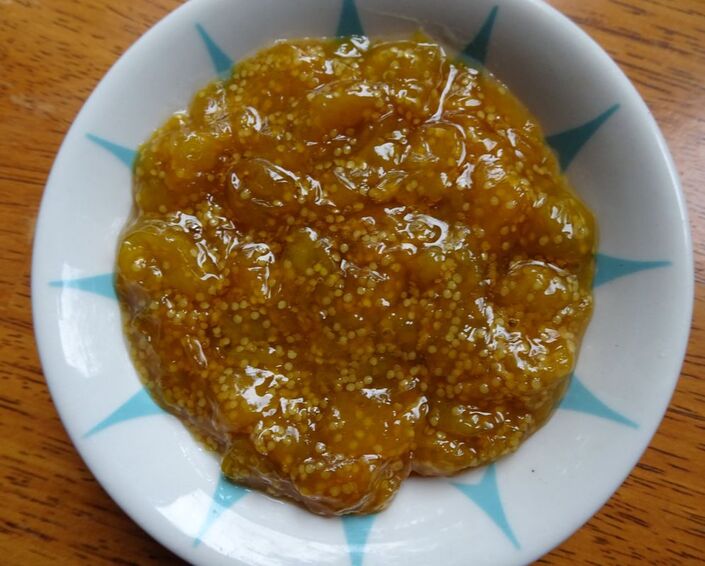 This recipe makes just 1 1/2 pints, but can easily be multiplied if you have an overload of ground cherries from your garden or farmer's market haul. If you do double or triple this and want longer-term storage, I recommend turning this into freezer jam. I don't have instructions on canning for this recipe, so freezing it is the safest bet if you make more than you can use in a couple of weeks. 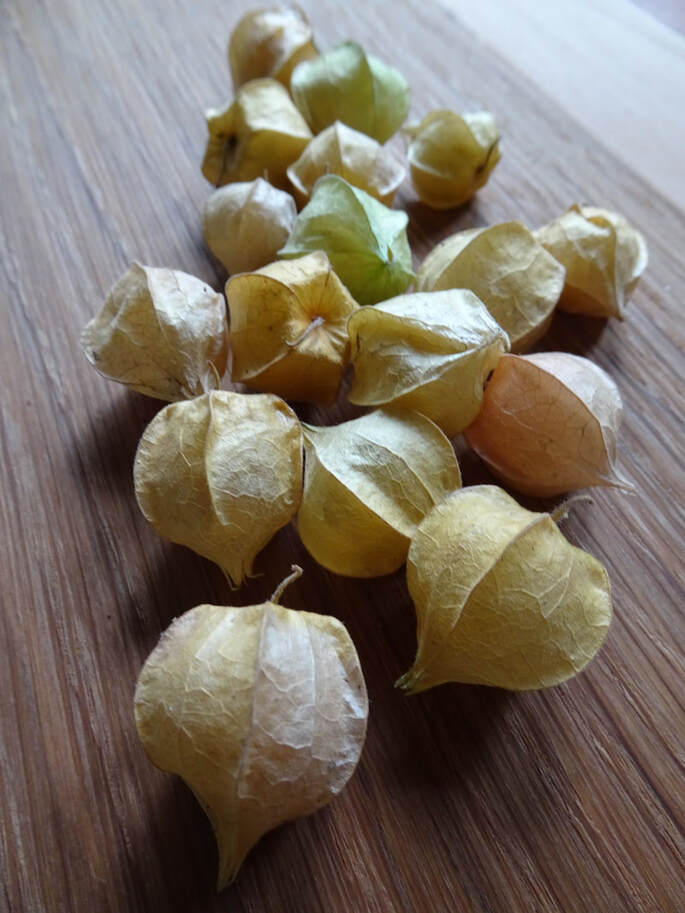 Ground Cherry Preserves with Vanilla Makes 1 1/2 pints 4 cups de-husked ground cherries 1/3 cup sugar/sweetener of your choice 1/2 cup water 1/2 tsp sea salt 1 tsp vanilla extract 1 Tbs lemon juice Optional add-in: 1" fresh ginger, finely minced or 1/4 cup chopped crystallized ginger Directions: 1. Remove the husks from the ground cherries and rinse them to remove any dirt. 2. Place in a medium sauce pan and add the sugar, water and salt in the pan as well. If using ginger, add at this time. Turn to medium heat and bring to a boil. 3. Reduce the heat to low and let simmer until cooked down to about half of the original volume and the mixture becomes quite thick and jam-like. This should take about 30 minutes or so. While it simmers, stir frequently to prevent sticking or burning, and to help the ground cherries burst as they cook to release their stored juices. 4. Remove from the heat once thickened and stir in the vanilla and lemon juice. Let cool to room temperature before transferring to glass or other storage jars. 5. Refrigerate or freeze as desired. This will keep for 2-3 weeks in the fridge or several months in the freezer. 
0 Comments
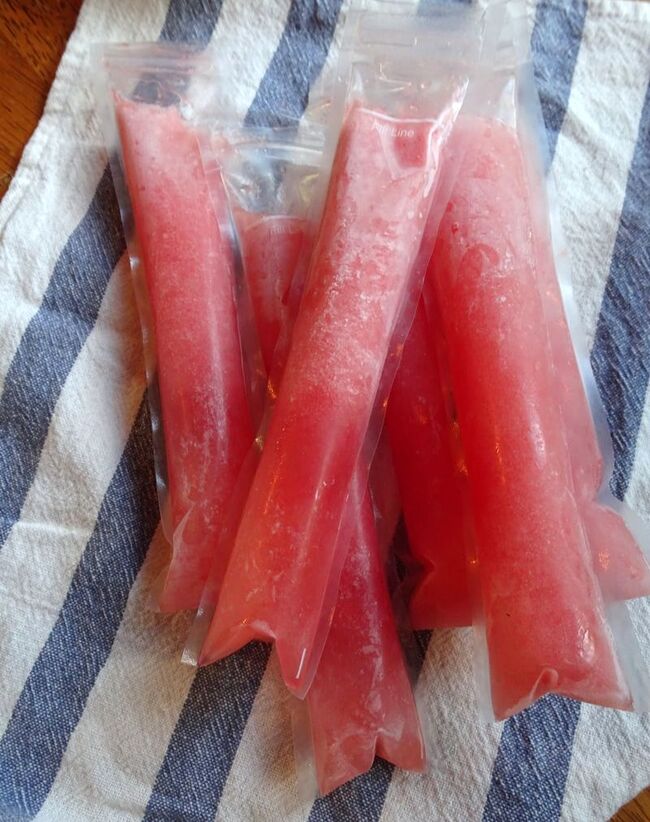 Is there anything better than coming in from swimming or playing outside in the summer and cooling off with a popsicle? Well, that certainly has been our jam in the last few weeks, and I have been loving it--swimming and popsicles may be the only things keeping me sane in the heat, to be honest. Of course, we are not going to buy those store-bought freezy pops full of corn syrup and food coloring (the ones I loved as a kid), but instead, I made a healthy version at home to satisfy our popsicle cravings. The idea for the Watermelon Lemonade version of these homemade popsicles was a collaboration between the kiddo and myself (she was very proud!), and turned out not only to be delicious, but a super-hydrating recipe that is full of electrolytes in addition to delicious flavor. The watermelon provides potassium and the sea salt offers a bit of sodium, both helping to replenish us after sweating in the hot sun. If you use coconut water in lieu of water here, it adds even more electrolytes, including some magnesium as well. I bought these DIY Flav-R-Ice/Otter Pop/ice pop bags online ( I got the Zipzicle brand), which are essentially long, skinny zip-top bags that you fill and freeze. I thought they were so cool, I just had to try them. These were so easy to use and made me reminisce about eating the neon-colored ones in my childhood, earning them bonus points. You should certainly try this recipe, but you can also fill these homemade popsicle molds with so many other combinations, such as pureed fruit and yogurt, other fruit/citrus combos like I made here, or even straight up coconut water, which turned out amazing! I may have to try some adult popsicles, too, with some iced coffee or cocktail versions...stay tuned for that!  This was so nice to have something homemade and healthy as a summertime treat, but was also great as a project to make with the kiddo. She even wanted to make a recipe card of our collaboration, which is about as sweet as can be! If your family is looking for a little project, I highly recommend giving this recipe a try--they will love to fill the little bags and see them change as they freeze over a few hours! Stay cool and hydrated, have fun, keep boredom at bay...what's not to love? If you don't want to buy these ice pop-type of baggies, you can still totally make this recipe, just use any popsicle mold that you like. They also make silicone reusable versions of these ice pop molds if you prefer, although we washed and reused these zip-top versions a few times with no issues. Most popsicle molds hold much more volume, however, so you may want to double the recipe to make an entire batch if using a different type. Heck, you may want to double the recipe anyway, since these are likely to be eaten up quickly!  Healthy Watermelon-Lemonade Popsicles
Makes 6 Flav-R-Ice/Otter Pop-style popsicles Ingredients: Juice of 1 lemon 2 Tbs raw honey 1/2 cup water or coconut water 3 cups diced watermelon 1 big pinch of sea salt Optional: a few sprigs of fresh mint or basil Directions: Place all ingredients in a blender and puree until smooth. Pour into popsicle bags or molds up to the fill line. Be careful not to overfill, as the liquid expands as it freezes and can make the bag burst if overfilled (free science lesson involved!!). I used a small funnel to fill my bags, which made it a much easier, neater process, but is probably not a deal-breaker if you don't own one that fits in the bags. Put into the freezer, letting them sit upright as they freeze, for about 3 hours or until they are completely frozen. Then, enjoy and be thankful it's summer! 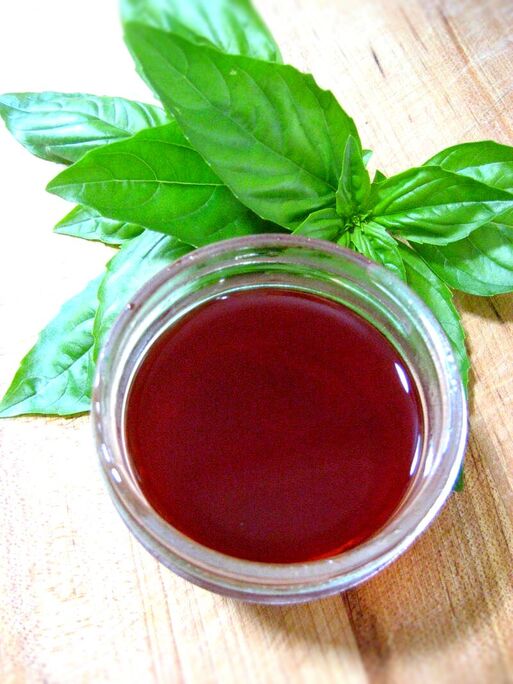 Some of my favorite flavors from summer are strawberry and basil, and these come together beautifully in this Strawberry-Basil Shrub. A shrub is a lightly fermented syrup that is commonly used in cocktails as a mixer. Also known as a "drinking vinegar," shrub is made my making a fruit-and-sugar syrup (some do this by cooking it down, but I make mine with a short fermentation) added to vinegar to make a sweet and tart elixir full of flavor. Shrubs are to be used as a concentrate rather than to be sipped on their own, which is why they are perfect for cocktails to add a pop of acidity and sweetness. For the non-drinkers out there, shrubs also go great splashed into sparkling water or added into a mocktail recipe. 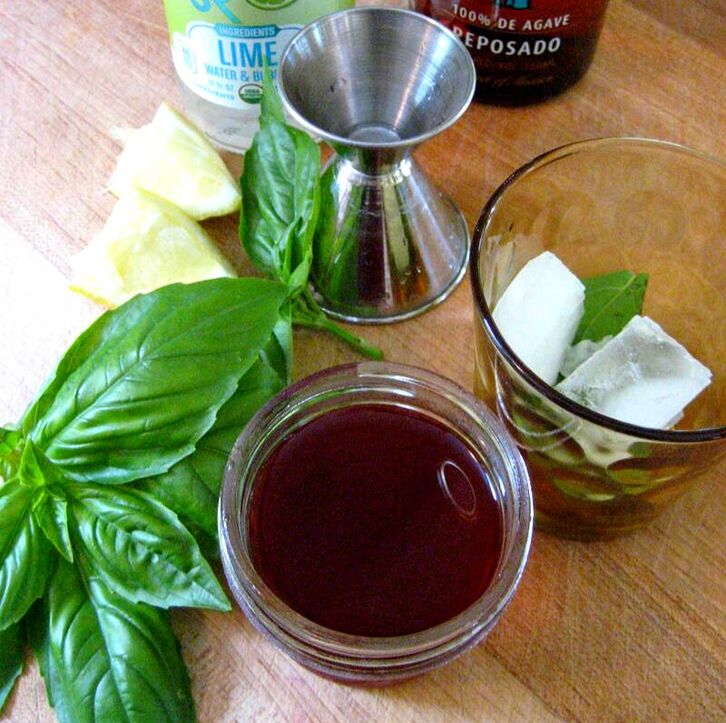 Shrubs can be made with any fruit, and I have made a tasty Rhubarb Shrub in the past that is a favorite around here, but you could use the same method with whatever fruit you have on hand. I love to make shrubs when I have some fruit that needs to be used up and is past its prime, but is still perfectly find to use. Other combinations I have made are pineapple-thyme, cranberry-ginger, raspberry, and apple spice. Since it summer is in full swing, I recommend blending herbs and berries to make the most refreshing mixer the season has to offer! Our garden gave us some beautiful strawberries and lots of fragrant basil, so this shrub was a no-brainer. 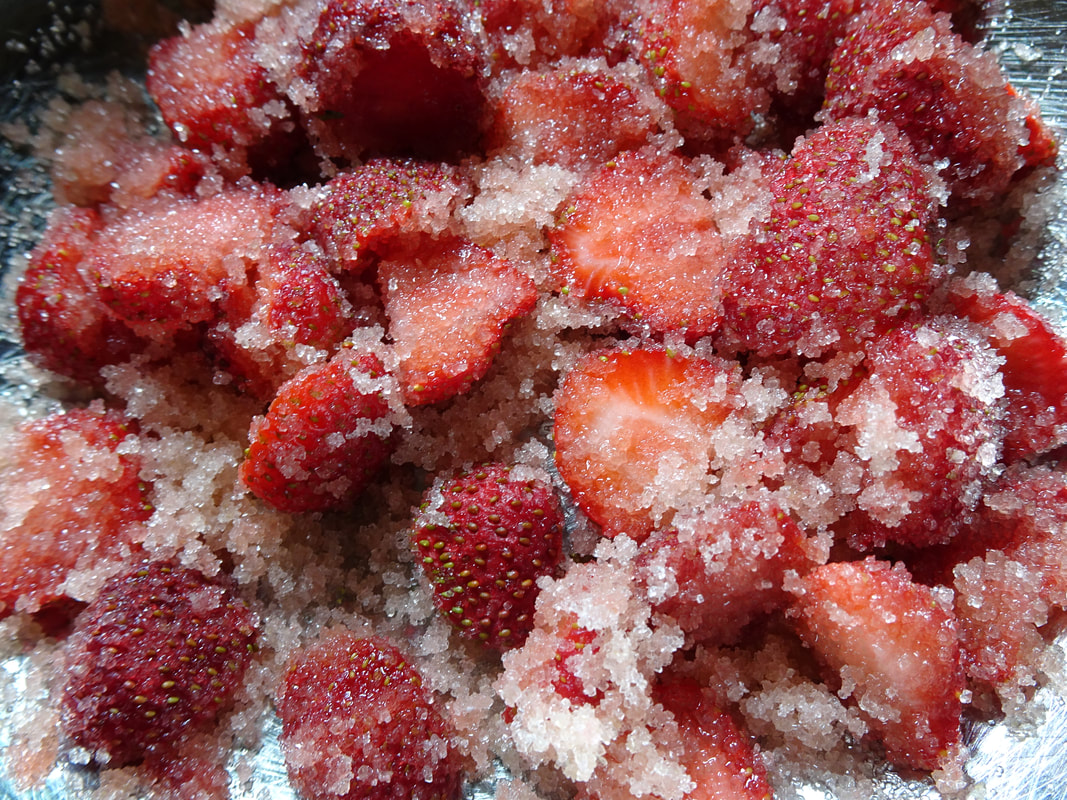 Strawberry-Basil Shrub Makes 2-3 cups 1 quart strawberries, sliced (about 4 cups) 2 cups unrefined cane sugar 1 cup white wine vinegar (approximate) 1 cup red wine vinegar (approximate) 1/2 cup fresh basil, roughly chopped and packed Directions: 1. Combine sliced strawberries and sugar in a mixing bowl. Stir well to coat the strawberries with the sugar. Cover the bowl with a cloth to allow air flow. 2. Let this mixture sit at room temperature for 3-5 days, stirring once or twice a day to dissolve the sugar and keep the berries submerged in liquid. Check for mold when you stir as well. 3. The fruit mixture will be ready once it shows early signs of fermentation. It should begin to bubble and start to have a lightly fermented, acidic smell. Be sure to not let this over-ferment, or it can become quite boozy and lose a lot of the flavor you want in your shrub. The fermentation may only take a couple of days if your kitchen is quite warm, or a few extra if you keep it cooler. 4. Strain the macerated and fermented strawberries through a fine mesh strainer, pressing to get out as much juice as possible. Measure this liquid, then transfer it to a glass storage jar. 5. Add the basil to the strawberry juice. Add the vinegar in the amount equal to the volume of the strained juice, half white and half red wine vinegar. You should get about 2 cups of juice from this, so you would then add 2 cups of vinegar total, with 1 cup each of the two types of vinegar. 6. Stir the mixture well and let sit, covered with a lid, at room temperature 2-3 more days to infuse with the basil. Strain and transfer to a glass storage jar. Refrigerate before serving. 7. This will keep for about 6 months in the fridge. Serve 1-2 ounces of shrub in with your favorite cocktails, mocktails, sparkling water or even iced tea. 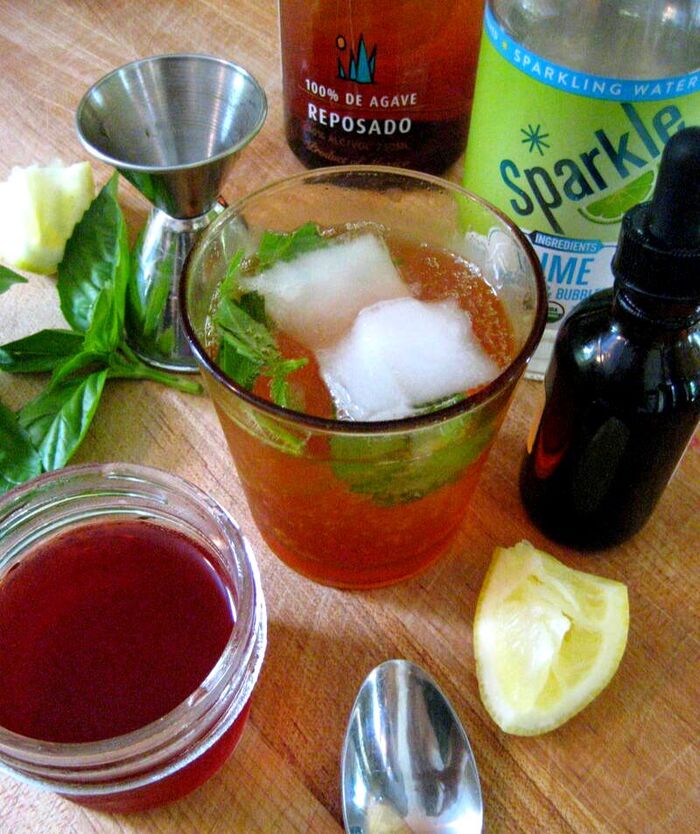 Sweet Summertime Strawberry-Basil Cocktail
Serves 2 2 Tbs fresh basil 2 ounces Strawberry Basil Shrub 4 ounces (2 shots) tequila 12 ounces sparkling water (can be mineral water or your favorite fizzy water brand...we use locally-produced Sparkle in the lemon or lime flavor but use your favorite flavored or plain mineral water) 6-8 drops Bitters Ice cubes Lemon wedge Pinch of salt (I like to use a nice flaky sea salt here) Divide the fresh basil between the two cocktail glasses. Crush lightly with a muddler or wooden spoon to release its flavorful volatile oils. Add ice cubes to the glasses. Combine the shrub, tequila, sparkling water and bitters in a pitcher or mason jar and stir well. Pour the cocktails into the glasses over the ice, dividing evenly. Add a squeeze of fresh lemon, a pinch of chunky sea salt, and serve. 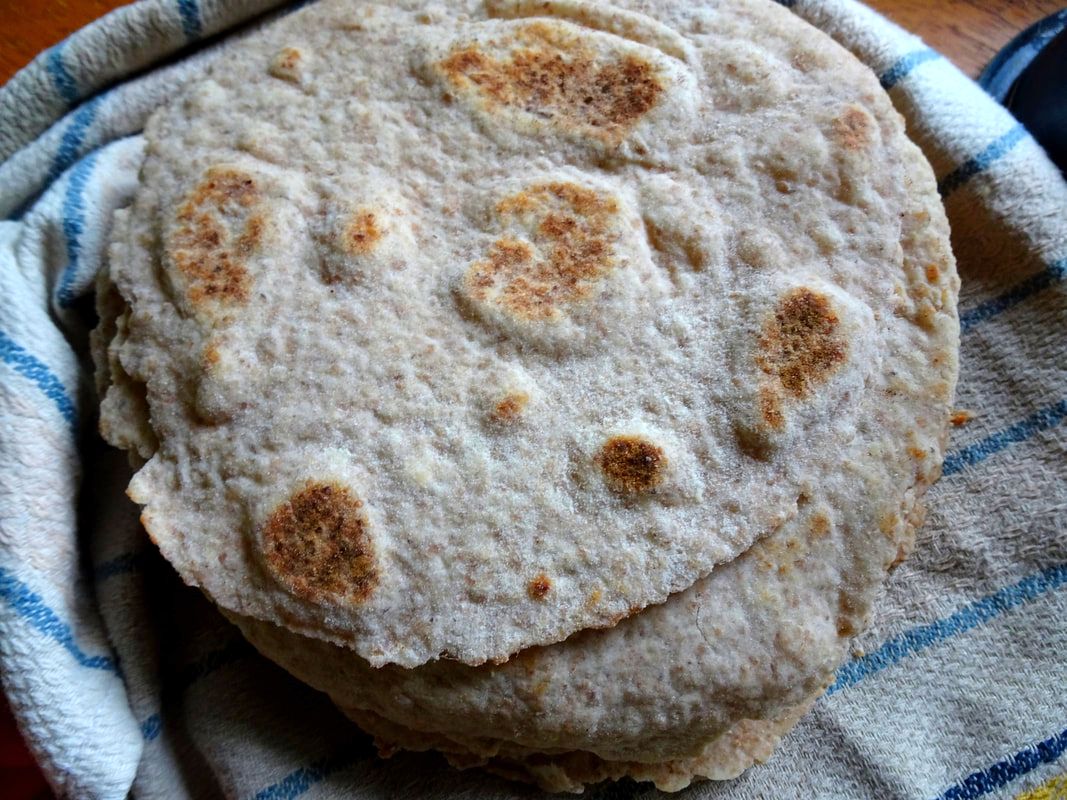 Spending lots of time at home continues, as does more and more bread baking--hopefully sourdough bread! I did a previous post a while back on ways to use extra sourdough starer, by making sourdough pancakes, and I hope that you get to make lots of these tasty cakes topped with your favorite summer berries right about now. But if you are looking for more recipes to use your sourdough discard and, even better, a way to get your sourdough fix without turning on your oven in the summer heat, then this recipe is perfect. I absolutely love flour tortillas and, though we usually make corn tortillas for our go-to taco shell, sometimes a soft and chewy flour tortilla is what you want. Much like so many other foods we love, the store-bought versions of tortillas tend to be sub-par, both in quality and ingredients, so I usually like to make my own. While corn tortillas may make a faster weeknight dinner, flour tortillas could be the perfect weekend cooking project. You could throw together a Sunday morning breakfast burrito bar or just make up a double batch to eat throughout the week. To be sure, the extra time and effort with fermentation and rolling is so worth it. I played around with a few versions of sourdough tortillas, tweaking until I found one we loved. If you are interested, my version is adapted from recipes on the Ashley Marie Farm and Bakery and Butter for All blogs....both of those are amazing, so go check them out! In this version of homemade flour tortillas, you get the benefits of whole wheat, full of fiber and minerals like zinc and magnesium, along with the benefits of naturally-fermented grains by making these using sourdough starter. The addition of sourdough allows fermentation of the wheat for improved nutrient bioavailability and digestibility. I do toss in some unbleached white or high extraction flour to lighten these up, making them less dense and keeping a bit of that nostalgic tortilla flavor I dream of, but feel free to use all whole wheat here (or all white if you are feeling wild). The other ingredient that really makes these tortillas stand apart from pre-made versions is the use of lard as the fat in the recipe, while commercial flour tortillas will use refined, processed oils such as soybean or canola. Lard provides a flaky texture that crisps up nicely when griddle-cooked (think the best quesadillas ever), plus it adds awesome flavor and a healthy fat profile. It is traditional to use lard in flour tortillas, but so many people have gone away from using this amazing animal fat in their cooking that real tortillas can be hard to find these days. If you haven't used lard in your cooking, this is a great recipe to start with. Check this post out that I wrote for the Mother Earth News blog to learn how to render your own lard at home! In addition to the lard, I added in a bit of avocado oil as well, as the liquid oil lends flexibility in the tortillas. I tried some versions with all lard but they were so ricj and flaky that they bordered on pastry-like (which was delicious, I must say). This meant they weren't as pliable as I wanted, so I swapped out a bit of lard for avocado oil; you could use other liquid oil such as olive oil, but I like the high heat tolerance of avocado oil and its neutral flavor, letting the freshly ground wheat and home-rendered lard flavors shine.  Home-rendered lard for the tortillas...this batch was made from lamb Once you make these tasty wrappers, you can fill with whatever you like. Flour tortillas wrapped in shredded pork or sliced steak along with sauteed onions and peppers make a superb fajita, or fill with beans and cheese for a throwback burrito. My favorite has got to be soft scrambled eggs, bacon, cheese, and avocado for a killer breakfast burrito or taco, but I am sure you will find your favorite after you make these enough times! Sourdough Whole Wheat Tortillas with Lard
Makes 12 burritos-sized or 18 taco-sized tortillas--feel free to double or triple for a mega tortilla batch! 1/2 cup bubbly, active sourdough starter 2 cups whole wheat flour 1 cup unbleached white flour or high-extraction flour 1 1/2 tsp sea salt 1/2 cup lard 2 Tbs avocado oil 1/2 cup warm water (around 80 degrees F) The evening before you plan to make your tortillas (or 6-8 hours prior to making them), feed your sourdough starter so that is active and ready to use in the morning. To make your tortillas, combine the flours and sea salt in a mixing bowl and stir well to combine. Cut in the cold lard, similarly to making a pie crust, using a fork or pastry cutter to combine the lard with the flour to create a wet sand-like texture. Be careful not to over-mix here. Add in the active starter, avocado oil and warm water, and stir to combine. You will have a dough that is sticky and quite wet, but it will get less sticky as it ferments. Mix well to create a smooth dough, but do not knead the dough, as you want the end result to not be tough or chewy. Place in a bowl and cover with a cloth. Let sit at room temperature for at least 8 hours, up to 12 hours. Cover the bowl with a lid and transfer the fermented dough to the fridge to cold ferment overnight, or at least 4-6 hours. To cook the tortillas, remove from the fridge and divide into either 12 or 18 evenly-sized pieces, depending on how big you would like your tortillas to be. Roll each piece of dough into a ball and set aside. Preheat your cast iron skillet over medium-high heat. Prepare each tortilla for cooking by generously flouring your surface and rolling out a dough ball into a circle, about 1/8" thickness. Cook in the preheated skillet for 30-60 seconds per side. It should have some nice bubbles and a bit of browning when it is done cooking. Remove from the skillet and repeat with the rest of the tortillas. I like to roll one out while the other cooks, speeding up the process quite a bit. If you plan to serve these right away, keep warm by wrapping in a tea towel or store in a tortilla warmer until ready to serve. To store, keep in an airtight bag in the fridge, where they will stay fresh for up to a week. You can also make a larger batch and store in the freezer for longer-term storage, up to a few months. Make Your Own Soaked Granola for a Delicious, Nutrient-Dense Breakfast Your Whole Family Will Love!6/27/2020 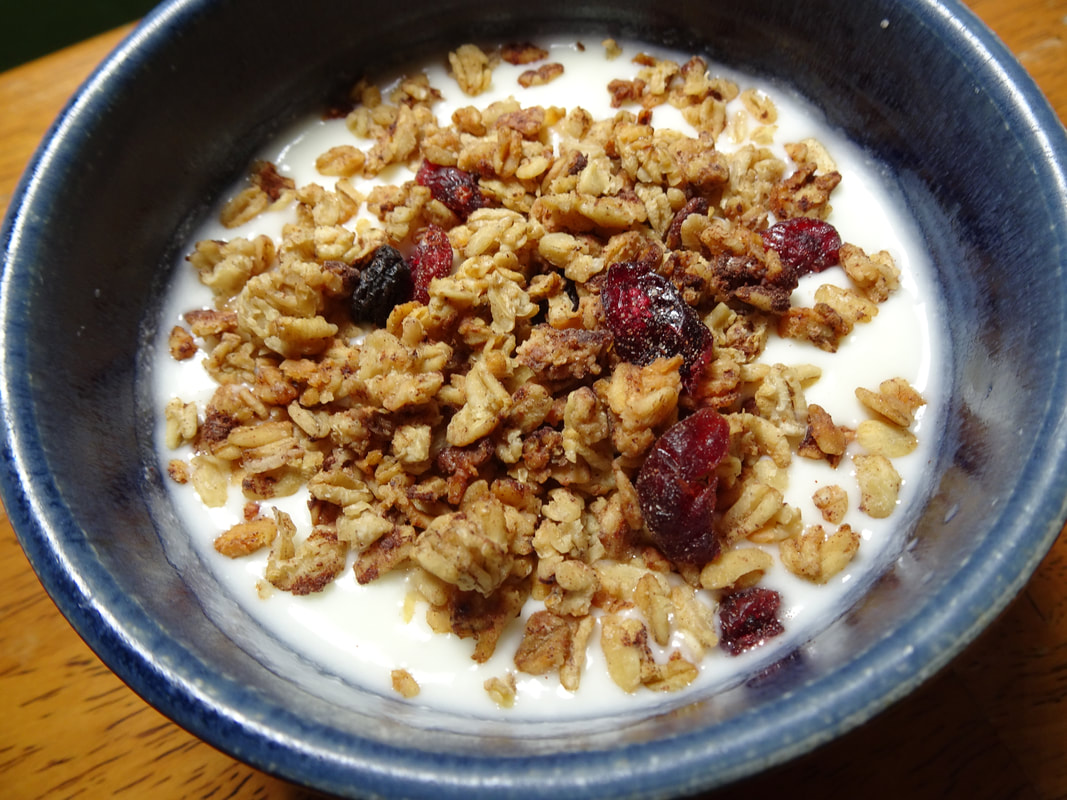 When you follow a real food diet, it can sometimes be tough to find variety in your breakfast options, especially for those that are needing something quick and easy. Sure, eggs, sourdough toast, and bacon are all healthy and delicious breakfast foods, but sometimes you just want something different. Unfortunately, the vast majority of ready-to-eat items available at the grocery store (even health food stores!) are highly processed and do not fit into a traditional foods diet. Foods like cereal and granola are typically not welcome in our house, as they are made with refined grains and contain a lot of added sugars. My solution: I make our own homemade granola to have on hand for a quick breakfast or snack, and it has been a huge hit. The difference between this granola and the store-bought version is that this is made using soaked grains and is sweetened with just a bit of maple syrup, unlike the pre-made types that can be loaded with sugar and refined oils. I also soak the nuts in the granola before toasting them, which provides the same health benefits as soaking the oats. I use raisins, dried cranberries, and walnuts in this recipe, but feel free to use whatever dried fruits and nuts you like or have on hand. 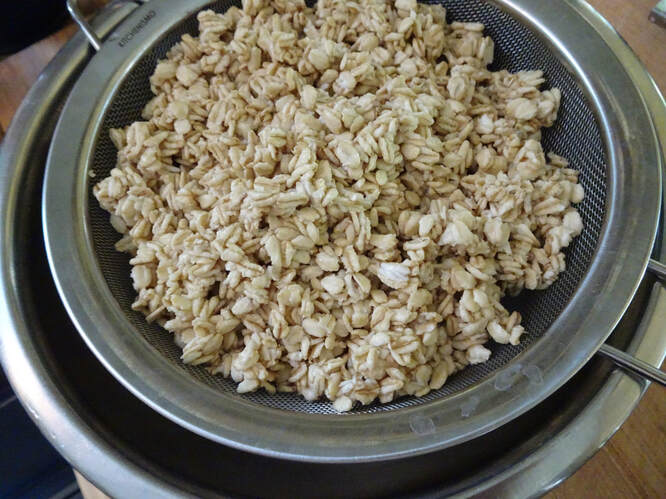 When grains and nuts are prepared through soaking, just as in sprouting or souring, their content of anti-nutrients, such as phytates and lectins, are decreased significantly. These traditional preparation methods make the grains easier to digest and their minerals more available to the body. Oats can be a nutrient-dense food when prepared this way, and I soak them before turning into this tasty granola or even soak overnight before making oatmeal. When Weston A. Price traveled to Scotland to study their traditional diets, he found they ate a great deal of oats that were properly prepared, both in sweet and savory dishes, and the people there enjoyed extremely robust health. I like to include them in our diet because of their high content of soluble fiber, which feeds the beneficial bacteria in the gut, acting as a prebiotic. They are also delicious and everyone in our house loves to have them every once in a while to mix up our breakfast options.  I omitted the coconut in this batch, as it is one of the only foods my husband dislikes (nuts, huh?!)...you can totally make this your own! This recipe can be intimidating because of the extra steps with soaking and such, but it really comes together easily and I encourage you to give it a shot. Many of the ingredients can be prepped while the oats bake, so it actually takes less time than it seems!
Serve this on homemade yogurt, kefir or raw milk (I like to mix it up with my dairy options), or eat it as-is for a quick, crunchy snack. If you have a lot of mouths to feed, go ahead and double this recipe to have extra on hand. Homemade Soaked Granola Makes about 6 cups 3 cups rolled oats (not quick oats) 1 Tbs yogurt or kefir 1/2 tsp sea salt Water to cover 1 cup walnuts (can sub any nut or seed you like) Pinch of sea salt 1 tsp apple cider vinegar Water to cover 3 Tbs coconut oil 3 Tbs maple syrup 1 tsp sea salt 1 Tbs cinnamon powder 1/2 cup each raisins and dried cranberries (or 1 cup dried fruit of your choice, such as chopped figs or dates) 1 cup shredded, unsweetened coconut 1. The night before (or 8-12 hours) you plan to make your granola, soak your oats. To soak, place the oats, yogurt, and salt in a medium bowl. Add enough water to cover with a few extra inches to allow for the oats to expand. Cover with a cloth and let sit at room temperature. 2. Just like the oats, the nuts need to be soaked prior to cooking as well. Place the nuts in a small bowl or jar with the salt and apple cider vinegar. Cover with water and let sit for 8-12 hours (or more) on the counter. 3. When you are ready to make your granola, preheat the oven to 325 F. Line a baking sheet with parchment paper and set aside. 4. Drain the oats through a mesh strainer and let them sit to strain for up to 30 minutes, allowing them to drain off as much water as possible. 5. Mix the drained oats with the coconut oil, maple syrup, salt, and cinnamon, then spread on the baking sheet. Bake for about 90 minutes, stirring occasionally, until the oats are crunchy and the moisture has all baked off. 6. While the oats bake, drain the soaked nuts, allowing them to sit in the strainer for 10 minutes or so to let them dry out a bit. Heat a dry skillet over medium heat, then add the nuts and let toast for about 5 minutes until lightly brown. Be sure to keep an eye on these to prevent burning. Remove from the heat and let cool. 7. Once cooled, chop the nuts and transfer to a mixing bowl. Add the dried fruit and shredded coconut. 8. Once the oats are done, remove from the oven and let them cool to room temperature. 9. Add the cooled oats to the fruit and nut mix, stirring to create a relatively uniform mixture. 10. Transfer the granola to a glass jar or other storage container. This will keep for about a week at room temperature. If you are needing longer-term storage, keep this in the fridge to extend its shelf life and prevent rancidity in the nuts.  Our lovely chickens are doing their jobs, giving us countless opportunities to figure out ways to use more eggs in our cooking. Pretty much every meal has to have some eggs in it, or we get seriously backlogged on our inventory. While this egg salad may not be a necessarily new or creative way to use up lots of eggs, it certainly has become on of our lunchtime favorites. And, now that almost all of our lunches are eaten at home these days, I am always looking for something different and delicious to serve. 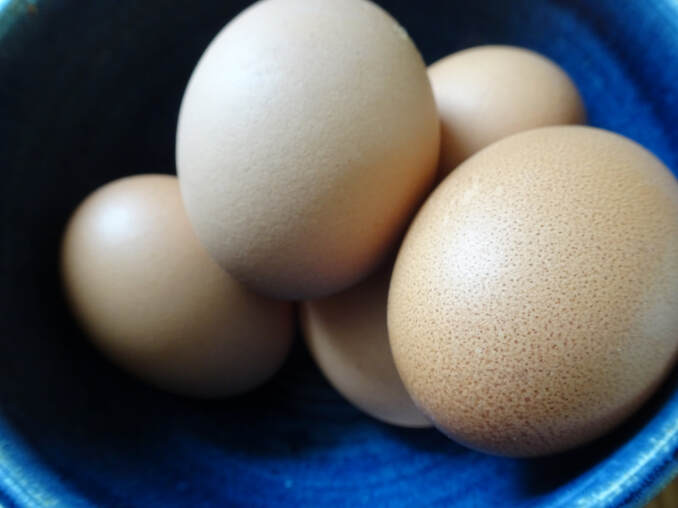 With that, here is my version of egg salad. I have said it many times and will again...I love any mayo-based salad and they continue to be some of my most crave-able foods. This version of egg salad may be a bit different than what you are used to. Instead of a fairly uniform, smooth texture, my style is chunky with plenty of texture from roughly chopped eggs, plus a super creamy dressing and plenty of fresh herbs to balance out all of the richness from the mayonnaise. I like mine schmeared on toasted sourdough served open-faced or as a sandwich on a soft, sprouted wheat bun. This also makes a great dip for whole grain crackers or veggie sticks, but would also go well served on a heaping pile of salad greens or straight up out of a bowl. Use whatever fresh herbs you like and/or have on hand and, of course, use the best quality eggs possible for the most nutrient-density in this tasty lunchtime favorite. 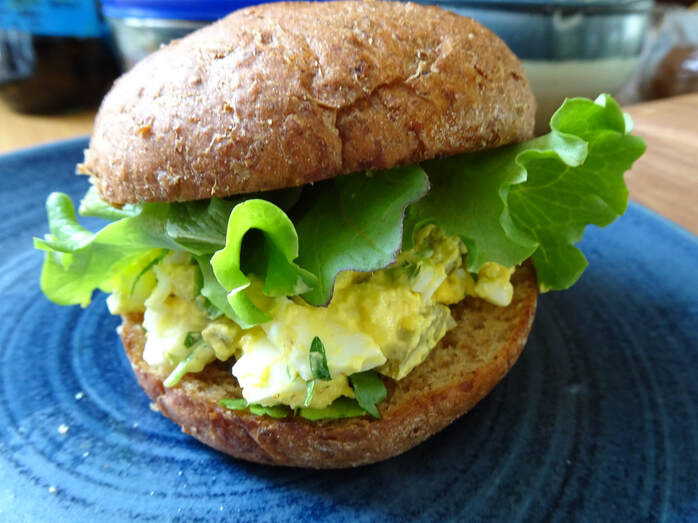 Chunky, Herby Egg Salad
Serves 3-4 6 eggs (use pastured, organic eggs for the most nutrition possible) 3-4 Tbs mayonnaise (use a good quality mayo, such as one with avocado oil, or homemade) 2 Tbs plain, whole milk yogurt or sour cream 2 tsp dijon mustard 1 tsp lemon juice 1 tsp pickle juice 1 dill pickle, finely diced--about 2 Tbs 2 Tbs chives or scallions, finely chopped 1/4 cup fresh flat-leaf parsley (or other herbs), roughly chopped 1 clove garlic, minced 1/2 tsp sea salt, or to taste Big pinch black pepper To make the eggs: The first step in making egg salad is to properly hard-boil your eggs. What I have found to work the best is to put the eggs in the pan with cold water and a big pinch of salt. Bring the water to a boil, then cover the pan and turn off the heat. Let sit for 12 minutes in the hot water. While this sits, prepare an ice bath (lots of ice with enough water to make it submerge-able) for the eggs. After 12 minutes, drain the eggs and toss them into the prepared ice bath. Let sit until cooled. Gently peel and rinse the eggs. To prepare the egg salad: Cut the hard boiled eggs in half lengthwise, and then roughly chop them. I like my egg salad with big, chunky pieces in it, but if you prefer egg salad with a smoother texture, feel free to chop away. In a mixing bowl, whisk together the mayo, yogurt, mustard, lemon juice and pickle juice. Add the chopped eggs, pickle, chives/scallions, parsley, garlic, salt and pepper to the sauce. Mix well to combine, lightly mashing the yolks as you stir to thicken the mixture. Taste and adjust salt and/or pepper as needed. Refrigerate to chill before serving. This will keep for 2-3 days in the fridge. 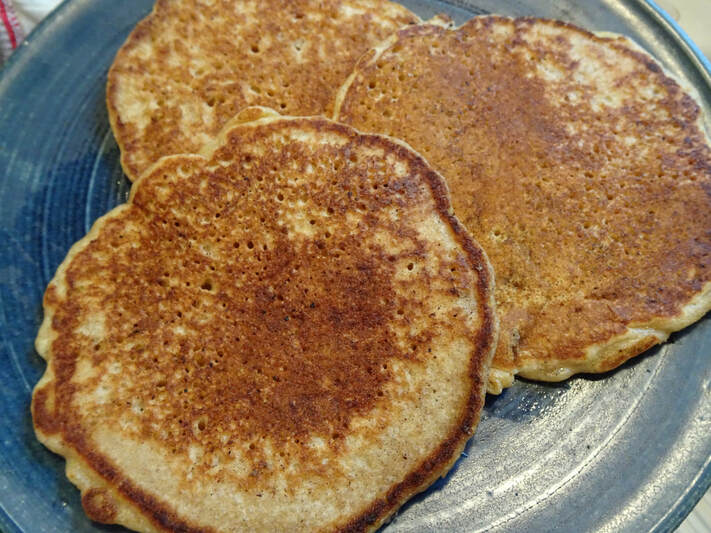 With folks staying at home with more time to cook and experiment in the kitchen, many are turning to sourdough bread baking as their new hobby. I am thrilled about this, as I think sourdough bread is the most nutritious form of bread we have available and making things yourself is an important value to me. With this renewed interest in traditionally-leavened bread, however, comes the issue of what to do with the sourdough discard. If you have cared for a sourdough starter before, then you are likely familiar with the feeding process of your little sourdough pet: you discard half of the starter, then feed it equal parts flour and water. This can be done daily for regular bakers or, in my case, one to times per week for less frequent baking. For the rest of the time, the starter is stored in the refrigerator until I am ready to feed it and bake with it. The discarding prior to feeding is done to keep your starter at a reasonable size (if you never discarded and did not bake with large amounts of starter, it would just get bigger and bigger!) and to keep microbial balance in the starter as well. If you are going through the steps of discarding and feeding daily, then you are going to be finding yourself tossing out quite a bit of sourdough starter. Not only is this unnecessary, but is also incredibly wasteful, which nobody wants, especially right now. 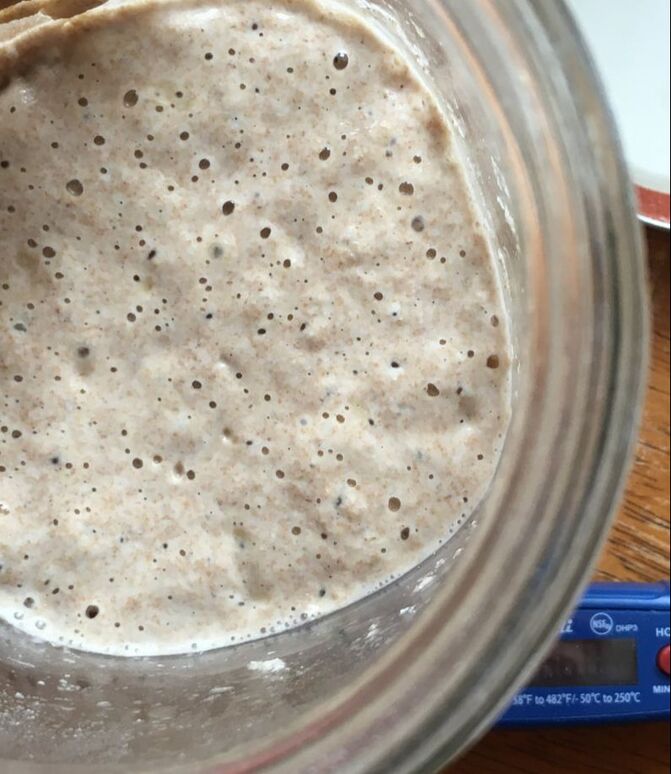 My strategies to reduce this food waste and continue to use as much of what I can from all of my kitchen projects are these: 1) Keep the starter in the fridge for the majority of the time, as mentioned above. Unless you bake bread daily or every other day, you do not need to keep your starter at room temperature and feed it everyday. Refrigerating the starter between bread bakes helps reduce the waste of regular discarding and feeding, plus it helps save on flour costs and helps keep it alive for longer in case you forget to feed it or need to leave for a few days. To "wake up" the starter before baking with it, simply feed it a bit of flour and water until it becomes bubbly and active, then it is ready to be used as leavening. 2) Keep a smaller amount of starter on hand. You really only need a small amount of starter at any given time to keep in your "reserves," at least for most home bakers. I typically have 1/4 to 1/2 cup of happy, healthy starter at any given time. Then, I feed it equal parts flour and water a few hours before use and any discard created will only be a small amount. 3) Save your discard to give away to others to start their own sourdough bread baking. I love the tradition of passing on starters and SCOBYs from one person to another, carrying on the magic of fermentation and keeping folks connected through food, which is important for us humans! I always like to keep a bit of extra starter on hand, as I always have people asking me for some, and now is the perfect time to keep up this tradition. 4) Use that discard in a delicious recipe! This is the most important strategy, I believe, because some amount of discard is always going to happen with regular sourdough feeding and baking. Instead of tossing that (even small amount of) discard in the trash or compost, save it in its own jar in the fridge to be used later. You can keep adding to this with each feeding and, when you get enough, use it in a recipe where a strong, active starter, such as you would use in bread baking, is not necessarily needed. You could also use the discard right away in a recipe, making it just after feeding your starter, instead of storing it in the fridge. If storing in the fridge, I like to let the discard warm up to room temperature before using in a recipe. Examples of recipes that are perfect for discard include: waffles, quick breads (such as banana bread or cornbread), cakes and cookies, scones and biscuits, and pancakes, both sweet and savory. I have also heard of folks who use the discard in a batter for deep-frying, but I have not ventured into that wonderland...yet. With so many different ways to use your leftover starter (and so much time to cook right now), I am hopeful that you are inspired to never toss out perfectly good sourdough starter again. Might I suggest your first discard recipe be pancakes...to inspire you even further, below is my recipe for Sourdough Pancakes that I think you will love. Sourdough Pancakes
Serves ~4** For the overnight build: 1/2 cup sourdough starter discard--can be active or straight from the fridge 1 cup warm water (about 75 F) 1 1/2 cups flour (can be whole wheat, white, spelt, or a combination of flours) For the batter: 3 eggs, whisked lightly 1/4 cup milk 4 Tbs melted butter, cooled 1/2 tsp vanilla extract 2 Tbs real maple syrup 1/2 tsp fine sea salt 1/2 tsp baking powder 1/2 tsp baking soda Pinch of cinnamon 2 tsp apple cider vinegar or lemon juice Optional add-ins: berries, chopped nuts, bananas, dark chocolate chips Butter for cooking the pancakes 1. The night before you plan to make pancakes (if making them for breakfast; otherwise, do this 4-8 hours before pancake time): Stir together the starter, water, and flour in a bowl. Cover with a cloth and let sit on the counter overnight. 2. In the morning, or just prior to making the cakes: In a large bowl, whisk together the eggs, milk, melted butter, vanilla, and maple syrup. This mixture should look creamy and smooth. 3. Gently fold in the flour/starter mix, being careful not to deflate the air bubbles built up in the overnight fermentation. 4. Sprinkle in the salt, baking powder and soda, and the cinnamon. Gently stir into the batter. 5. Just prior to making the pancakes, stir in the vinegar or lemon juice. 6. Heat a skillet to medium-high heat. Add butter to grease the pan. 7. Using a 1/3 measuring cup, ladle the batter onto the hot pan. Cook on the first side until the pancake is covered in small bubbles, about 2 minutes. (If using add-ins, dot these evenly across the top of the pancake just prior to flipping to the second side.) 8. Flip the pancake and cook another minute or so, until the middle is cooked through but not overcooked or burnt. 9. Remove from the pan and keep warm until serving. Continue with the rest of the batter until all of it is used. 10. Serve with plenty of butter and maple syrup, of course, or your favorite pancake fixings. **Feel free to double or triple this recipe to serve a bigger crowd or to freeze and serve anytime you get the hankering for a pancake. Simply heat up in a skillet for a few minutes before serving and you are good to go.  The Spring foraging season is in full swing and that can only mean one thing: ramps are here! I have also been foraging nettles, wintercress, Virginia water leaf, wild mint, violets, and dandelion greens, but ramps hold a special place in my kitchen and my heart. This wild onion, that tastes like a strong onion-garlic hybrid and looks like a big-leafed scallion, is available for foraging for just a short period of time in the Spring. Ramp season, then, is a celebration of this season and creates an opportunity for flavors that can only happen during this time of year. If you are unsure about plant identification, where to find ramps, or how to ethically harvest them, start by reading this to learn more before you forage. In addition to finding ramps in the wild, some stores, such as health-food stores, are carrying fresh ramps in the produce section. If you are in the city or aren't ready to forage on your own, this may be an option instead. For either of the recipes, feel free to sub in a few cloves of garlic for the ramps if you just can't seem to find any. Each season, we (ethically) harvest a few bunches to use in various dishes, such as pesto, chimichurri, kraut, kim chi, frittatas, and just about anything that lends itself to a pop of allium-scented goodness. They are also delicious mixed into hummus, salad dressings, and even mayo for a perfect dipping sauce or sandwich spread. 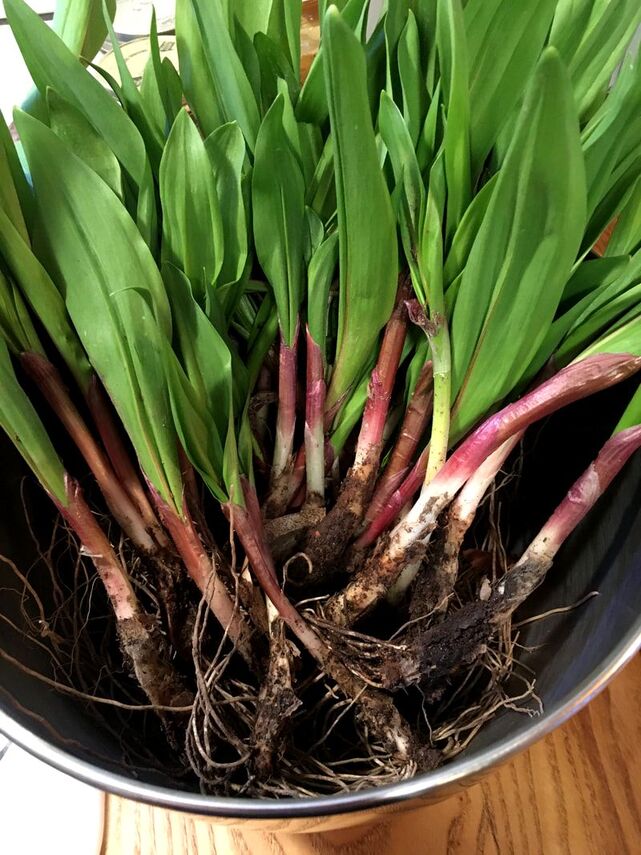 This year, I experimented with two new sauces where I could incorporate ramps: Zhoug and Mint Chutney. Zhoug is a Middle Eastern green sauce, sort of their version of a chimichurri, that is made with lots of fresh herbs and aromatic spices. My recipe was inspired by the recipe for Zhoug found in Jerusalem: A Cookbook, from Yotam Ottlenghi and Sami Tamimi--this is one of my favorite cookbooks that I own and cannot recommend it enough! Zhoug is chunky and spicy, making it the perfect condiment for falafel, pita, yogurt, lamb meatballs, or some glorious combination of all of the above. I'm digging zhoug with eggs, yogurt, and sourdough pita for breakfast, personally. 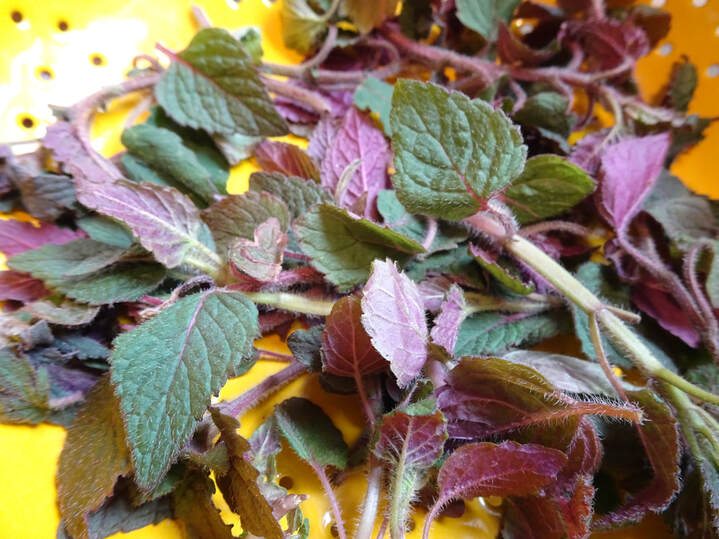 Wild Mint Mint Chutney is an Indian condiment that you may be familiar with from Indian restaurants, where it is typically served with samosas, naan, and a variety of other dishes that need cooling flavors to balance out their warm, spicy flavors. I love that I can also use my wild-foraged mint and homemade yogurt in this chutney as well! At home, you could serve it with any Indian-themed dish or meal, and I am certain it would jazz up frozen samosas if you aren't wanting to deep-fry your own at home. Both of these sauces come together in a snap and can be kept in the fridge for 2 weeks or, if you prefer to make a larger batch, can be frozen for longer-term storage. If you don't typically cook Middle Eastern or Indian food, don't let that stop you from trying these sauces. Hopefully, this will inspire you to start cooking some dishes for these cuisines, but if not, they also can compliment just about any food you might already be making. Next time you have a plain dish, such as eggs, rice, or potatoes, toss either you ramp-y zhoug or mint chutney on top and you have just created something flavorful and totally different. Happy foraging! 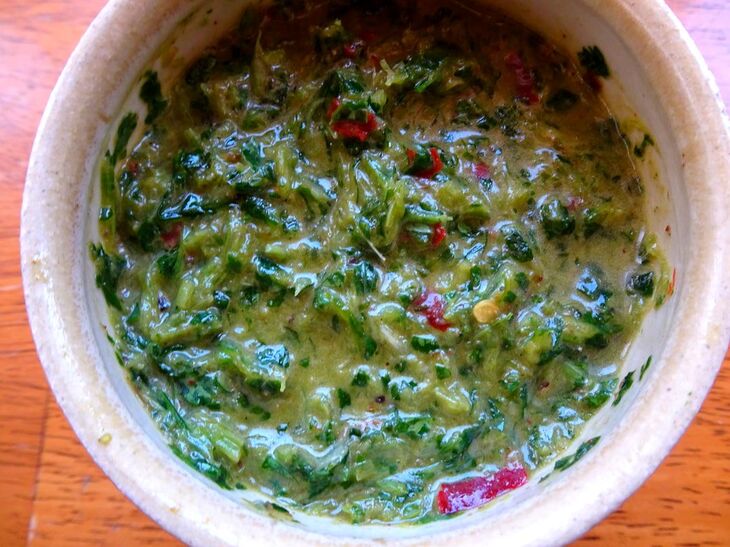 Zhoug with Ramps (Middle Eastern Herby Green Sauce) Makes 1 cup Modified from Jerusalem: A Cookbook 2 cups fresh cilantro, chopped--tender stems included 1 cup fresh parsley, chopped--tender stems included 4 ramps, chopped (or sub 2-4 cloves minced garlic) 2-4 fresh green chiles--can sub dried chiles that have been soaked in hot water to soften (vary chile type and amount based on your heat preference) 2 tsp lemon juice 1/2 tsp ground cumin 1/2 tsp ground cardamom 1/4 tsp ground cloves 1/2 tsp sea salt Big pinch freshly-ground black pepper 1 tsp honey 2-4 Tbs 1/4-1/2 cup olive oil Combine ingredients in a food processor or blender. Pulse several times to break up the large chunks and blend until relatively uniform, while leaving it with plenty of texture. It should not be smooth and runny, but thick and chunky. If you have trouble blending it, add more olive oil until it purees easily. Taste for seasoning and adjust as needed. Transfer to a glass storage container and refrigerate until ready to use. This will keep for about 2 weeks in the fridge or several months in the freezer. 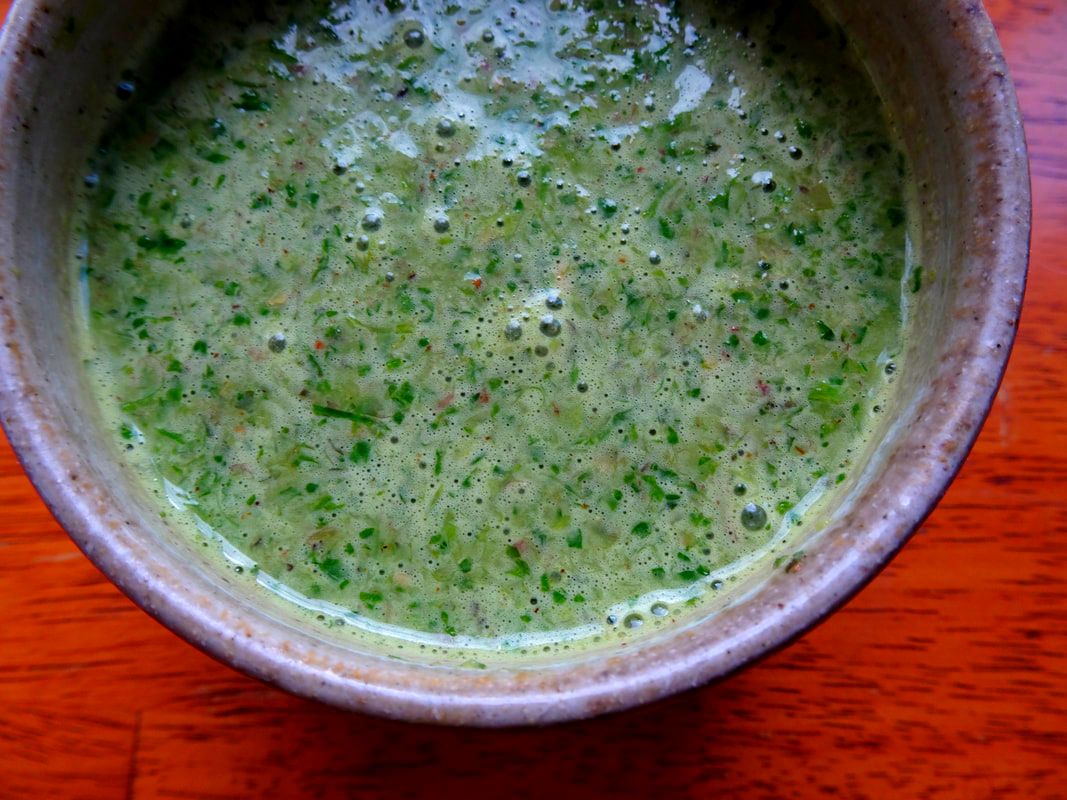 Indian Mint Chutney with Ramps
Makes about 2 cups 2 tsp cumin seeds 1 tsp coriander seeds 2 cardamom pods, crushed 1 cup fresh mint leaves 1 cup fresh cilantro, chopped--tender stems included 4-6 ramps, chopped--if you don't have ramps, sub 2 cloves garlic and 1/4 cup chopped onion 2 tsp chopped hot pepper (use more or less depending on your heat preference) 2" fresh ginger, minced or grated 1/2 cup plain yogurt 1/4 cup lemon or lime juice 2 Tbs olive oil 2 tsp honey 1 Tbs tamarind paste--if you cannot find this, add an extra tsp each of lemon juice and honey 1 tsp sea salt Fresh black pepper 2-4 Tbs water In a small, dry skillet over medium heat, place the cumin, coriander and cardamom pods. Toast for several minutes, until the seeds become fragrant and just begin to brown. Remove from the pan and transfer to a spice grinder or mortal and pestle, removing the cardamom pod and only leaving its seeds behind. Grind the spices and set aside. In a blender or food processor bowl, add the mint, cilantro, ramps, hot pepper, ginger, yogurt, lemon juice, olive oil, honey, tamarind, salt, pepper, water and toasted spices. Pulse several times to break up larger pieces, then switch to puree. Blend until very smooth and uniform, adding a few more tablespoons of water or olive oil if the mixture needs to be thinned for smoother blending. Taste for seasoning and adjust as needed. Transfer to a glass storage container and refrigerate until ready to use. This will keep for about 2 weeks in the fridge or several months in the freezer. For dairy-free folks, you can sub shredded coconut for the yogurt here. Before starting your chutney, soak 1/4 cup finely shredded, unsweetened coconut in enough water to cover it, for about 30-60 minutes. Once ready to make your chutney, drain the coconut and add it to the chutney instead of the yogurt, yielding a creamy, rich consistency without the dairy. You may need to up the lemon juice for more acidity, so adjust the amount as needed. 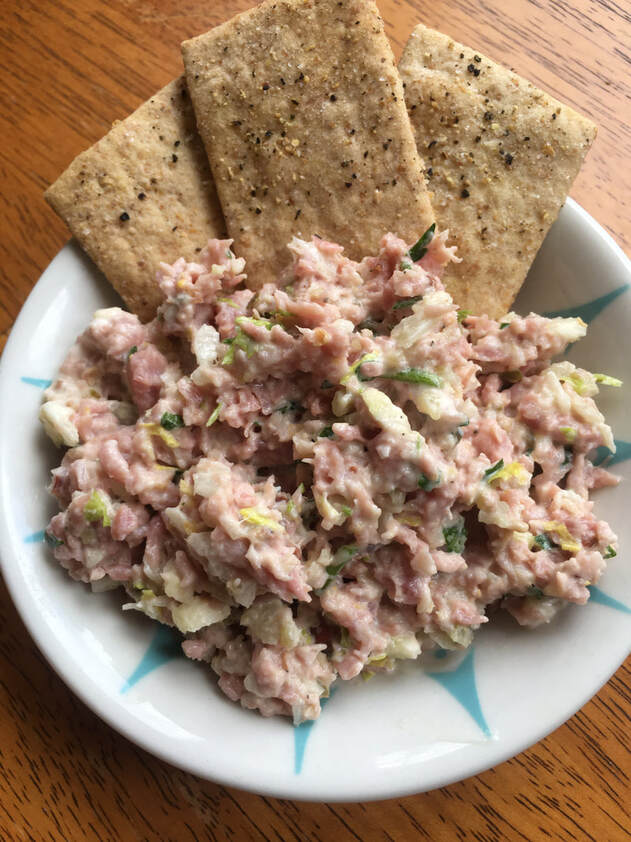 If you don't know what ham salad is, then you are probably from the North. Having grown up in Missouri, however, I have eaten my fair share of ham salad, usually at a church potluck or family dinner. I've probably mentioned before that I am a big fan of anything made into a "salad," essentially being any protein or vegetable chopped up and mixed with a mayo-based dressing, and ham salad is no exception. This is made similarly to a tuna or potato salad, where ham is the star of the show, creating a savory, salty dip for crackers or a spread for sandwiches. What makes this unique is that the ham is chopped very finely (I use a food processor to do the chopping here), so the texture is much finer and more uniform than, say, a chunkier chicken salad. My version is also different from those I grew up with, because we are using organic avocado oil mayonnaise, as opposed to super-processed soybean or canola oil mayos, and the ham is naturally-raised, not from a feed lot. I really do love re-creating my childhood favorites using real food ingredients! I have made this before, but it struck me to whip up a batch this week after we had lots of leftover ham from our Easter dinner. I suppose you could go out and buy ham just to make this dish, but something about it just screams "the perfect use for leftovers." Either way, this recipe is made with ham from a roast, not deli-style sliced ham. You need that firm, roast-like texture to create this spread rather than using thin, flimsy deli ham pieces. I use dill pickles here, but if sweet pickles are your thing, feel free to sub them in for the dills. Some people also throw hard-boiled eggs into their ham salad, so feel free to do so, especially if you have extras you are trying to use up. If adding hard-boiled eggs, just adjust the mayo and seasonings as needed to keep the texture creamy and the flavors in balance. Not only is this an awesome way to use up leftovers, but it is also super high in protein and it makes a quick lunch or snack for just about anyone in the family. I served mine with sourdough crackers (using the easy and delicious King Arthur Flour recipe here), but you could easily spread this on some softer-style sourdough bread to make a sandwich or use as a dip for cut up veggies. Southern-Style Ham Salad
Makes about 4 cups 2 heaping cups (about 1 lb) roast-style ham, diced 1/4 cup white onion, diced 1/2 cup celery (about 2 stalks), diced 2 Tbs fresh parsley, chopped 1 medium dill pickle (about 2 Tbs), chopped Optional: 2 tsp jarred pimento peppers 1/4 cup good quality mayonnaise--you can add another Tbs or two if your salad is a bit dry, depending on the fattiness of the ham you use 2 tsp brown or dijon mustard 1 tsp pickle juice 1/4 tsp garlic powder 1/4 tsp paprika powder Big pinch black pepper, to taste In a food processor, pulse the diced ham several times and then continue to blend it until it is very finely chopped, just before it becomes a paste. Remove from the food processor and set aside in a mixing bowl. Add the onion, celery, parsley, pimento (if using) and pickle to the food processor and blend until finely chopped. Mix in with the chopped ham. Stir in the mayonnaise, mustard, pickle juice, garlic powder, paprika, and black pepper. Stir well to combine and create a cohesive mixture. Taste for seasoning and add a bit more mayo if your ham was on the dry side. Serve right away or refrigerate until ready to use. This will keep for up to a week in the fridge. Serve with crackers, soft sourdough bread or veggie sticks of your choosing.  One of the fun paths I get to exercise/play on, including a few sweet obstacles Everyone's routines are being thrown off right now due to the COVID-19 crisis, and that is not just the routine from school and work. Physical activity and workout regimens are also being tossed out the window my many, as all of the gyms are closed and even public places, such as parks, where people would normally get their physical activity, are no longer available to use. While many people may be letting the setback keep them sedentary during this time of isolation from others and limitations on using certain spaces, such as gyms, this does not have to be the case. In fact, I encourage everyone to use this "extra" time on their hands, either from working at home, lack of- or underemployment, or other changes to their life that has made their schedule more flexible, to spend even more time on physical activity than they usually do. This decreased amount of work or even normal time constrains from meetings or obligations offer you more time to focus on your health than you might normally have, and that can be a silver lining to all of this. Certainly, I am not suggesting we all spend our extra time at home just working out or running tons of miles. Build in that screen or reading or napping time to your daily routine, as sometimes extra rest and, yes, even some distraction, can help relieve some stress. But R&R and eating comfort food cannot be the only outlet for letting go of worry right now; good self-care can actually look like getting plenty of daily exercise, making yourself healthy meals from scratch, sleeping extra at night and, if possible, spending lots of time outside. This increased focus on self-care will look different for everyone, depending on where you live or other lifestyle and family factors that may pose challenges to more physical activity. However, nearly everyone can do some form of exercise even just in their apartment if necessary. Do not let the lack of a gym or even a strong daily routine keep you from getting the physical activity your body truly needs. This is especially true right now, as exercise can improve your immune function and decrease stress, both of which could benefit us all at this time. My biggest suggestion is to create a daily schedule for yourself, especially if life isn't giving you its own right now, and try your best to stick to it. Include a set time for physical activity, but also meal times, waking and bed times, socializing virtually times, and even some tv/veg time for good measure. Keeping daily rhythms is so important to anchor you to time and keep things more normal for yourself, but also the best way to ensure you keep a routine of self-care to actually keep yourself healthy right now, rather than just turning to comfort. Plus, putting activity into your schedule helps it actually happen, rather than relying on motivation or "feeling like it," both of which are extremely subject to change depending on mood. Scheduling it prioritizes it. With that, I am going to tell you what I have been doing from my home (and land) to stay active everyday, to hopefully give you some ideas and inspiration on how you can make something similar work for you. I will also offer some alternatives to help adjust the exercises to your space or situation if needed. My goal has been to include about an hour of dedicated physical activity, either intense or restorative, into my daily schedule. All of these exercise regimens are in addition to all of the gardening, building, wood chopping and other physically-demanding work at our homestead, so I am staying pretty busy and active right now...I suppose it all balances out that extra movie watching and baking going on, too! I am typically a "gym person," and I very much love and miss going to the gym to lift my heavy weights, so altering things has been a challenge. If you have a home gym and work out there, then you are very lucky and nothing has changed for you there, but for everyone else, we may have had to start from scratch. Here are a few ideas for how you can stay active while in isolation (dare I say, captivity), using my weekly routine as a possible template.  Taking the weights outdoors when it's nice out...also using logs and rocks instead of freeweights My At-Home Workout Regimen (for Right Now) 2 Days per Week: Weight-Lifting Exercises As I noted above, I usually go to the gym for weight lifting three times a week (where I have been coaching classes for the past few years, actually). Since I cannot do this right now, I wanted to maintain a weight-bearing exercise practice while at home. Luckily, I have a couple of dumbbells and a kettlebell, but you certainly could do many different exercises simply by using body weight only, or by using items around the house (cans of food, buckets of water, heck, I have been using logs in my yard!) in lieu of free weights. I have been hitting each muscle group about twice per week, mixing it up with different exercises that focus on hamstrings, quadriceps, biceps, triceps, chest, glutes, shoulder, back, etc. The workout structures have typically been: begin with about 10 minutes of warm up doing calisthenics, light body weight movements, jogging, etc. then, 3 sets of 15-20 reps, with about 1-2 minutes rest between sets. I have doing higher reps because of using lighter weight or body weight rather than my usual weights at the gym. If I am able to do something more intense, such as pull-ups on a branch or lifting a heavy rock or log, I have been doing more like 4-5 sets of 5-8 reps, with 2-3 minutes rest between. I also like to throw some isometric (holding a movement essentially in the middle of the range of motion) exercises in addition to plyometric (moving) exercises. I finish it all of with a cool down of walking for a few minutes, stretching and mobility movements, and deep breathing exercises to get my central nervous system calmed back down. Some bodyweight exercises that you could do in your home or yard include:
Of course, there are so many more body weight exercises out there for you to choose from, and these are just a few of my favorites. Don't be afraid to use stuff around your house to use for overhead press, bicep curls, tricep extensions, flys, lateral raises, squats, deadlifts, and different row variations, especially if you want to mix it up with your body weight routines. If you are new to weight training, especially with body weight moves, I like the websites Nerd Fitness and Breaking Muscle to learn more about movements to perform and creating a workout routine with them If you are looking for more functional, or natural, type of movements to include in your weight-bearing routines and in your exercise regimens in general, I highly recommend the MovNat resources. They have a website with lots of information, online videos to demonstrate the moves, and you can even sign up for their weekly newsletter that give you three free workout routines per week using their style of exercise. The founder, Erwan Le Corre, also has a book out that is packed with information if you wanted to take a deep dive into the world of Natural Movement right now. In that same vein, I also like to incorporate movements from Darryl Edwards' Animal Moves book and fitness deck into my workouts. These are not only great functional movements, but they are also super fun to perform, which really helps with motivation. If you want assistance with creating a workout routine, the fitness deck he created can be very helpful. 1-2 Days Per Week: High-Intensity Interval Training This are probably my favorite workouts to do at home because they really get you working hard and sweating, and that always makes me feel great to get done at home for some reason. If you are unfamiliar, a high-intensity interval (HIIT) workout is comprised of short bursts of intense activity with periods of rest in between. This is much of what Crossfit (TM) workouts are comprised of, in addition to weight lifting. Think sprints rather than a long run. For these, I will usually put together a workout that has two or three different short HIIT routines within it. I also begin these with warming up thoroughly, such as jogging, drills like high knees, leg and arm swings, etc. The HIIT workouts typically look like 40 seconds of work with 20 seconds of rest (:40/:20), picking 5-6 exercises to do in this fashion, for three rounds (that is about an 18 minute workout right there). If you are new to HIIT, you can also start with a 30 second work/rest split instead (:30/:30). Other HIIT regimens include 10 to 1 reps (ten rounds, each round decreasing in the number of reps until the last set is just one rep); 21-15-9 reps (a classic Crossfit routine), AMRAP (as many rounds as possible of a given exercise in a set amount of time); EMOM (perform an exercise every minute on the minute, resting until the minute is up); and Tabata, which is my favorite, 8 rounds of an exercise, all out, with a 20 second/10 second work/rest split. Sprint and hill sprint workouts are perfect HIIT workouts if you can get outside right now, with a typical workout being 8 or so rounds, sprinting for 15-20 seconds, with 1-2 minutes rest in between sets. As with the body weight routines, I also like to throw in some isometric moves like planks, hanging from a pull up bar or branch, boat pose, wall sits, etc. into my HIIT workouts. This is one to be sure to cool down properly from, as it gets your nervous system rocking and you want to bring it all the way back down before moving on to your next thing, especially if it just sitting. Some examples of HIIT exercises you can perform at home, using the above routines, are:
Again, there are lots of possibilities for creating a HIIT workout, but I feel it is extremely important you get at least one of these in per week. They are so good for you, take up much less time than many other workouts, and can generally be done in the home if necessary. Nerd Fitness, mentioned above, has other great ideas for these exercises, as does Crossfit's website under their "At Home" tab.  Hitting the running trail in my minimalist workout shoes (they are Vivobarefoot and I love them!) 1-2 Days per Week: Running or Hiking I like to throw at least one, maybe two, days of some longer, slower cardio-focused exercise into my week. Not only do I find it helpful for endurance and weight maintenance, but it can also be really nice and relaxing just to zone out and listen to music or watch nature during a longer, less intense stretch of exercise. This has typically looked like about 30 minutes of running or an hour of hiking, but you could start wherever you are at physically. I am lucky that my husband built some trails in the woods by our house, but even road running would be fine. If parks or trails are open within a short drive, take advantage of getting outside as much as possible. If you don't like running, try hiking, biking, or going for a longer walk for other great options in this category. On a walk or hike, if you have some ways to add other movements such as jumping, climbing, or carrying, that adds a whole new layer of movement to this activity and can make it more intersesting. Even canoeing, one of our favorites, wold be a great exercise to include that takes some more endurance but mixes it up (and keeps you away from other folks!). Longer cardio workouts like running are probably the hardest to do at home if you are totally unable to go outside. Hopefully, however, even a walk or run around your neighborhood is accessible to you. If not, just try to stay active around the house with cleaning or active projects as much as you can, and aim for getting the other types of workouts into your weekly routine instead.  My beloved bolster, which is a key prop for yin yoga and restorative movements...a stack of firm pillows can be a good substitute 2 Days per Week: Yoga or Restorative Movement This is where I add a little yin to balance out all of the yang exercises I do on the other days in the week. I really believe in "off" days in a workout schedule and active recovery from hard workouts, which is where these days come in. This part of my routine is not any different, as I was already doing this at home. I tend to prefer practicing yoga or similar moves at home, but classes can also be fun and relaxing. If you are used to going to a yoga class as part of your physical activity routine, then you are probably looking to continue this at home right now. I practice yin yoga, which are long-held poses aimed at releasing connective tissue and focusing on restoration rather than power or intense exertion and flexibility. There are lots of videos online, such as Yoga with Adrienne, to follow along with so that you can practice at home. Alternately, Freeport Yoga and Yoga Journal also post yin yoga (and other types as well) routines on their website that you can do on your own. Many yoga studios are putting their classes online right now, so you can search for one in your area to support during this time, in addition to keeping yourself healthy. Heart and Bones Yoga now has an online studio that you can join, all from the comfort (or confinement) of your own home; I highly recommend her work, as it focuses on alignment and sustainable yoga poses for every body. If yoga isn't your thing but you are looking for work around mobility, alignment, and restorative movement, I could not recommend the work of Katy Bowman enough. Katy's work is around "nutritious movement," and she has several books (I have them all....), a blog, and many online videos, some free and some for purchase, that you could use if you want to go down this path for movement. She has also launched an online studio and is currently offering a discount due to so many needing help with continuing their moveement from home. She also has a podcast, and I am kind of a fangirl of hers, as she is so inspiring about how to get more movement into your daily life. This is great information for movement all of the time, not just for when you are stuck at home.  I may look crazy doing tree branch pull ups, but it is keeping me sane (and healthy!) This is just what I have been doing to help spark some ideas and inspiration for you. If you have taken a break from intentional exercise since staying at home in the last few weeks, there is no shame in that at all, and everyday is a new chance to get back on that wagon. Change the movements mentioned above to suit your preferences and modify these ideas to fit your schedule, needs and current fitness level. Don't be afraid to try to put together a few workouts and see how they go for you, then make adjustments where you need to. If that is too intimidating, check out some of the online classes/videos/studios I mentioned to take some of the pressure off trying to figure out what to do. Most importantly, just do something everyday to stay active, especially when you are out of your normal routine, even if it is just a long daily walk alone or with someone in your family. This not just so you can stay physically fit during this time, it is also to keep you sane! Stay safe and healthy, and try to have some fun with it, making the most of a totally weird and terrible situation.
|

Brine & Broth
I am a gut health-focused nutritionist and online health coach based in Southwest Wisconsin. My recipes and philosophies center around traditional, nutrient-dense foods that support robust gut health. Archives
May 2022
Categories |
 RSS Feed
